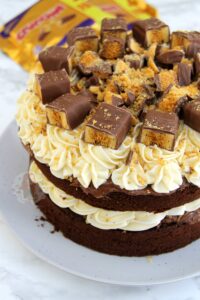
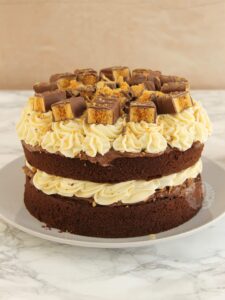
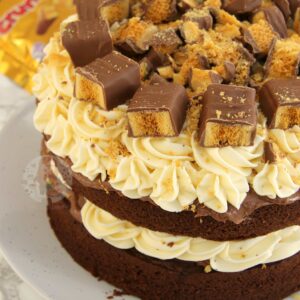
Chocolate Sponge, Crunchie Spread, Honey Buttercream Frosting & Crunchies.. the Perfect Honeycomb Crunchie Cake for all occasions!
So I made these delicious little Honeycomb Crunchie Cupcakes back in June, and they have been SO popular. Like, I underestimated how much people would like these! Something about the delicious and light chocolate cupcakes, with the honey buttercream frosting, and the Crunchies of course, make a DELICIOUS and dreamy cupcake. So, after the success of them, and that they’ve been pinned over 10,000 times on Pinterest, I made a cake version.
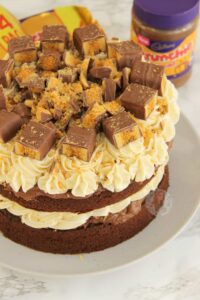
However, I wanted to elevate this Cake above the Cupcakes, so I used the Crunchie Spread you can now buy in supermarkets. I won’t lie, I had to buy several jars because I ‘tested’ the first to see if it was safe and all… and then the second was demolished soon after because its addictive and delicious. Imagine a cadburys version of Nutella, with crunchie bits. SO GOOD. So, I decided to have a delicious Chocolate Sponge (made with Light Brown Sugar to make it even more delicious) and then with the Honey Buttercream Frosting, and the Crunchie Spread.
I will admit, that the cake looked a little funky, and I blame using someone else’s oven. You might underestimate how much of a difference this can make, until you know your oven SO well, and suddenly a different oven makes it bake all weirdly. But anyway, it was yummy either way. I will admit, I feel like I didn’t put in enough Crunchie but I was limited to how many I had at the time of baking, and I feel like the Spread helped.
I used two 8″/20cm tins to make this, and they’re about 4 inches deep in size. The cake doesn’t rise that much, but I use these tins all the time as they’re so easy, and can fit bigger cakes in if need be! You can split the mixture between three tins like my Biscoff Cake for example, but I like this as a two layer. I hope you all adore this cake as much as me, and my Trusty Taste Testers did… ENJOY!
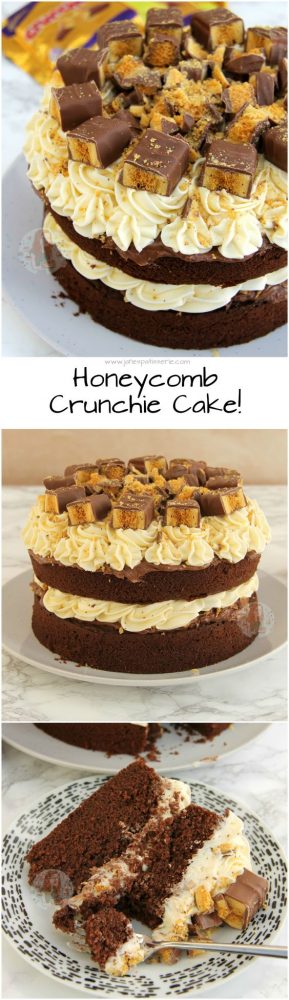
Honeycomb Crunchie Cake!
#wprm-recipe-rating-4 .wprm-rating-star.wprm-rating-star-full svg * { fill: #343434; }#wprm-recipe-rating-4 .wprm-rating-star.wprm-rating-star-33 svg * { fill: url(#wprm-recipe-rating-4-33); }#wprm-recipe-rating-4 .wprm-rating-star.wprm-rating-star-50 svg * { fill: url(#wprm-recipe-rating-4-50); }#wprm-recipe-rating-4 .wprm-rating-star.wprm-rating-star-66 svg * { fill: url(#wprm-recipe-rating-4-66); }linearGradient#wprm-recipe-rating-4-33 stop { stop-color: #343434; }linearGradient#wprm-recipe-rating-4-50 stop { stop-color: #343434; }linearGradient#wprm-recipe-rating-4-66 stop { stop-color: #343434; }
Print Pin Rate
Ingredients
For the Cake
- 350 g Unsalted Butter/Stork
- 350 g Light Brown Sugar
- 7 Medium Eggs
- 300 g Self Raising Flour
- 1 tsp Baking Powder
- 50 g Cocoa Powder
Honey Buttercream Frosting
- 250 g Unsalted Butter (not stork)
- 500 g Icing Sugar
- 100 g Clear Honey
Decoration
- 1 Jar Crunchie Spread
- 4 Crunchie Bars
Instructions
For the Cake
-
Heat the oven to 170C/150C Fan and line two deep 20cm/8inch sandwich cake tins with baking parchment – leave to the side.
-
In a stand mixer, beat together the butter and sugar until light and fluffy. Add in the Flour, Eggs, Baking Powder and the Cocoa Powder and beat again briefly till combined – try not to overbeat!
-
Divide the mixture between the two tins and smooth it over – bake for 45-55 minutes until the cake springs back and the skewer should also come out clean.
-
If you listen to your cake, and it sounds like its bubbling/crackling it isn’t quite done… bake for another few minutes until its quiet! (I bake at a lower temperature as it keeps the cake more moist, and bakes flatter. Can take longer/shorter time depending on the oven so check after 40 minutes!)
-
Once baked, leave the cake to cool in the tin for 10 minutes, and then remove and leave to cool fully on a wire rack.
For the Frosting/Decoration
-
In a stand mixer, beat the butter with an electric mixer (with a paddle attachment) until it is smooth and loose and then beat in the icing sugar 1/3 at a time until its fully combined.
-
Once in, add in the honey, and keep beating the buttercream for 3-4 minutes on a medium speed so it starts to get fluffier and lighter.
-
If the buttercream is a little stiff, add in one tablespoon or two of boiling water till you have your desired consistency.
-
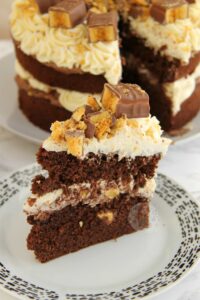
With the first layer of the cake, spread some of the Crunchie Spread onto the cake and then pipe half of the buttercream on top!
-
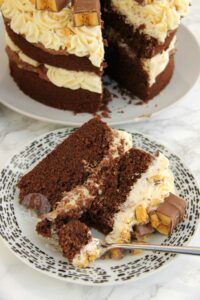
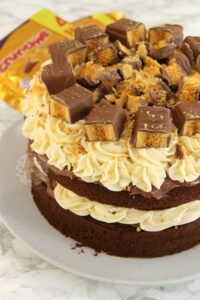
Add the second cake on top, spread on some more of the Crunchie Spread, and then top with the rest of the buttercream. Sprinkle over some chopped Crunchies and add a larger chunk of Crunchie for each cake slice! Enjoy!
Notes
- I didn’t put Crunchies in the middle of the Cake as I feel like the cake layers wouldn’t stick together enough, but if you want to, it would be DELICIOUS.
- I also used a closed star piping nozzle to decorate my cake as I like the look it gives – but slathering on the buttercream is also a delicious option!
- This cake will last in a container for 3 days, at room temperature!
- You can find the Crunchie Spread in most UK supermarkets now where the Nutellas and such would be!
ENJOY!
Find my other Crunchie & Cake Recipes on my Recipes Page!
You can find me on:
Instagram
Facebook
Pinterest
Twitter
Bloglovin’
Youtube
J x
© Jane’s Patisserie. All images & content are copyright protected. Do not use my images without prior permission. If you want to republish this recipe, please re-write the recipe in your own words and credit me, or link back to this post for the recipe.