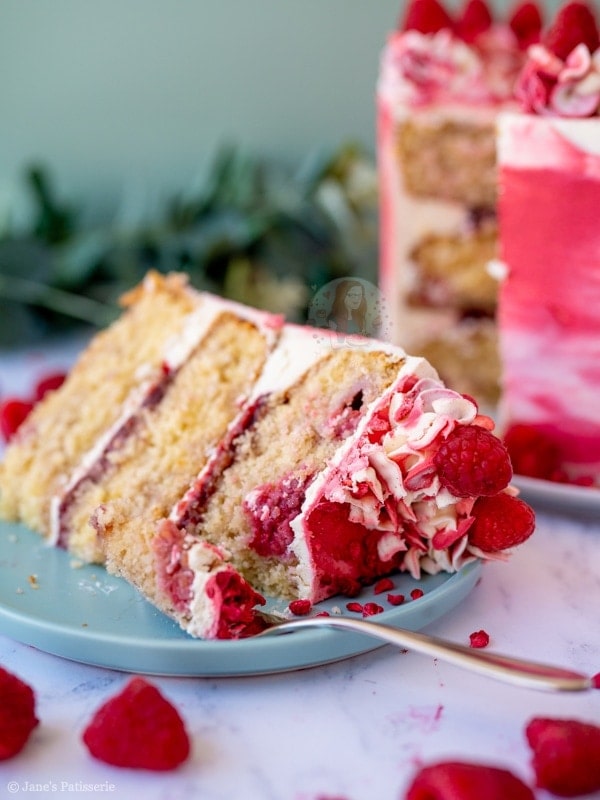
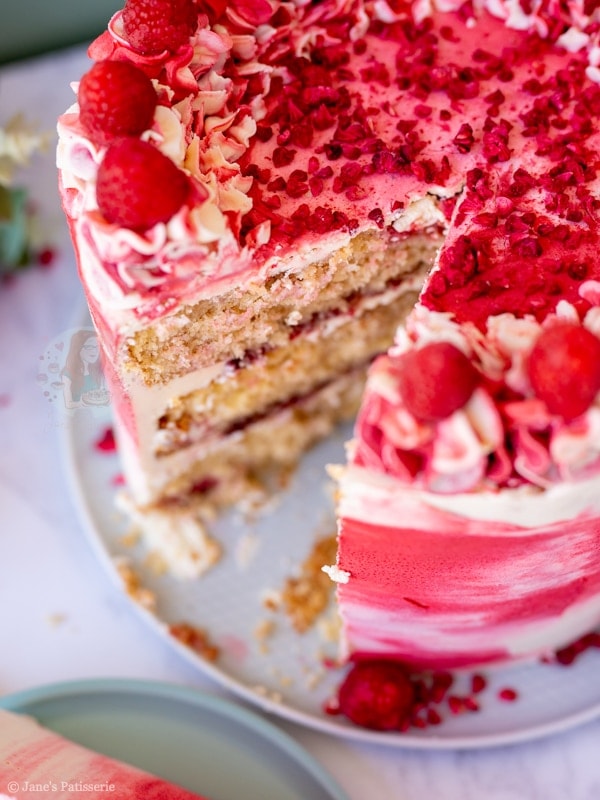
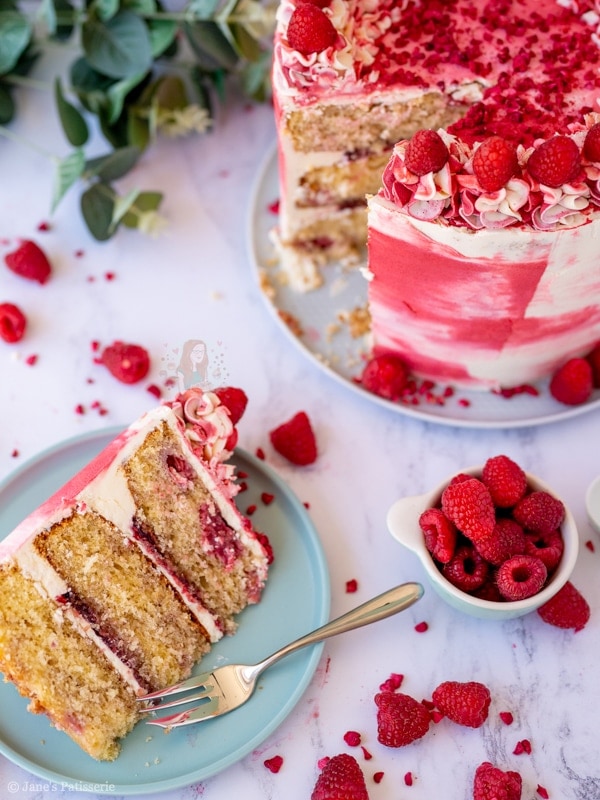
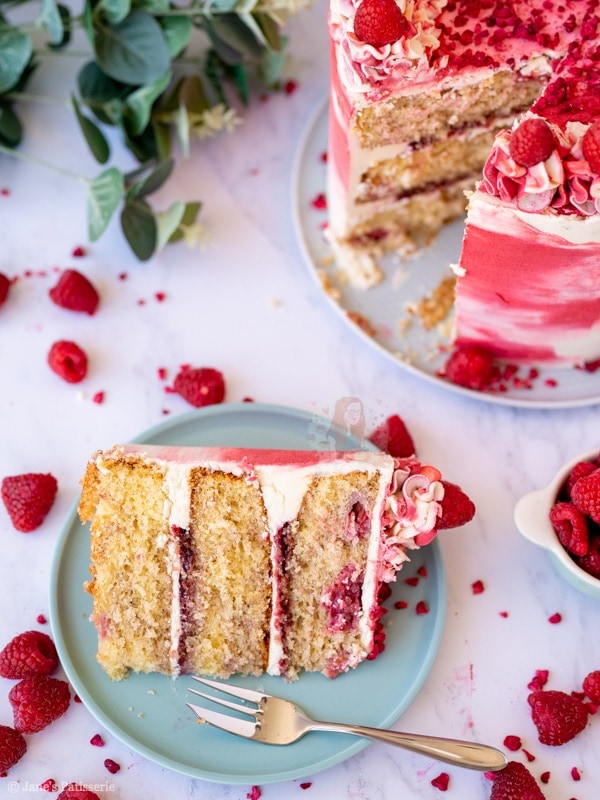
A three layer raspberry ripple cake with raspberry jam, vanilla buttercream frosting, and even more raspberries!
Raspberry ripple
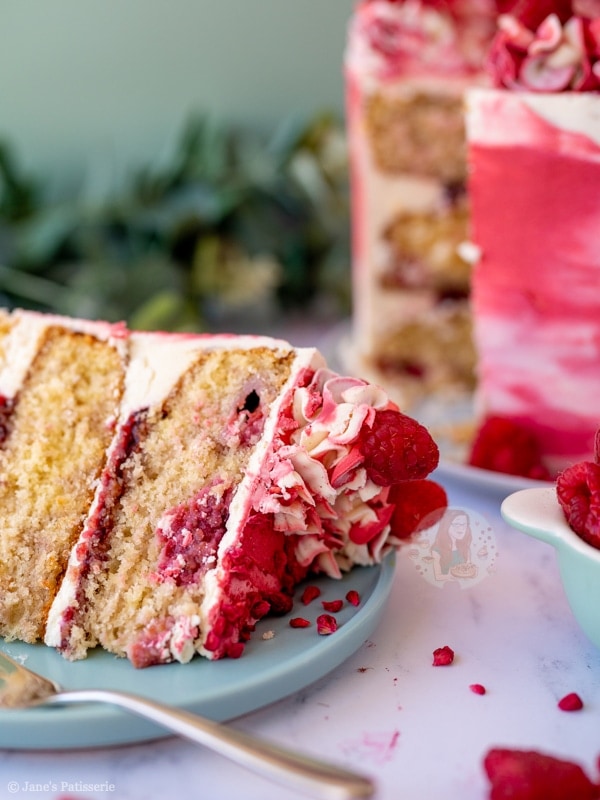
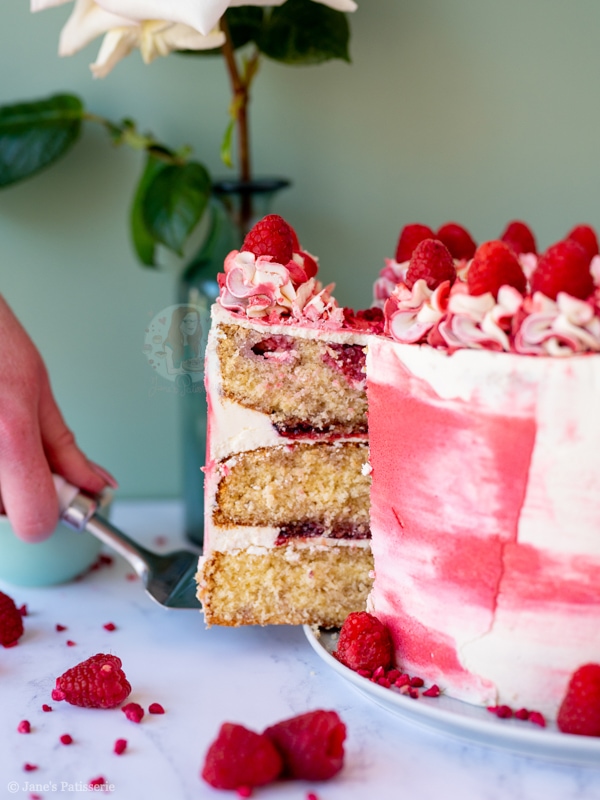
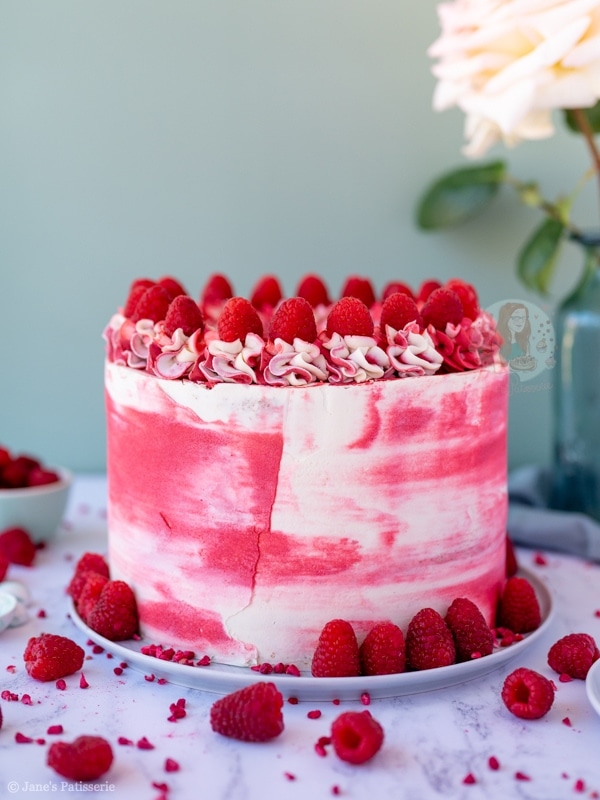
So… raspberry ripple cake anyone?! Honestly… I just love this cake straight from the start. We need to appreciate just how beautiful a bake it is because look at that smudged beautiful buttercream pattern on the outside!
This is a cake that looks spectacular, is such a showstopper, but is actually so easy to make! The smudge effect with the buttercream definitely changes the aspect of the bake so quickly, and I am here for it!
Sponge
For this cake, which had been requested so. many. times. I wanted to go a little bit all out, but not just do the same as I normally do! I always have the fear that a cake will look too plain but it most certainly does not!
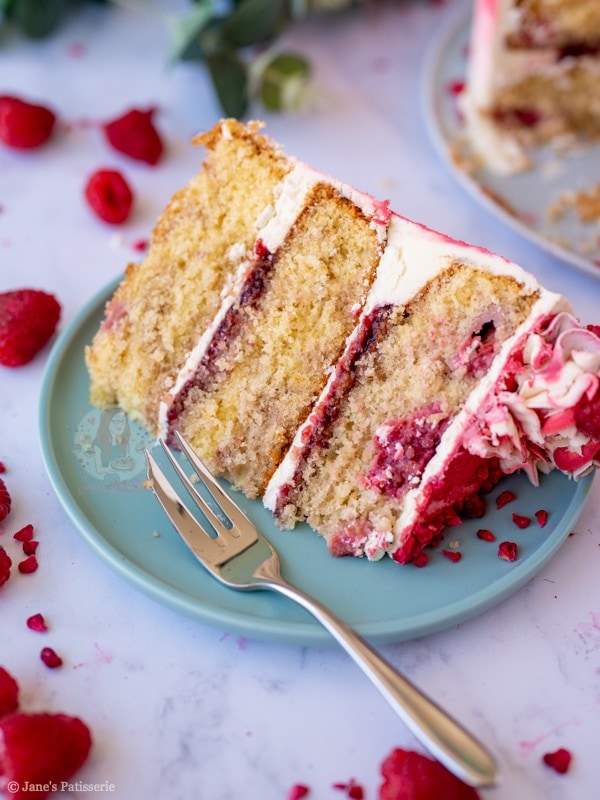
For the sponge I decided to use a basic cake mix (I tend to use a 400g mix for three layer cakes as I find it works best!) in my standard three eight inch tins – I nearly always bake my cakes into 8″ tins as I find it suits me best!
Sugar, raspberries and coulis
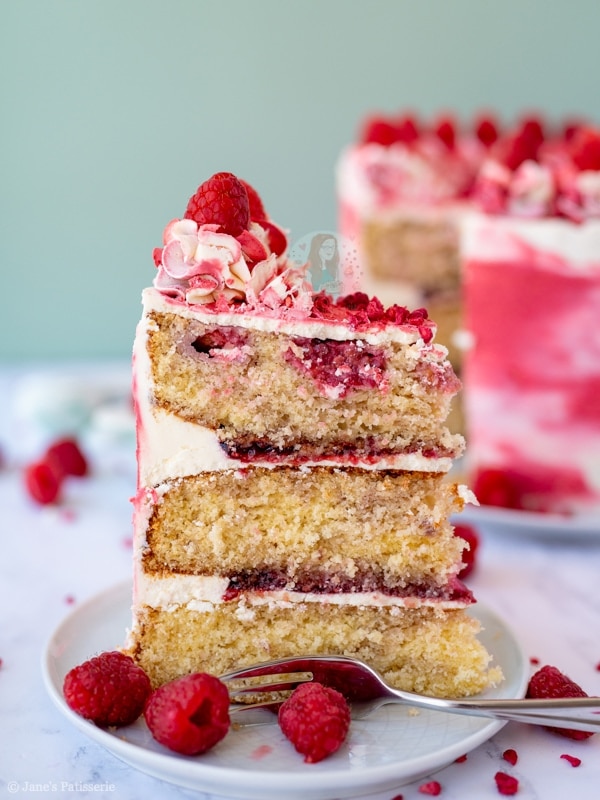
I used caster sugar in this sponge as I wanted this recipe to be lighter in colour, and then put in some fresh raspberries (not too many to make the cake too soggy), and a swirl of some raspberry coulis!
The raspberries and coulis are optional – but it adds a smidge of flavour, and it adds just even more raspberry! I would struggle to call this a raspberry ripple cake if it wasn’t raspberry enough!!
Buttercream
For the raspberry ripple cakes buttercream I decided to stick to a plain buttercream – you can add a standard flavouring such as vanilla if you wanted, or even use a delicious flavouring such as this raspberry flavouring (but I didn’t have any left so I was a little bit sad!).
The risk in adding in jam or coulis to the buttercream frosting (other than it changing the colour!) is that it will loosen the buttercream for this decoration too much. You want the buttercream to be stiff on this cake so that it can stick to the sides and hold up without falling down!
Decoration
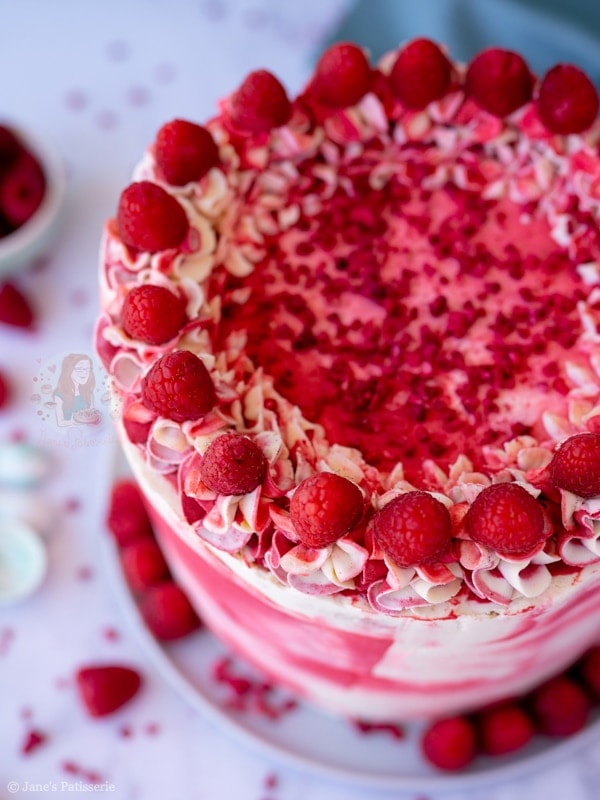
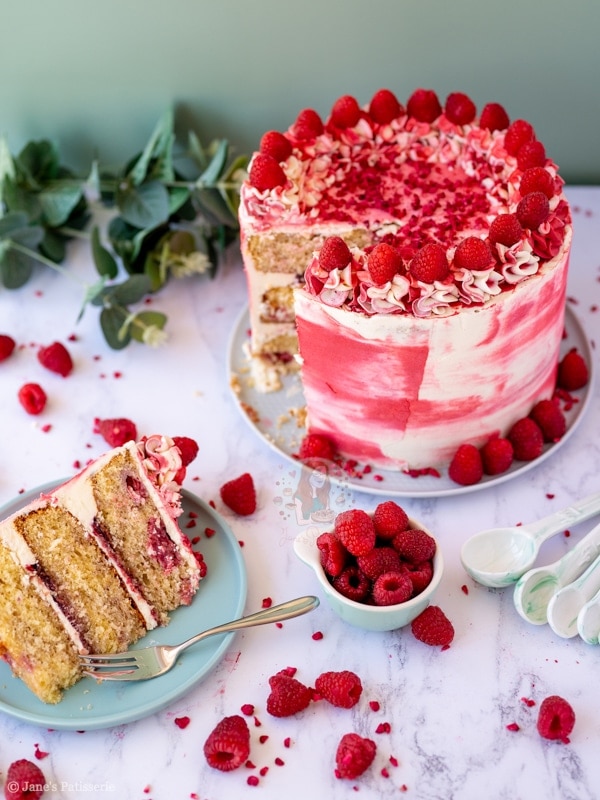
I thought using a colour scheme would be better for the decoration, and to get the smudged effect really is so easy. You do not need much buttercream at all to be coloured red as a little goes a long long way! And the good thing is, you can use it for the decoration on the top of the cake too!
Literally add on small smudges of red buttercream onto the white buttercream you have already done, and smooth around the edge of the cake until it creates a smooth smudged surface! I used this large metal scraper when I made this cake, and it really is the best thing for it!
Finishing touches
I didn’t add a drip to this cake as I did only really want the flavour to be raspberry – but feel free to add what you want! You can do whatever you want decoration wise – but I thought this was beautiful and I didn’t want to change it too much!
A little sprinkle of my favourite freeze dried raspberries as always – because I can’t resist them on any type of bake – let alone a raspberry themed bake, and then some fresh raspberries on top too, with the leftover buttercream. I love the recipe – and I hope you do too!


Raspberry Ripple Cake!
#wprm-recipe-rating-0 .wprm-rating-star.wprm-rating-star-full svg * { fill: #343434; }#wprm-recipe-rating-0 .wprm-rating-star.wprm-rating-star-33 svg * { fill: url(#wprm-recipe-rating-0-33); }#wprm-recipe-rating-0 .wprm-rating-star.wprm-rating-star-50 svg * { fill: url(#wprm-recipe-rating-0-50); }#wprm-recipe-rating-0 .wprm-rating-star.wprm-rating-star-66 svg * { fill: url(#wprm-recipe-rating-0-66); }linearGradient#wprm-recipe-rating-0-33 stop { stop-color: #343434; }linearGradient#wprm-recipe-rating-0-50 stop { stop-color: #343434; }linearGradient#wprm-recipe-rating-0-66 stop { stop-color: #343434; }
Print Pin Rate
Ingredients
Cake
- 400 g unsalted butter
- 400 g caster sugar
- 8 medium eggs
- 400 g self raising flour
- 150 ml raspberry coulis
- 200 g raspberries
Buttercream
- 500 g unsalted butter (room temp)(not stork)
- 1000 g icing sugar
- 1 tsp white food colouring
- 1/2 tsp red food colouring
Decoration
- 150 g raspberry jam
- 15 g freeze dried raspberries
- 150 g fresh raspberries
Instructions
Cake
-
Preheat the oven to 180ºC/160ºC fan, and line three 8″/20cm cake tins with baking parchment.
-
In a stand mixer, or a large bowl, beat together the unsalted butter or stork and caster sugar until light and fluffy.
-
Add in the eggs, self raising flour and beat again until combined well.
-
Add the raspberries and raspberry coulis and fold a couple of times to slightly combine the mixture.
-
Split the mixture evenly between the three tins.
-
Bake the cakes in the oven for 35+ minutes, or until baked through – check with a skewer to make sure they’re done!
-
Leave the cakes to cool in the tins for 10 minutes, and then take out and leave to cool fully on a wire rack!
Buttercream
-
Beat your unsalted butter on its own for minute or two, to soften it and loosen it.
-
Add in the icing sugar and beat well until smooth and fluffy.
-
Add the white food colouring and beat until the colour has lightened
-
Remove 1 tbsp worth of buttercream and add the red food colouring to it.
Decoration
-
Put the first cake onto a cake board or plate. Add a little of the white buttercream and spread.
-
Add half of the jam to the middle of the buttercream and spread slightly (but not right to the edges)
-
Repeat with the second sponge!
-
Using a small amount of the white buttercream, spread and smooth around the cake sides and top for a crumb coat and add to the fridge for at least 30 minutes.
-
Once set, add more of the white buttercream onto the tops and sides of the cake, and smooth around covering the cake completely in buttercream.
-
I add the buttercream on using a small angled spatula, and smoothed around the edge with the patterned scraper! You need to make sure there is more buttercream on the sides of the cake than you need, as some will be removed as you smooth it over.
-
Once smooth, carefully add small amounts of the red buttecream randomly on the sides of the cake, and smooth around again to create the smudge pattern.
-
Finish the cake off by piping on any leftover buttercream on the top, and sprinkling on the freeze dried raspberries and fresh raspberries.
Notes
- This cake lasts for 3-4 days at room temperature!
- For this Cake I used (affiliate links):
- I used three of these 8″ Cake Tins
- These piping bags for the buttercream
- These piping bags for the drip
- This cake turntable to make decoration easier
- I used this piping tip for the buttercream!
- I use this white food colouring
- I use this red food colouring
- I use these freeze dried raspberries
- All of the decoration is optional, this is just how I do it!
- You can swap the raspberry flavour for other fruits such as blueberry or even strawberry!
- I used shop bought raspberry coulis but you can make your own using the recipe on this blog post
ENJOY!
Find my other Recipes on my Recipes Page!
You can find me on:
Instagram
Facebook
Pinterest
Twitter
Youtube
J x
© Jane’s Patisserie. All images & content are copyright protected. Do not use my images without prior permission. If you want to republish this recipe, please re-write the recipe in your own words and credit me, or link back to this post for the recipe.