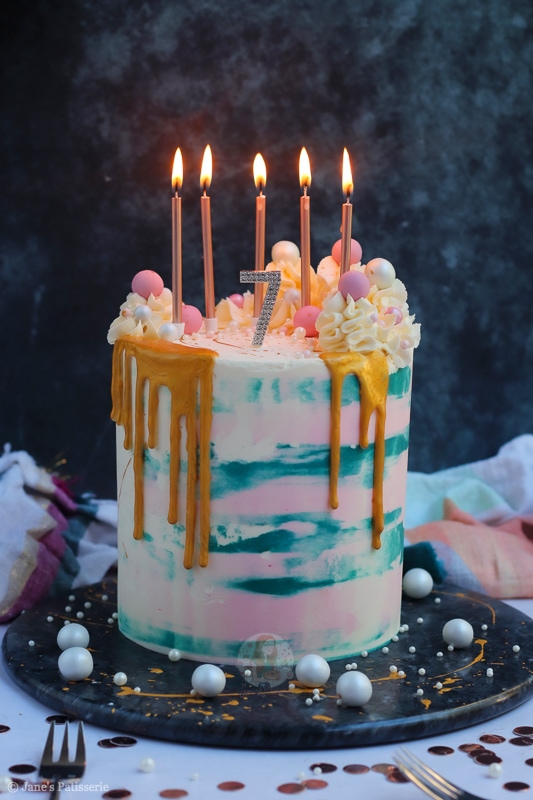
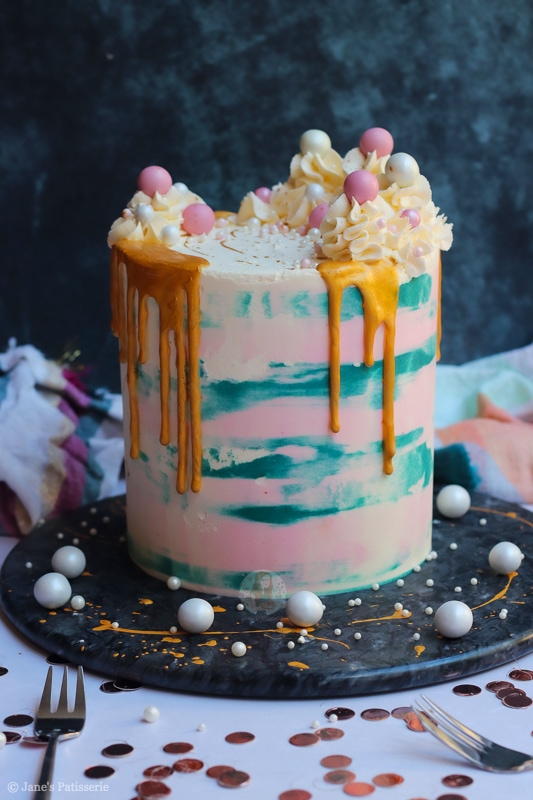
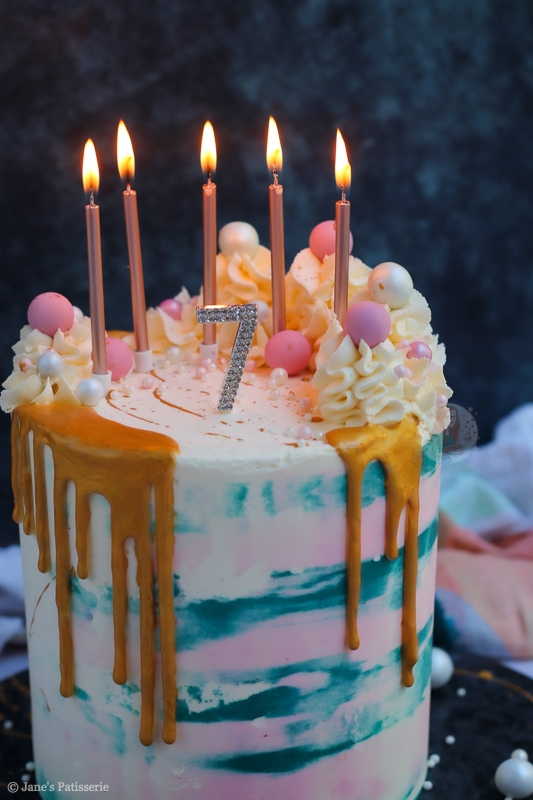
A delicious 6″ vanilla cake, with vanilla buttercream frosting and a fun decoration – to celebrate my blogs 7th birthday!!
Happy birthday to my blog!!
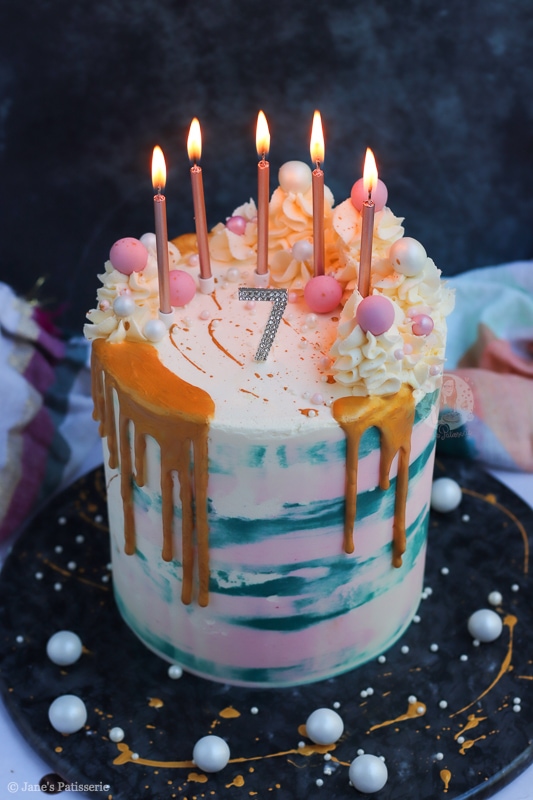
IT’S MY BLOGS 7TH BIRTHDAY! Jane’s Patisserie is now officially seven years old, and I am not entirely sure where that time has gone?! How on earth have I been doing this for seven years?! I just can’t quite believe it.
As always, I wanted to make a cake to celebrate the occasion, and just generally wanted to celebrate an insanely amazing year for Jane’s Patisserie! My book “Jane’s Patisserie” became the fastest selling bakery book ever – it sold 100k+ copies in two months, and just whaaaaat!
Blogs 7th birthday cake
Genuinely when I started my blog I never thought anyone would read it, let alone it be one of the biggest food blogs in the country, and then also produce the fastest selling bakery book ever… its mind-blowing to me! I love my blog so much, so thank you as always for supporting me.
For this years cake, I wanted to do something a little different compared to what I normally do because I like experimenting with decoration, and also wanted to do something with a different size cake to normal!
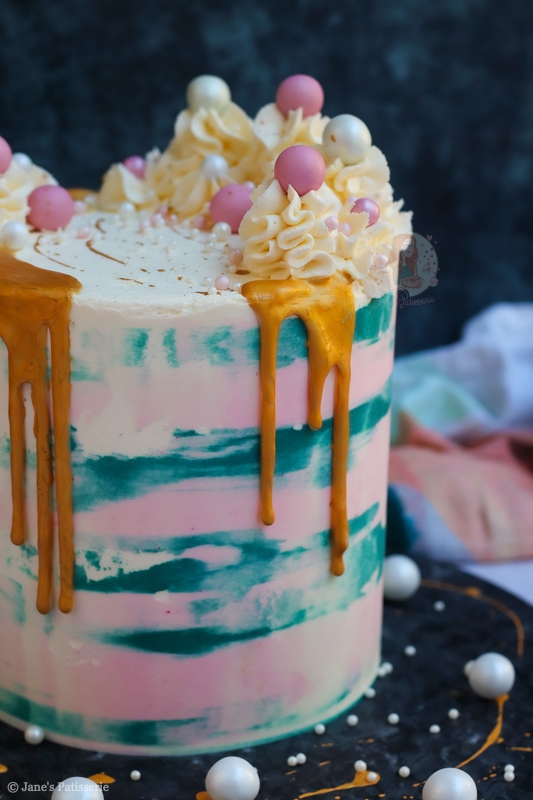
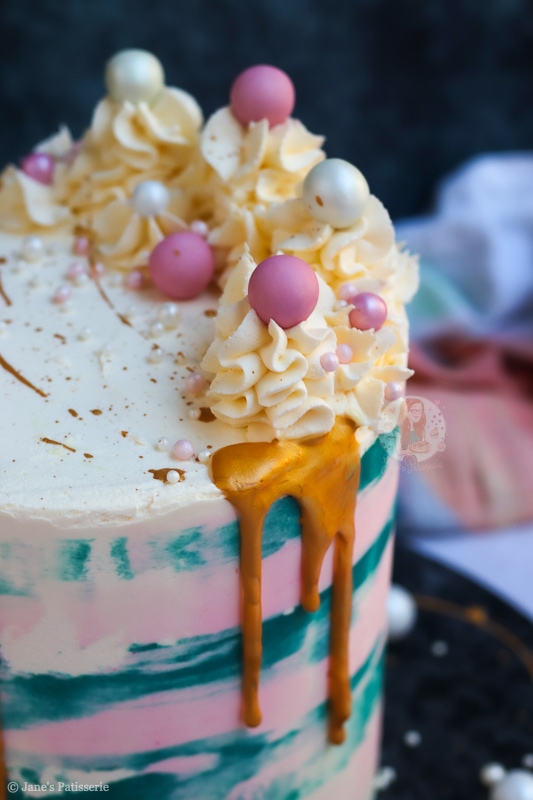
So this cake became a buttercream smudge effect for the decoration, with a gold drip, piped buttercream, splatters of paint, pearl sprinkles and more.. and is maybe a little OTT?! But honestly can it be OTT when it’s a celebration like today? Obsessed.
Size
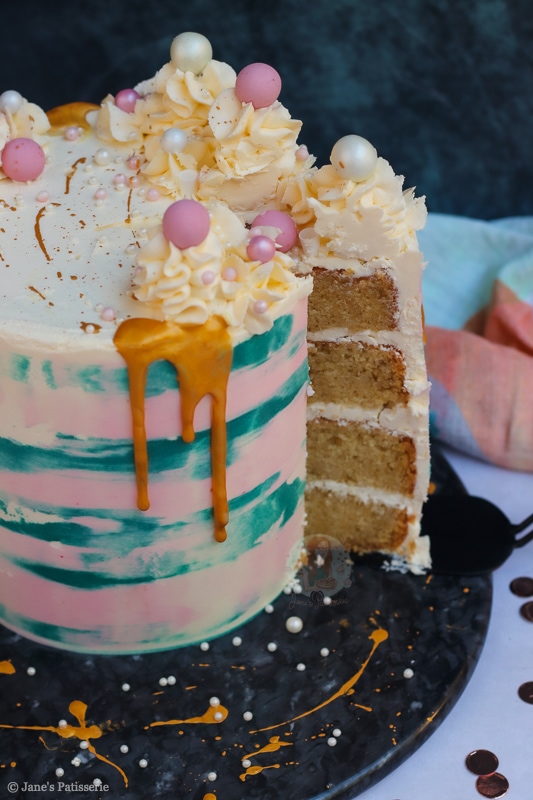
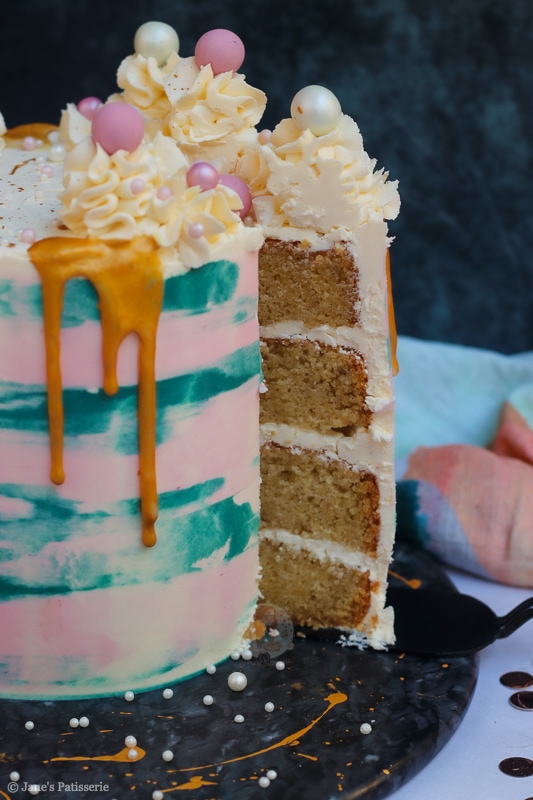
I went for a 6” vanilla cake as I get many requests for 6” cakes – and I rarely do them. I find the most common size cake is an 8”, and that is what a majority of my round bakes are – whether they are cheesecakes, layer cakes, or drip cakes… but this time I have made a slightly smaller one.
For this cake, as it is smaller – I used a 300g mix! It’s the same method in the mixing, just less mixture for the smaller tin. Therefore, as the tin is smaller, and there is less mixture, it’s also quicker to bake – I bake these for about 40 minutes.
Tins
I use these tins for when I am making 6” cakes – I use them because I can easily make a deeper sponge (like these sponges) to then cut in half later, and I really recommend them. They are not loose bottomed tins, but as long as you line the base, the sponges are easily removed.
If I was to do an 8” version of my blogs 7th birthday cake, I would do a 500g mix – 500g butter, sugar, flour and eggs, split into the two tins and baked at 170ºc/150ºfan and bake for 50-60 minutes – the main difference between different tin sizes, is the timings.

Buttercream
I tend to leave this sort of cake to cool fully, and then wrap and freeze until required – as I love to make a sponge in advance. I don’t know about anyone else, but I find it much easier to bake and decorate on different days!
For my blogs 7th birthday cake decoration, I just used a simple American buttercream frosting because it is so easy to do – use block unsalted butter, and icing sugar, and make a thick and lovely frosting that can work wonders. Do NOT use a spread of any kind for the buttercream!
Colouring
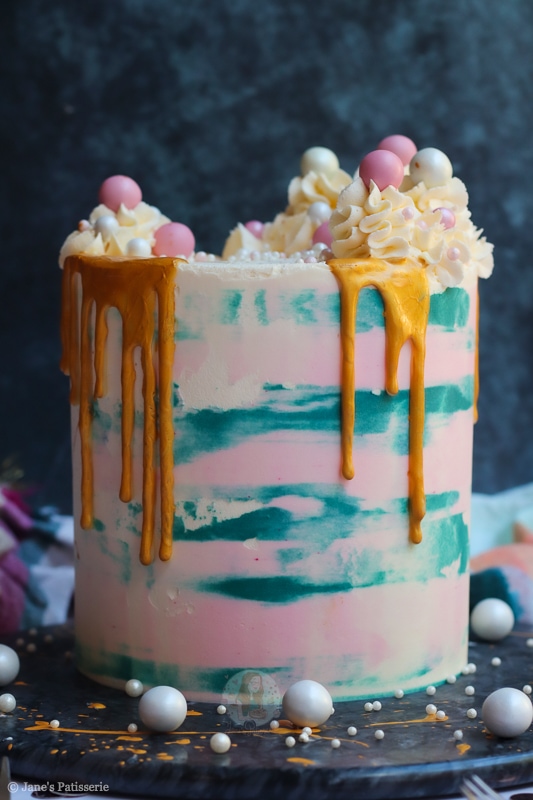
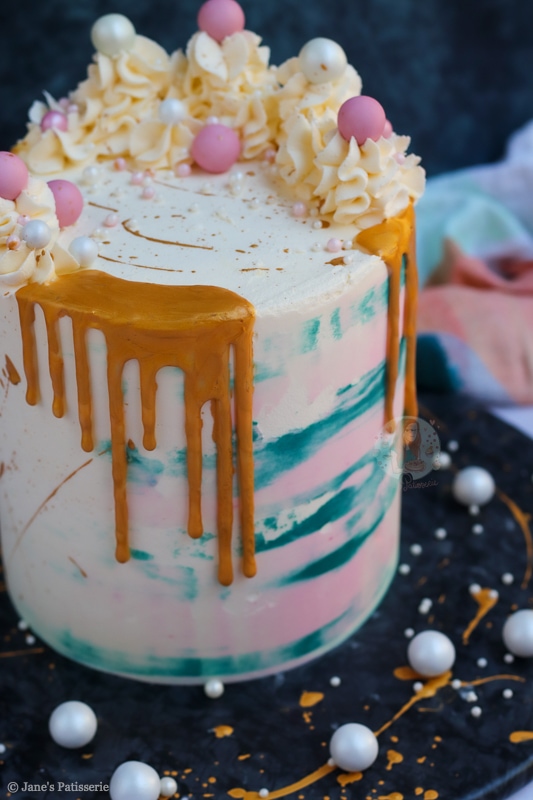
I beat the buttercream for ages on it’s own to make it light and fluffy – and added in a small amount of white food colouring just to lighten it even further. I then took a small spoonful of the buttercream, and coloured one a pale pink using this food colouring, and then the other an aqua colour using this colour! The colours were meant to match my book.. seemed appropriate.
I only wanted the colours to be on part of the cake, so concentrated it to one section, and then randomly added a white chocolate drip to parts – once the drip had set, I then painted this gold using this gold food paint!

Decoration
I filled and covered the cake as normal for any buttercream cake that I do – using a large metal scraper to create a beautifully smooth cake. I then chill the cake to make adding the smudges even easier – you literally dab the smallest amount on randomly, and then smooth the cake around again one more time to get the effect.
No I know my painting skills aren’t the best, but you get the idea! This 7th birthday cake really was quite random, so now writing a post about it is reasonably hard so I hope this makes sense. The leftover buttercream was piped on for a ‘feature’ on the top, and then I topped with sprinkles.
Finally, I added a splatter of gold to the parts of the cake with just the white buttercream – and the cake was done! Random as always. I hope you love this cake, and thank you again for supporting my blog! Jane x


My Blog’s 7th Birthday!
#wprm-recipe-rating-6 .wprm-rating-star.wprm-rating-star-full svg * { fill: #343434; }#wprm-recipe-rating-6 .wprm-rating-star.wprm-rating-star-33 svg * { fill: url(#wprm-recipe-rating-6-33); }#wprm-recipe-rating-6 .wprm-rating-star.wprm-rating-star-50 svg * { fill: url(#wprm-recipe-rating-6-50); }#wprm-recipe-rating-6 .wprm-rating-star.wprm-rating-star-66 svg * { fill: url(#wprm-recipe-rating-6-66); }linearGradient#wprm-recipe-rating-6-33 stop { stop-color: #343434; }linearGradient#wprm-recipe-rating-6-50 stop { stop-color: #343434; }linearGradient#wprm-recipe-rating-6-66 stop { stop-color: #343434; }
Print Pin Rate
Ingredients
Cake
- 300 g unsalted butter
- 300 g caster sugar
- 300 g self raising flour
- 6 medium eggs
- 1 tsp vanilla extract
Buttercream
- 500 g unsalted butter (not stork) (room temp)
- 1000 g icing sugar
- 1 tsp vanilla extract
- 1 tsp white food colouring
- 1/4 tsp pink food colouring
- 1/4 tsp aqua food colouring
Decoration
- 120 g white chocolate
- 40 ml double cream
- gold paint
- feature sprinkles
Instructions
For the cake!
-
Preheat your oven to 170ºC/150ºC Fan, and line two 6″ deep cake tins with parchment paper.
-
Add the unsalted butter and caster sugar to a bowl, and beat until light and fluffy.
-
Add in the flour, eggs and vanilla extract and beat again until a lovely smooth cake mixture is formed.
-
Split evenly between the two tins and bake in the oven for 35-45 minutes (or until a skewer comes out clean!)
-
Once baked, leave to cool in the tin for 10 minutes, and then leave to cool fully on a wire rack.
Buttercream
-
Beat the unsalted butter on its own for a while in your mixer until its smooth and supple.
-
Add in your icing sugar a little at a time and beat fully until its light and fluffy and add the vanilla extract and white food colouring!
-
(If the mixture is really stiff, add in 1-2tbsp of boiling water and beat fully to smooth out)
-
Add a small spoonful of the buttercream to a bowl and colour this to a pale pink. Repeat again with another small spoonful and colour this aqua. (You can of course use whatever colours you want.)
Decoration
-
Level the cakes off if necessary. Split the two cakes into two so you have four layers in total
-
Add your first cake to a cake board or flat serving plate and secure with a small amount of buttercream.
-
Spread some buttercream onto the first layer, add the second sponge. Repeat until you reach the top layer of cake.
-
Spread some buttercream around the sides to fill in the gaps and create a crumb coat. Refrigerate the cake for at least 30 minutes.
-
Once refrigerated, using an angled spatula, spread the buttercream around the cake and then smooth around using a large metal scraper.
-
Chill the cake again for another 30 minutes.
-
Once chilled, carefully dab on the coloured buttercream, and then smooth around using a large metal scraper. You really do not need much coloured buttercream to get the effect.
-
Refrigerate the cake for another 30 minutes.
-
In a small bowl or jug, add the white chocolate and double cream and melt carefully in short bursts in the microwave, stirring well each time, until smooth.
-
Carefully pipe this onto the cake to create a drip – I chose random sections to make the look of the cake. Set the cake in the fridge for another 30 minutes.
-
I then used some gold paint to paint on to the ganache drips, and then flicked a little gold paint onto the white parts of the cake.
-
Pipe some swirls of the leftover buttercream on top using a medium 2D closed star piping tip and decorate with the sprinkles.
Notes
- This cake will last for 3-4 days once made.
- You can look at this post to see the details on making an 8″ cake – or a chocolate cake version.
- In this recipe I used:
ENJOY!
Find my other recipes on my Recipes Page!
You can find me on:
Instagram
Facebook
Pinterest
Twitter
Youtube
J x
© Jane’s Patisserie. All images & content are copyright protected. Do not use my images without prior permission. If you want to republish this recipe, please re-write the recipe in your own words and credit me, or link back to this post for the recipe.