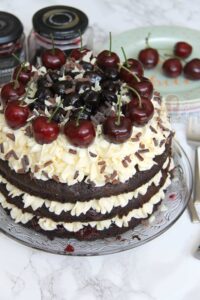
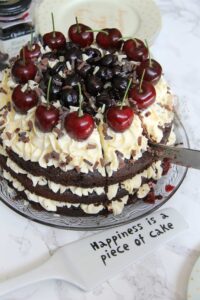
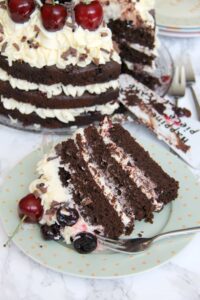
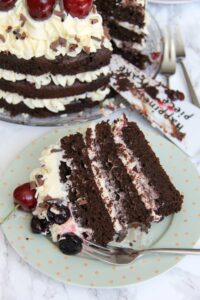
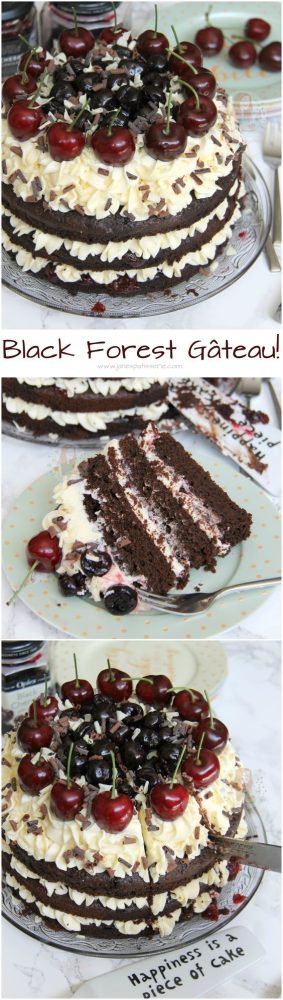
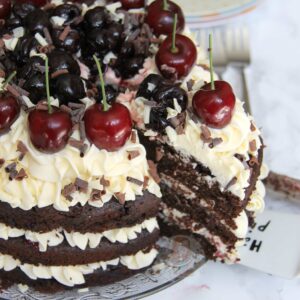
A Three Layer, Chocolate and Kirsch Sponge, with Vanilla Buttercream, and all things Cherry and Chocolate. My delicious Black Forest Gateau!
I have recently found my love for all things Black Forest with the help of my Black Forest Brownies and my No-Bake Black Forest Cheesecake, I thought it was about time to post a Cake Version. I will say from the beginning that this is my version and interpretation of a Black Forest Gateau, and I loooove it, but its not the most classic attempt ever.
I went for using the same sponge as my Chocolate Fudge Cake because its just so damn delicious and perfect in my eyes. It does use Coffee in the sponge but you can’t taste it! I get so many comments all of the time, but honestly, you cannot taste the coffee inside it. It enhances the flavour of the chocolate, and it helps make it the perfect texture.
The Buttermilk in the sponge, mixed with the bicarbonate and other ingredients helps give it a deliciously light and moreish texture. I jazzed it up a little by using the Liquid from the Cherries in Kirsch jar to soak into the sponges to make it delicious Black Forest like and ohmydays it was so tasty!
I decided to use a Vanilla Buttercream for my cake which immediately strays from the classic, but I didn’t want to have to store my cake in the fridge like if you use cream. I used Double Cream in the buttercream to smooth it down into the best textured buttercream I’ve eaten in a long time, and it helps give it a creamy heavenly flavour. You could add Kirsch to the buttercream as well if you wanted, but I like that the buttercream is different to the cake.
In my No-Bake Black Forest Cheesecake I used Cherries in the filling of the Cheesecake, and drizzled jam and such on top. Because this cake is so soft and delicious already, I decided to use a Cherry Conserve/Jam on each layer of the cake, with some of the buttercream after having soaked Kirsch into the sponges.
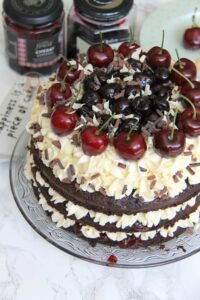
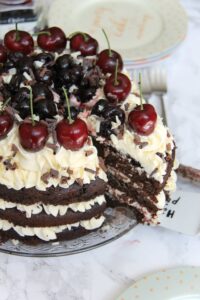
On the top, I created a barrier with the Buttercream to pile the Kirsch soaked Cherries into the middle, and then decorated with some fresh cherries to boot. Dark Chocolate Curls were a given for me, but thats an optional one of course! I hope you like this recipe as much as I do, enjoy! x
Black Forest Gateau!
#wprm-recipe-rating-2 .wprm-rating-star.wprm-rating-star-full svg * { fill: #343434; }#wprm-recipe-rating-2 .wprm-rating-star.wprm-rating-star-33 svg * { fill: url(#wprm-recipe-rating-2-33); }#wprm-recipe-rating-2 .wprm-rating-star.wprm-rating-star-50 svg * { fill: url(#wprm-recipe-rating-2-50); }#wprm-recipe-rating-2 .wprm-rating-star.wprm-rating-star-66 svg * { fill: url(#wprm-recipe-rating-2-66); }linearGradient#wprm-recipe-rating-2-33 stop { stop-color: #343434; }linearGradient#wprm-recipe-rating-2-50 stop { stop-color: #343434; }linearGradient#wprm-recipe-rating-2-66 stop { stop-color: #343434; }
Print Pin Rate
Ingredients
Cake Ingredients
- 225 g Dark Chocolate
- 225 g Unsalted Butter/Stork
- 1 tsp Instant Coffee Granules
- 175 g Plain Flour
- 25 g Cocoa Powder
- 1 tsp Baking Powder
- 1/4 tsp Bicarbonate of Soda
- 200 g Golden Caster Sugar
- 200 g Light Brown Sugar
- 4 Medium Eggs
- 75 ml Buttermilk
Buttercream Ingredients
- 250 g Unsalted Butter (room temp)
- 500 g Icing Sugar
- 1 tsp Vanilla Extract
- 2-5 tbsp Double Cream
Decoration Ingredients
- Dark Chocolate Curls
- Opies Black Cherries Soaked in Kirsch
- Cherry Jam
- Fresh Cherries
Instructions
For the Cake
-
Preheat your oven to 160C/140CFan and grease & line three 8″/20cm Cake tins – leave to the side.
-
In a heatproof bowl, microwave the Dark Chocolate & Butter till melted – mine takes two minutes! Pour the Coffee Granules into 125ml Boiling Water and mix – add the coffee to the Chocolate/Butter mix and stir well till smooth!
-
In a separate large bowl add the Plain Flour, Cocoa Powder, Baking Powder, Bicarbonate of Soda, Golden Caster Sugar, and Light Brown Sugar and mix well so the ingredients are all mixed with each other well!
-
Mix the Eggs with the Buttermilk – Add the Chocolate Mix & the Egg Mix to the dry ingredients and stir together, try not to over mix it – it should be thick but runny when finished and no flour lumps!
-
Pour the mixture into the three lined tins and bake in the oven for 25-30 minutes (can take a little longer in some ovens).
-
Once baked, drizzle over a couple of tablespoons of the Kirsch Liquid from the Jar of Cherries onto each cake.
-
Leave for 10-15 minutes to cool in the tin and then fully cool on a wire rack.
For the Decoration
-
With an electric mixer with the paddle attachment, beat the butter until its very smooth and supple (couple of minutes) Gradually add the Icing Sugar and add the vanilla essence.
-
Beat for a couple of minutes so its extra smooth & creamy. Add in the Double Cream 1tbsp at a time till you get your desired consistency.
-
On each layer of the cake, spread some Cherry Jam. Pipe some buttercream round the edges using a 2D Closed Star Piping Tip and spread some in the middle.
-
Add a couple of cherries from the kirsch jar. On the top layer of the cake, pipe the buttercream round the edge, and spread a little in the middle.
-
Then, in the middle of the buttercream swirls, (like you see in the pictures) add the rest of your cherries from the Cherries in Kirsch Jar (The liquid should have been used to soak into the sponges).
-
On top of the buttercream swirls, add a fresh cherry, and sprinkle on some dark chocolate curls. Enjoy!
Notes
- I bought my Cherries in Kirsch Jar in Tesco. If you can’t access it, you can use normal kirsch, but buy another 300 of cherries and soak them in kirsch over night before baking the cake.
- You can use fresh cream filling in the cake instead if you liked, but the cake needs to be stored in the fridge if you do. I used Buttercream so it lasts much better!
- You can also bake this into two layers rather than three layers by using two 20cm tins – they will take 35-40 minutes in the oven!
- This cake will last for 3 days in an airtight container!
- I use a 2D Closed Star Piping Tip to decorate!
ENJOY!
Find my other Cake Recipes on my Recipes Page!
You can find me on:
Instagram
Facebook
Pinterest
Twitter
Bloglovin’
Youtube
J x
© Jane’s Patisserie. All images & content are copyright protected. Do not use my images without prior permission. If you want to republish this recipe, please re-write the recipe in your own words and credit me, or link back to this post for the recipe.
SaveSave
SaveSave