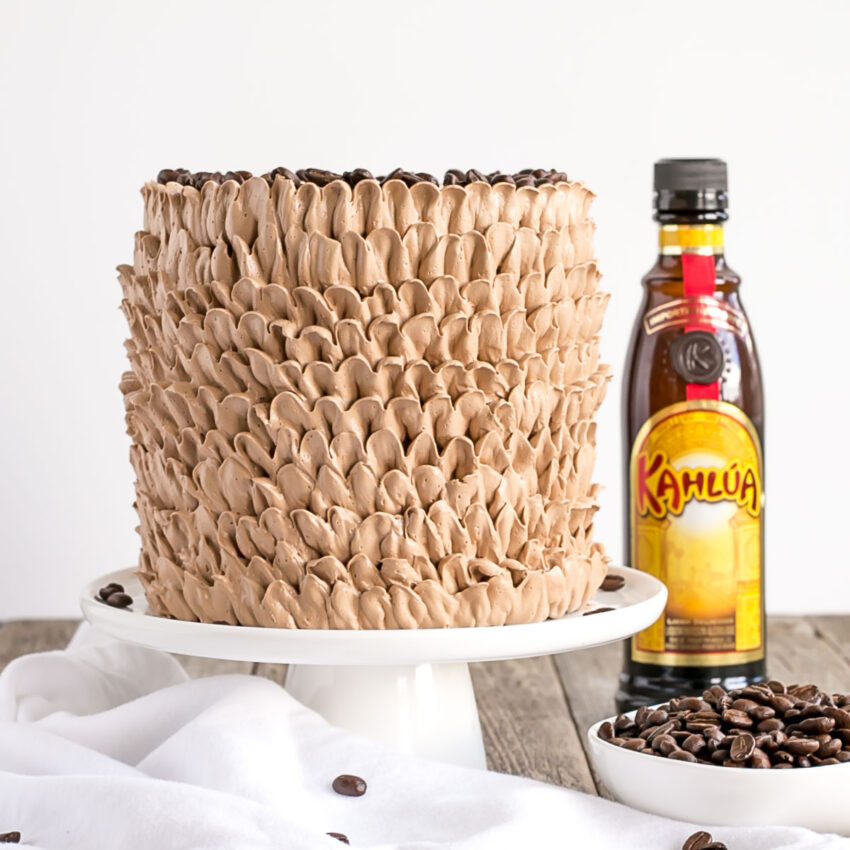
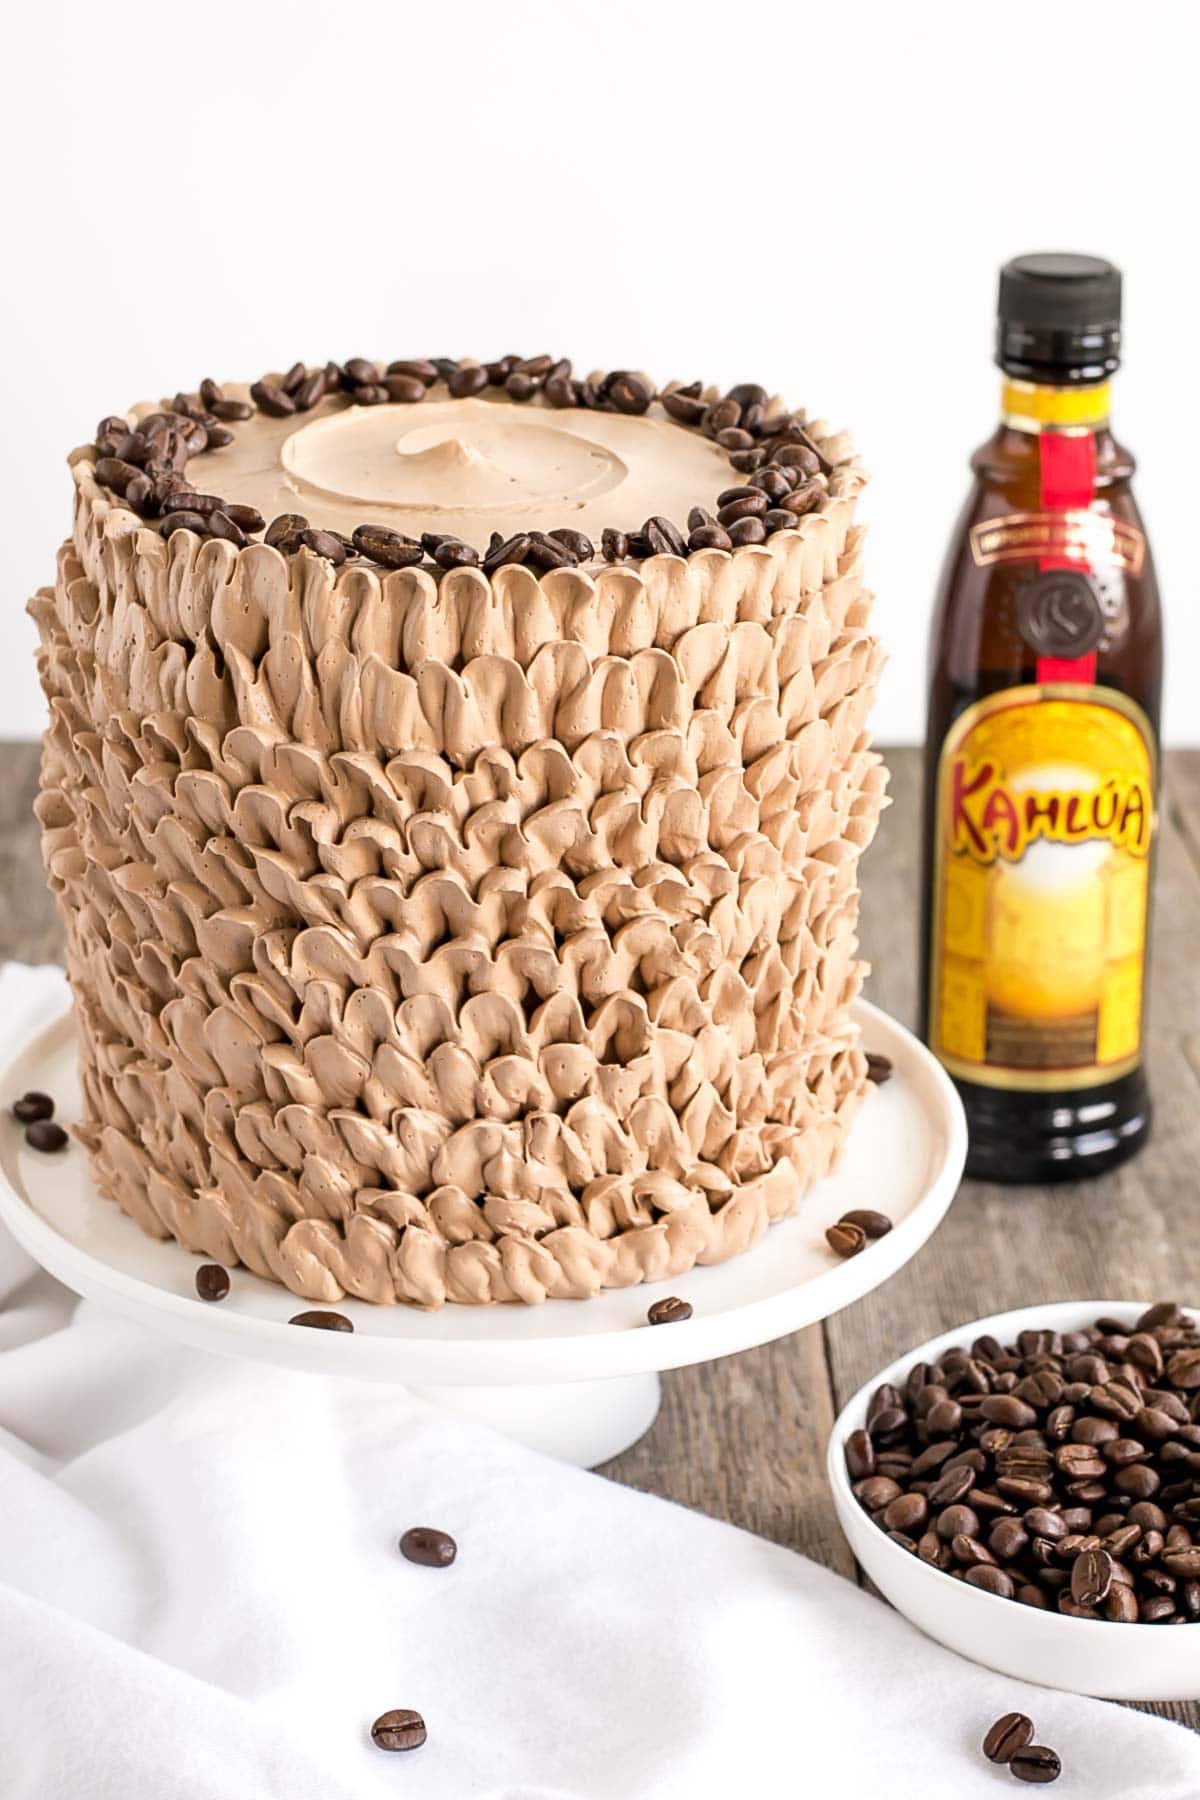
This pretty Kahlua Cake is infused with coffee liqueur & espresso, and adorned with billowy mocha buttercream ruffles.
Anyone else love boozy desserts as much as I do? I’m not huge on drinking alcoholic beverages, but I’m all over having that flavor come through in baked goods.
The cake I’m bringing you today uses one of my favorite liqueurs, Kahlua. It’s a staple around here, just like Baileys, and we all know I have my fair share of Baileys recipes. It was time to let another delicious liqueur shine with this Kahlua Cake!
How to make this Kahlua Cake
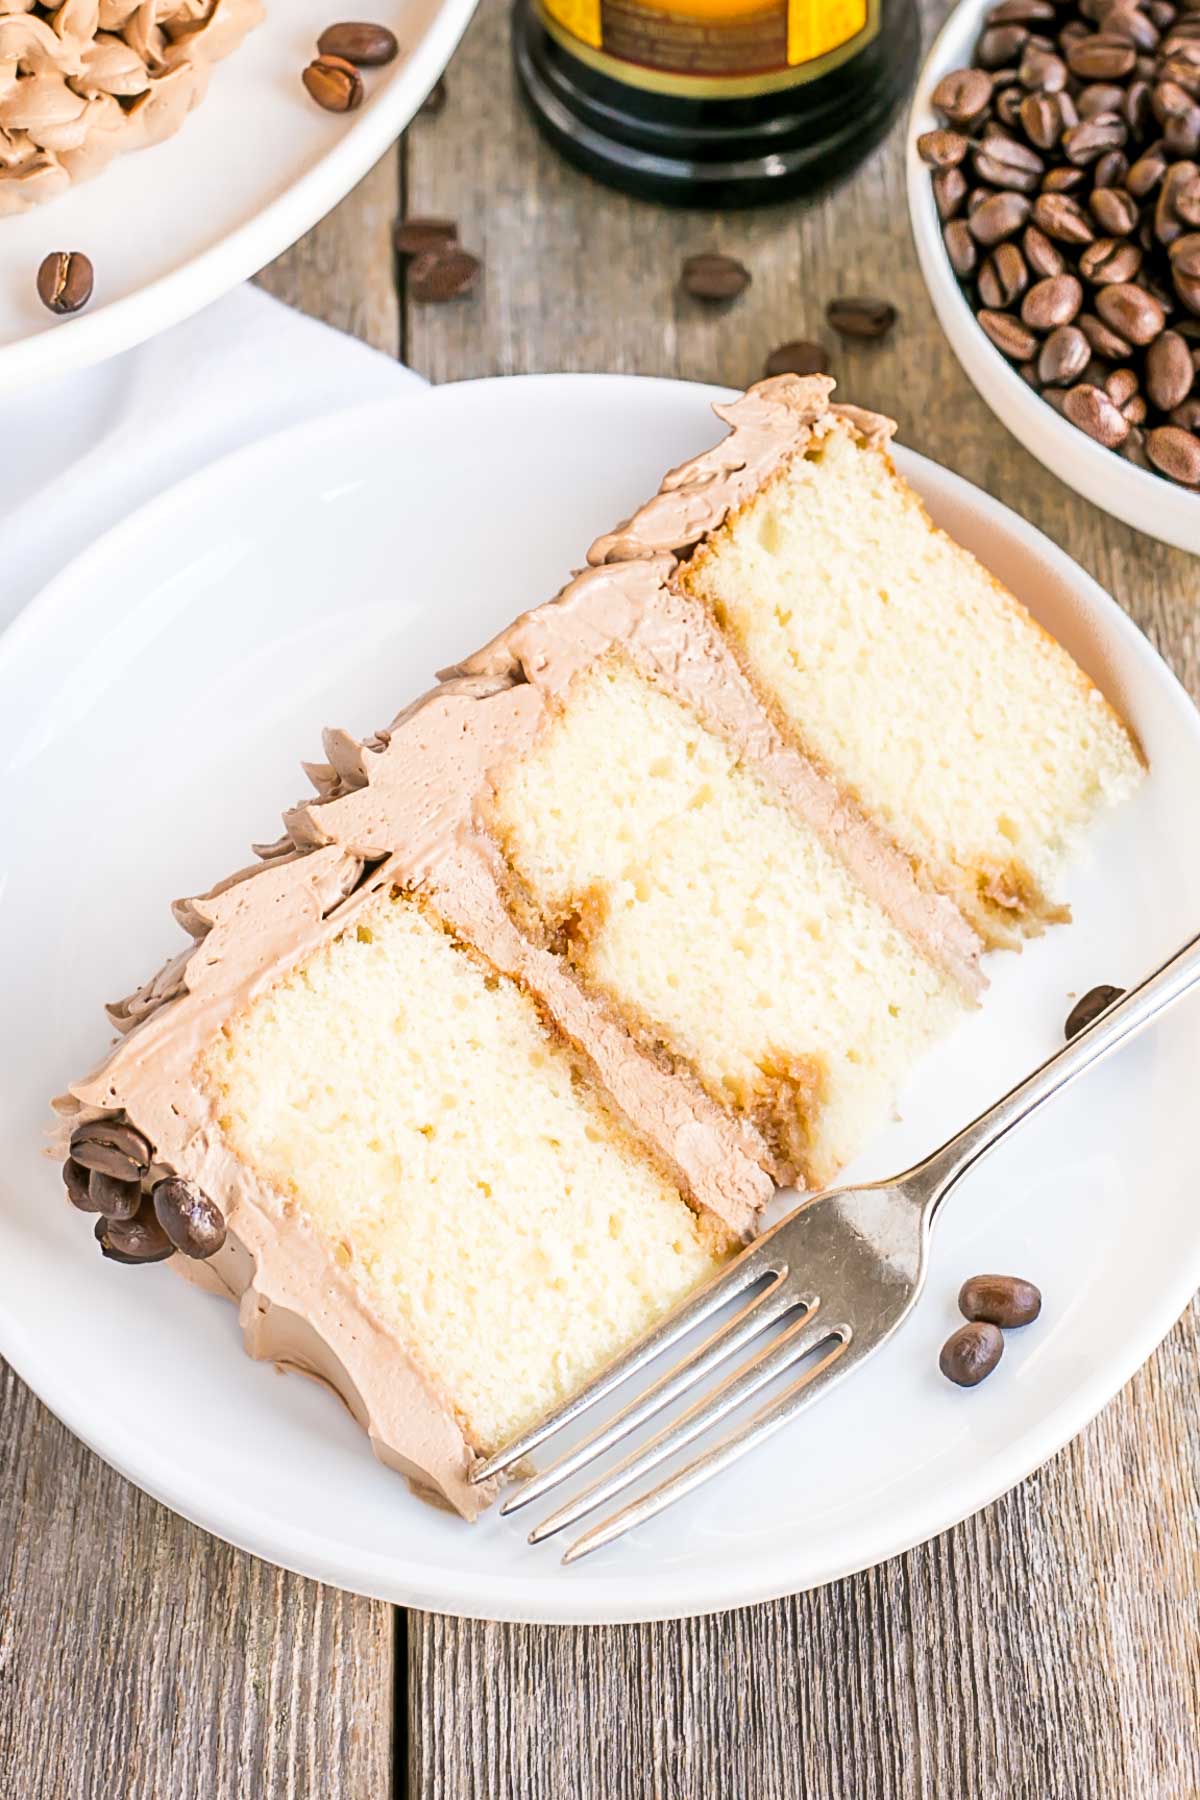
For the cake layers, I used my favorite vanilla cake recipe, except I replaced some of the buttermilk with Kahlua. You can use any coffee liqueur you like though, or stick with vanilla in the cake batter since there’s Kahlua in both the coffee syrup (don’t skip this!) and the mocha buttercream.
Kahlua Simple Syrup
The Kahlua simple syrup is a must-do, in my opinion. Really you could skip it, but it’s so easy to make and adds both flavor and moisture to the cake. After preparing the syrup, I poked a bunch of holes (using bamboo skewers) into the warm cakes and brushed the syrup onto each layer.
Next time, I’d probably wait till the cakes are cooled and trim off a very thin layer of the top to remove the “crust”. Then I’d brush the syrup onto each layer. I feel like this would do a better job of penetrating through the cake. No matter which option you choose, don’t be shy with brushing the syrup on!
How to make Mocha Buttercream
This Kahlua Cake is finished off with my very favorite mocha buttercream. Honestly, this stuff is SO good. You’ll be eating it with a spoon for sure, and you’ll be very grateful for the leftovers (if there are any).
The buttercream is a simple Swiss meringue buttercream with espresso powder, melted chocolate, and Kahlua added to it. It’s important to make sure your chocolate is melted, but cooled (no longer warm) or your buttercream will turn soupy. It’s saveable by popping the whole thing into the fridge for 20mins and rewhipping.
By the same token, make sure your buttercream isn’t too cold when you add the chocolate as the chocolate can solidify and create chunks. I’ve never had this happen, personally, but I know others have. I melt my chocolate before I start making my buttercream and once the buttercream is ready, the chocolate is at the right temperature (I stir the chocolate now and then to make sure it cools evenly).
How to Make a Ruffle Cake
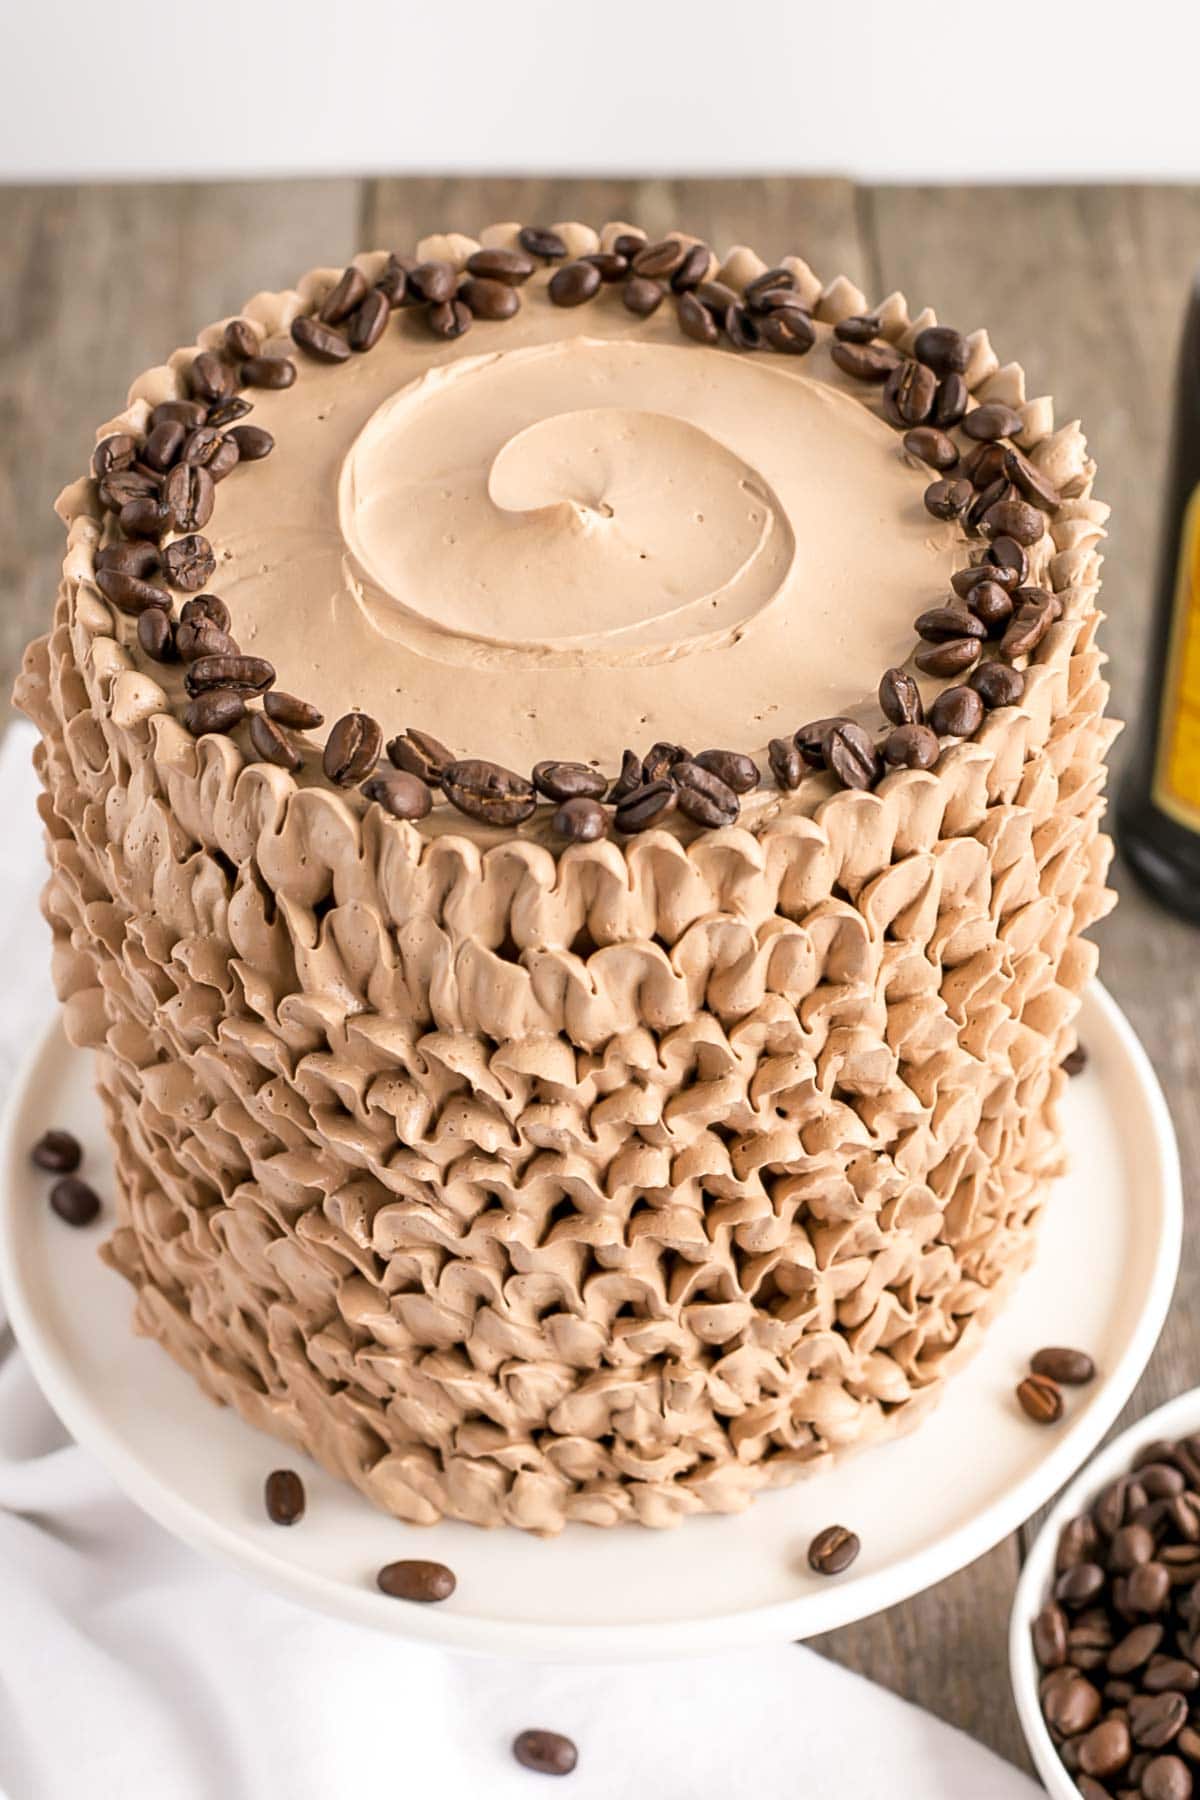
I wanted to try something a bit different with the decorating technique this time and (surprise, surprise!) I’m not totally happy with the way it turned out.
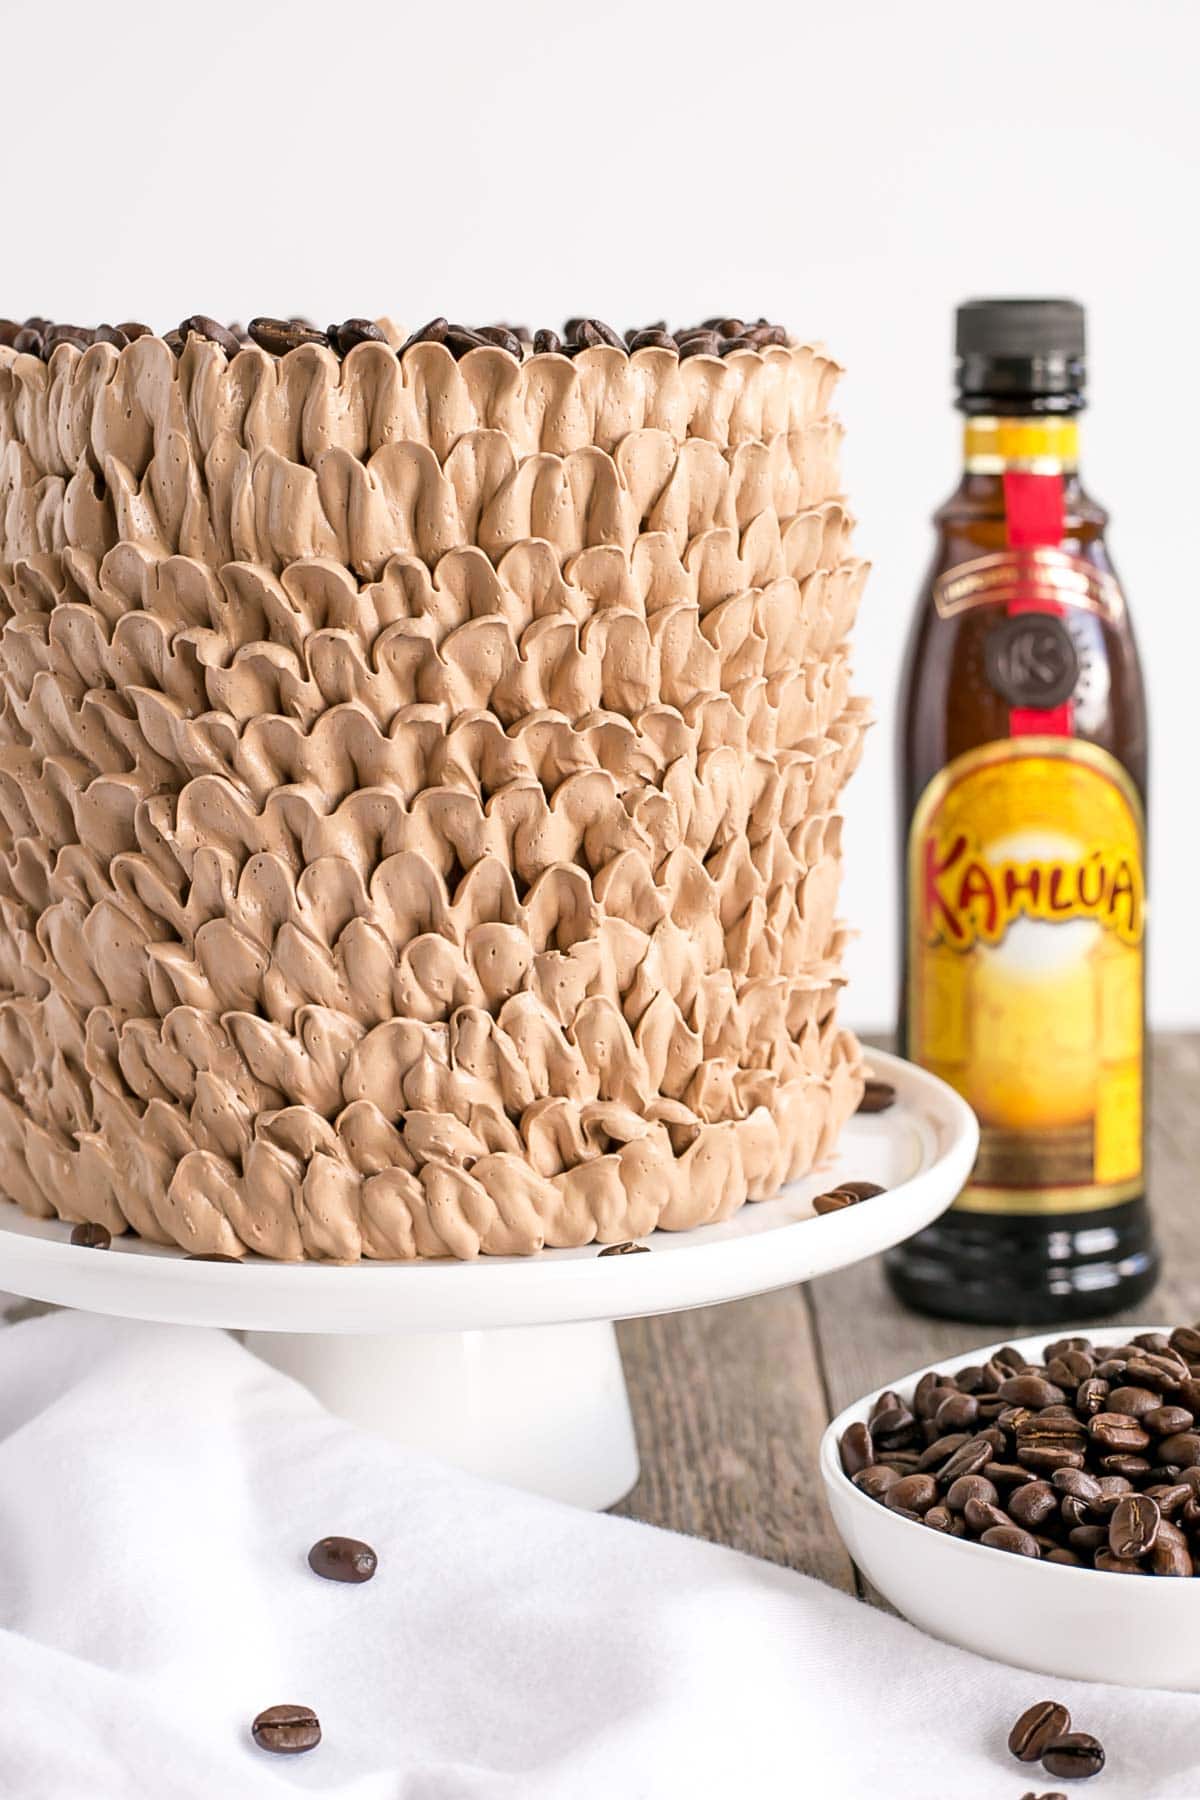
The ruffles aren’t exactly difficult to do, but the challenge comes in as you try to get the rows perfectly even while your hand is getting tired and the buttercream is getting super soft in the piping bag you’ve been clutching onto. As such, the ruffles are a bit messy in parts, especially near the bottom (I started at the top).
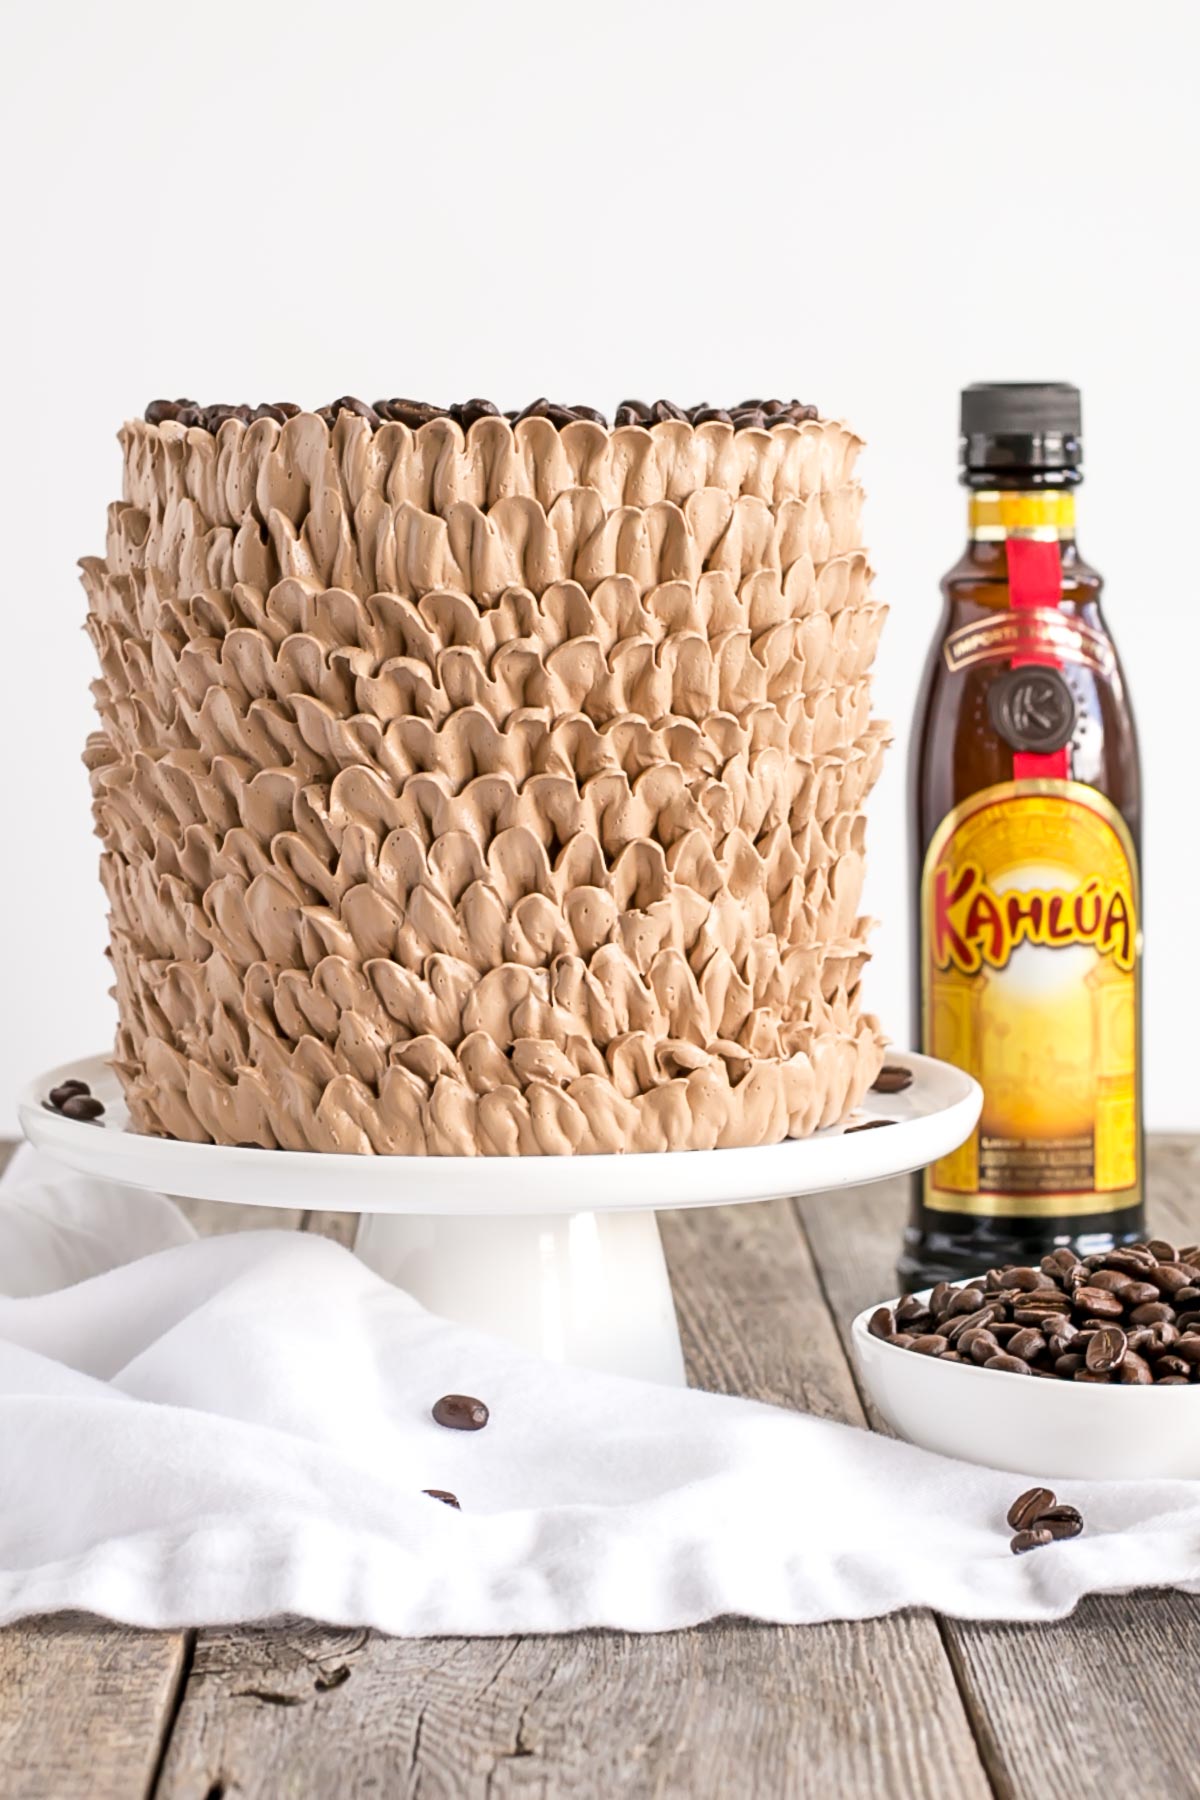
To do the ruffles, I used a large piping bag fitted with a large petal tip (Wilton #125). I started at the top of the cake, making sure that the first set of ruffles would peek over the top. I placed the thicker end of the tip against the cake at a 45 degree angle and piped the ruffles up and down as I spun my turntable.
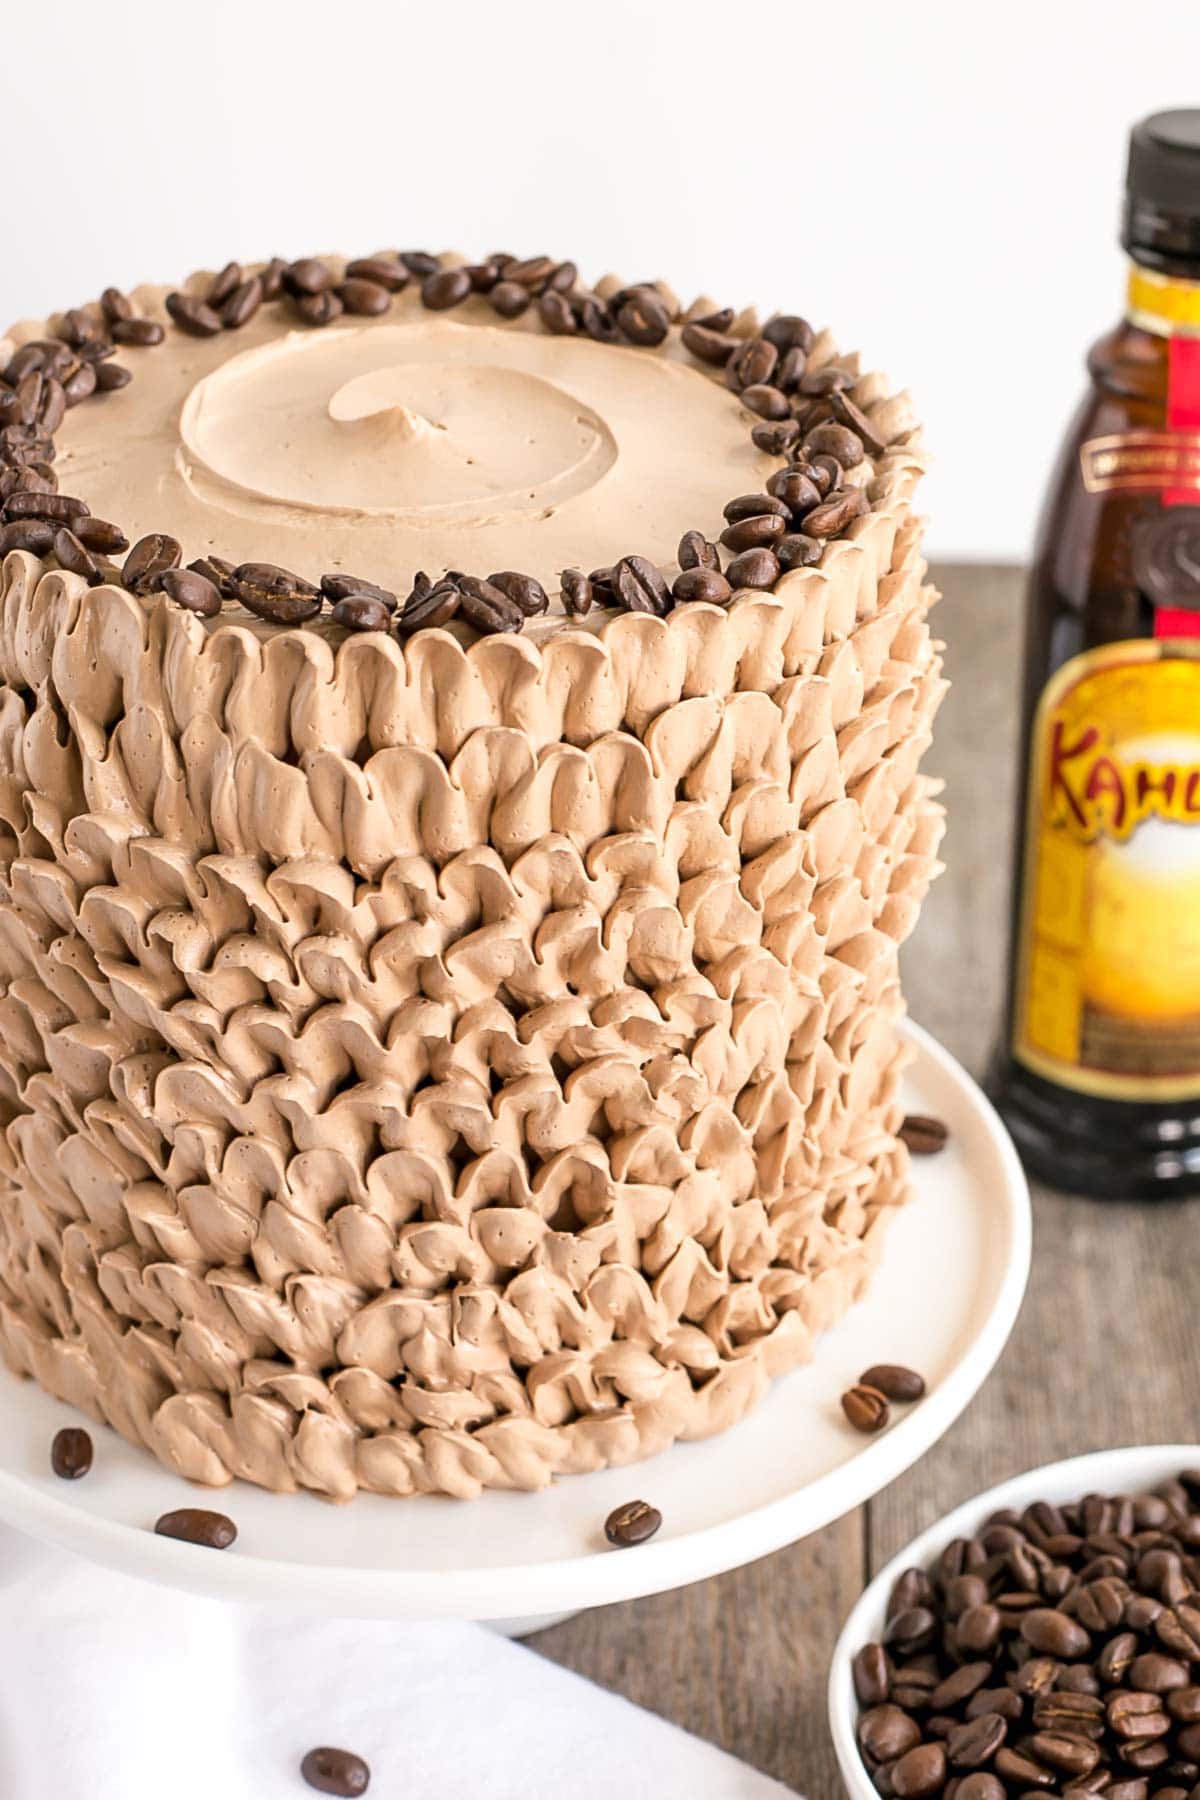
I repeated the process with subsequent rows, making sure to always start in the same place so that the “seams” would all be together at the back of the cake. All cakes have a “back” amiright?
Piping the ruffles gets more difficult as you work your way down for the reasons I mentioned:
- Your hand is tired
- Your buttercream is soft
- The angle is more awkward
To try to combat the soft buttercream, you can use a smaller piping bag and just refill it more often. I am lazy and I find refilling a used piping bag to be one of the most annoying things in the world, so I try to pack as much as possible into a large piping bag.
This is not the best thing to do, and I don’t recommend it, but again, I’m lazy. And my laziness has no doubt caused these imperfect ruffles! Oh well. It is what it is, and did I mention it tastes delicious??
I still think it looks pretty even though it’s not perfect, and most importantly it tastes DELICIOUS. You really can’t go wrong with the coffee + chocolate combo in my opinion. If you are a coffee fan, you will love this Kahlua Cake!
Tips for this Kahlua Cake:
- You can make this cake without coffee liqueur if you prefer. Use 1 cup buttermilk and substitute 1 tsp vanilla for Kahlua.
- I recommend trimming/levelling the tops of the cake layers before brushing the syrup on to get rid of the crust and help the syrup soak into the cake.
- Be sure to use instant espresso powder (not granules) in the buttercream. Otherwise, dissolve the granules in 1 Tbsp hot water and let cool before adding to the frosting.
- I used a large petal tip (Wilton #125) to make the ruffles.
- If you’re a fan of boozy or coffee flavored desserts, be sure to check out my Coffee & Baileys Cake, Mocha Chocolate Cake, and Baileys Cheesecake Cookie Cups!
- Be sure to check my Swiss Meringue Buttercream post for tips and troubleshooting.
- To help ensure your cake layers bake up nice and flat, see my Flat Top Cakes post.

Kahlua Cake with Mocha Buttercream
#wprm-recipe-rating-0 .wprm-rating-star.wprm-rating-star-full svg * { fill: #e87b99; }#wprm-recipe-rating-0 .wprm-rating-star.wprm-rating-star-33 svg * { fill: url(#wprm-recipe-rating-0-33); }#wprm-recipe-rating-0 .wprm-rating-star.wprm-rating-star-50 svg * { fill: url(#wprm-recipe-rating-0-50); }#wprm-recipe-rating-0 .wprm-rating-star.wprm-rating-star-66 svg * { fill: url(#wprm-recipe-rating-0-66); }linearGradient#wprm-recipe-rating-0-33 stop { stop-color: #e87b99; }linearGradient#wprm-recipe-rating-0-50 stop { stop-color: #e87b99; }linearGradient#wprm-recipe-rating-0-66 stop { stop-color: #e87b99; }
Ingredients
Kahlua Syrup:
- 1/2 cup water
- 1/2 cup granulated sugar
- 1 Tbsp espresso powder
- 1/4 cup Kahlua coffee liqueur
Cake:
- 2 1/4 cups all-purpose flour
- 2 tsp baking powder
- 3/4 tsp salt
- 3/4 cup unsalted butter room temperature
- 1 1/2 cup granulated sugar
- 3 large eggs room temperature
- 1/4 cup Kahlua coffee liqueur
- 3/4 cup buttermilk room temperature
Mocha Buttercream:
- 5 large egg whites
- 1 1/2 cups granulated sugar
- 2 cups unsalted butter room temperature
- 3 Tbsp Kahlua coffee liqueur
- 1 1/2 Tbsp espresso powder not granules
- 5 oz good quality dark chocolate chopped, melted, cooled
Instructions
Kahlua Syrup:
-
Bring sugar, water, and espresso powder to a boil in a small pot over med-high heat. Simmer for 1min. Remove from heat and stir in Kahlua. Set aside to cool.
Cake:
-
Preheat oven to 350F. Grease and flour three 6″ cake rounds and line with parchment.
-
In a medium bowl, whisk flour, baking powder, and salt until well combined. Set aside. Combine Kahlua and buttermilk. Set aside.
-
Using a stand mixer fitted with a paddle attachment, cream butter and sugar on med-high until pale and fluffy (approx 3mins). Reduce speed and add eggs one at a time fully incorporating after each addition.
-
Alternate adding flour mixture and buttermilk mixture, beginning and ending with flour (3 additions of flour and 2 of milk). Fully incorporating after each addition.
-
Bake for 30-35mins or until a toothpick inserted into the center comes out mostly clean.
-
Place cakes on wire rack to cool for 10mins then turn out onto wire rack. Poke holes into the cakes using a bamboo skewer and brush generously with Kahlua syrup.
-
Allow cakes to cool completely.
Mocha Buttercream:
-
Place egg whites and sugar into the bowl of a stand mixer, whisk until combined.*
-
Place bowl over a pot with 1-2″ of simmering water and stir constantly with a whisk until the mixture is hot and no longer grainy to the touch or reads 160F on a candy thermometer (approx. 3mins).
-
Place bowl on your stand mixer and whip on med-high until the meringue is stiff and cooled (the bowl is no longer warm to the touch (approx. 5-10mins)).
-
Switch to paddle attachment. Slowly add cubed butter and mix until smooth.**
-
Add cooled melted chocolate and espresso powder. Mix until combined. Slowly stream in Kahlua and whip until smooth.
Assembly:
-
Place one layer of cake on a cake stand or serving plate. Top with approximately 2/3 cup of buttercream. Repeat with remaining layers and crumb coat the cake. Chill for 20mins.
-
Frost the top of the cake with approximately 2/3 cup of buttercream. Do a decorative swirl using a large offset spatula. Smooth any frosting that overhangs the sides.
-
Using a large petal tip, pipe ruffles around the cake in horizontal rows starting at the top.
-
Decorate with coffee beans if desired.
Notes
** The buttercream may look like it’s curdled at some point. Keep mixing until it is completely smooth.