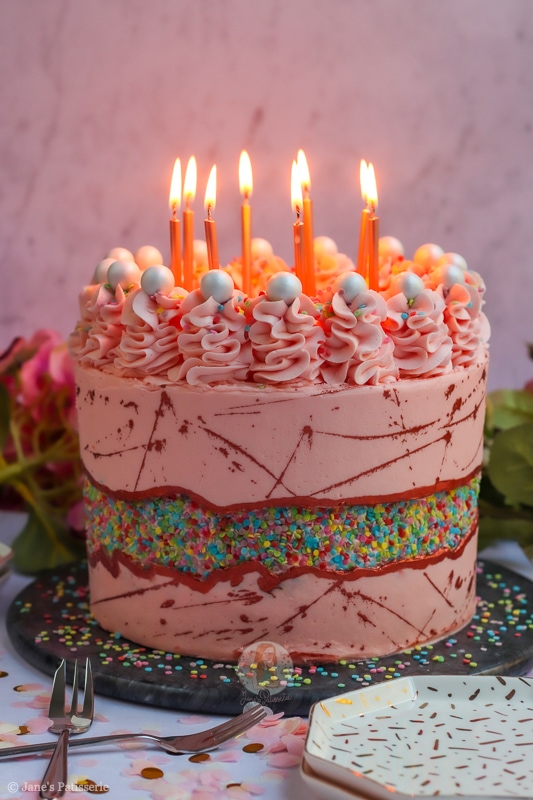
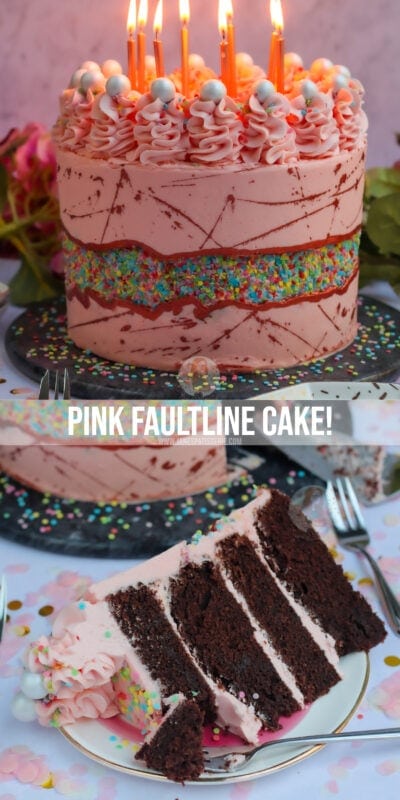
A recipe for my 29th birthday cake… a chocolate and vanilla fault line cake!

Happy Birthday to me!
Happy 29th birthday to meeeee! Yes that’s right, I am now one year away from being thirty. Let’s just avoid that little fact, and talk about all things cake! This post, is this years birthday cake!!
I always bake myself a birthday cake as I love baking cakes – but its also a good idea for a celebration cake style recipe for my blog, so I always love to post them onto here and my social media channels.
Fault line cake
Over the years I have gone down quite the chocolate theme for my birthday cakes – as I am a true chocoholic. I can’t resist them – but this year I thought I would do something I haven’t done on my blog before, and do a fault line cake!
I will say now before anyone asks – there is no video tutorial for this cake. As it was for my birthday and I baked this yesterday, I didn’t have the time to video it – sorry… hopefully will do a tutorial video for a fault line cake at some point!
Cake
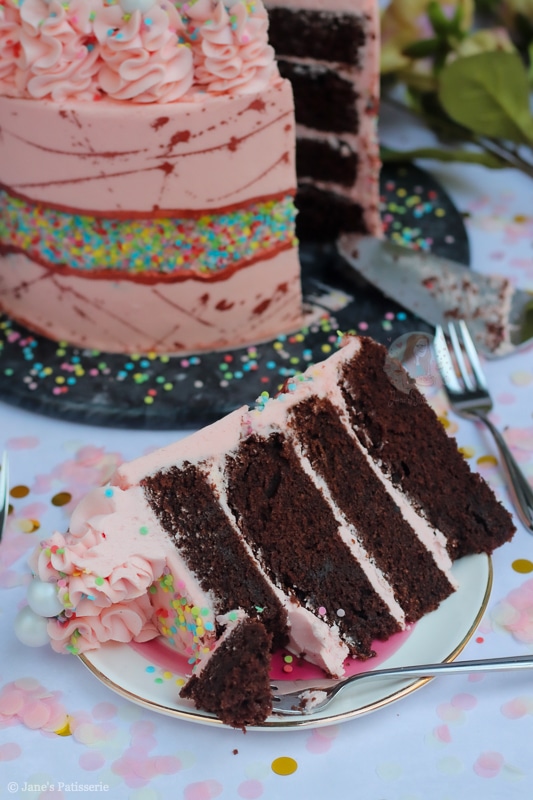
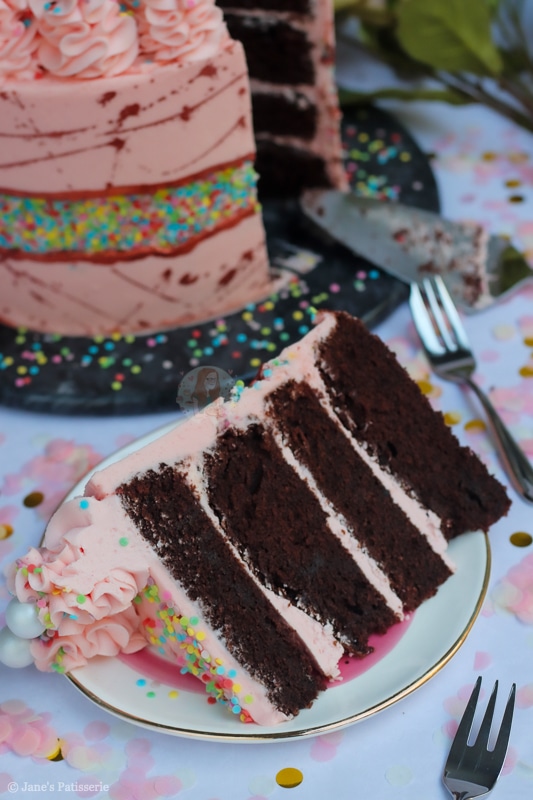
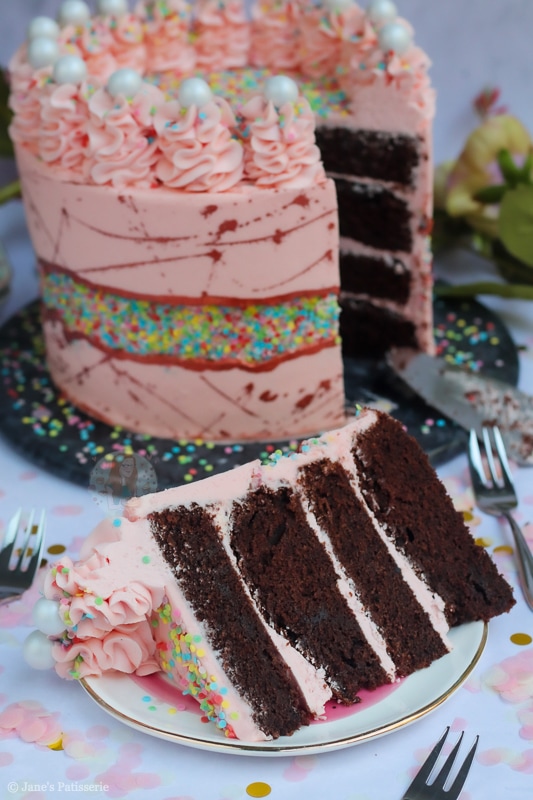
I decided to do a chocolate cake for the base cake of the recipe as I still wanted a little chocolate in my birthday cake this year – but used a vanilla buttercream frosting for the decoration. I love the combination of chocolate and vanilla and this is a good method of achieving it.
I used a four layer cake – baking into two of these cake tins. A slightly lower baking time means it bakes flat, and it stays moist! It’s the charm of baking a slightly deeper cake too. Although, don’t take them out too early, as the cakes will really sink if you do!

Decoration
When decorating a cake, I do find it easier when the sponge is frozen – some people may disagree with this, but honestly – it’s so good. I bake the cakes, cool them, and then half them ready. Double wrap in cling film and then foil and freeze until required!
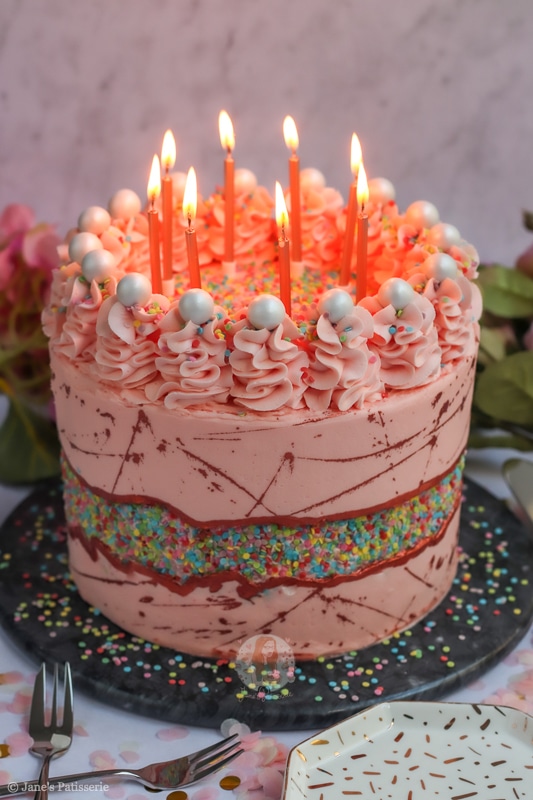
I used a pale pink/peach colour buttercream as the base – but you can obviously use whatever colour you prefer. I filled the cake with this buttercream, used it for the crumb coat, and then also the decoration!

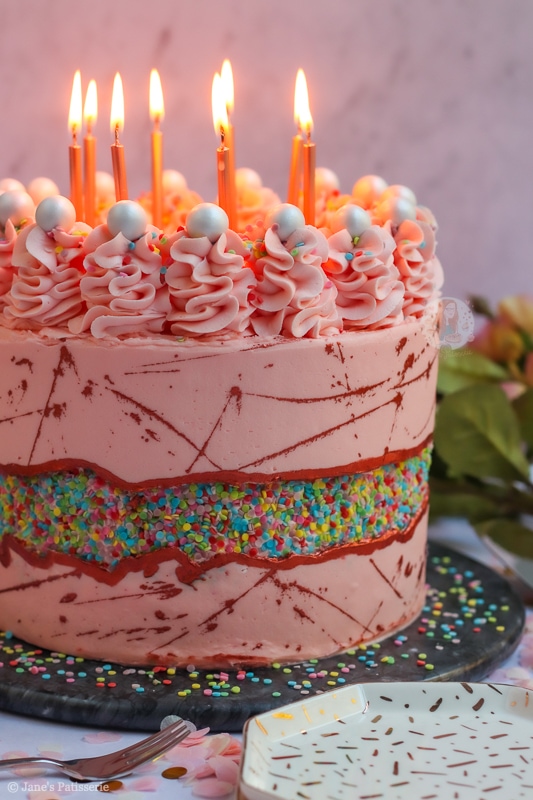
Fault line
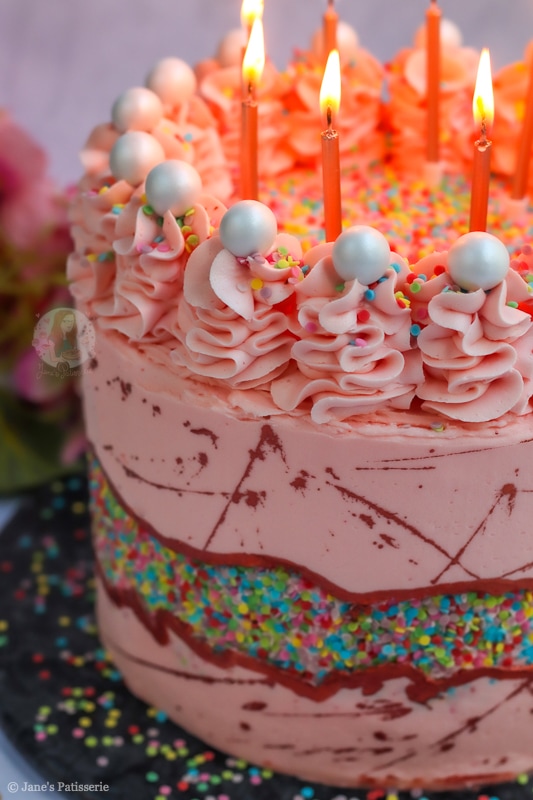
When doing the ‘fault line’ part – it can get a little messy if you use sprinkles like I did! I spread a little of the buttercream around the middle section of the cake using a small angled spatula, and pressed some sprinkles carefully into this buttercream. You don’t need much buttercream, just enough to use as ‘glue’.
Some sprinkles will inevitably fall off, so this is how it can get messy – but it’s fun! You can use any colour or type, but you don’t want the feature part of the cake to stick out too much, as the rest of the buttercream will have to be wider to create the look of the bake.

Sprinkles
Once I have pressed the sprinkles into the cake I chilled the cake in the fridge to set the sprinkles. I then used a piping bag to pipe buttercream around the cake bottom and top so that it was thick. I then used my large metal scraper to smooth the buttercream around the edge – this creates the look of the bake.
Don’t worry if you cover some of the sprinkles, or if it looks a little rugged – this is good! It creates the jagged edge that is perfect for a fault line cake. Once the buttercream has been smoothed around the edges and top of the cake, I chill it again.
Extra touches
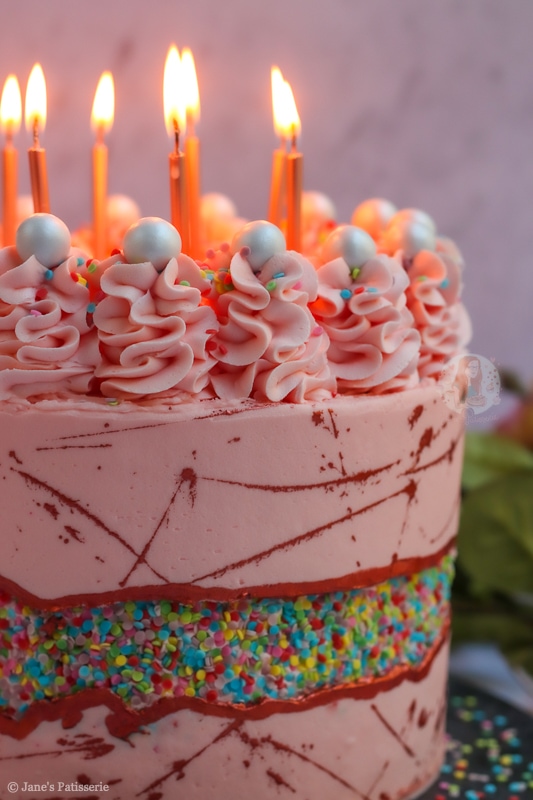
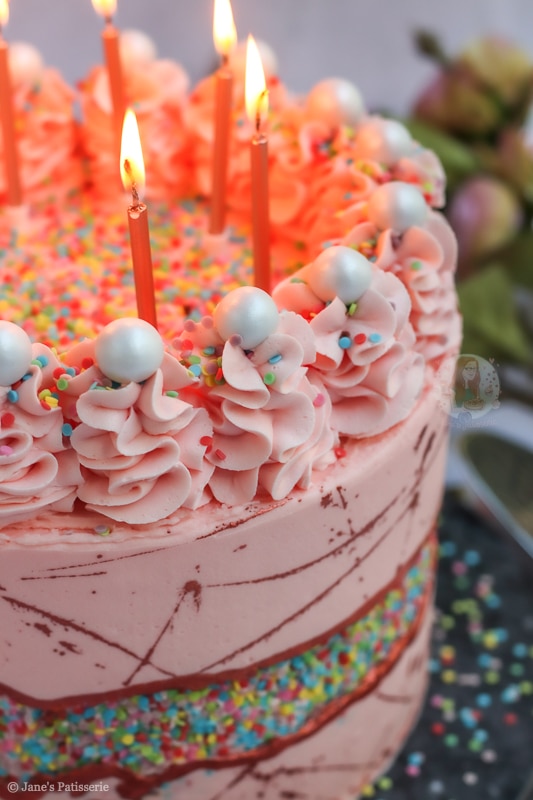
I used a little rose gold food paint to paint around the edges of the lines, to make it more of a feature – and then also did some paint splats as I got a little bored and carried away… sorry to the tiles behind the cake that became a little rose gold too haha!
I used the leftover buttercream to pipe tall swirls of buttercream on the top – and sprinkle on more of the sprinkles, and some large pearl sprinkles for an extra touch! This is of course, optional.
All of this is just what I happened to do for this years birthday cake – hopefully it can give you guys some inspiration for if you want to make your own fault line cake! Enjoy! X
My 29th Birthday Cake!
#wprm-recipe-rating-7 .wprm-rating-star.wprm-rating-star-full svg * { fill: #343434; }#wprm-recipe-rating-7 .wprm-rating-star.wprm-rating-star-33 svg * { fill: url(#wprm-recipe-rating-7-33); }#wprm-recipe-rating-7 .wprm-rating-star.wprm-rating-star-50 svg * { fill: url(#wprm-recipe-rating-7-50); }#wprm-recipe-rating-7 .wprm-rating-star.wprm-rating-star-66 svg * { fill: url(#wprm-recipe-rating-7-66); }linearGradient#wprm-recipe-rating-7-33 stop { stop-color: #343434; }linearGradient#wprm-recipe-rating-7-50 stop { stop-color: #343434; }linearGradient#wprm-recipe-rating-7-66 stop { stop-color: #343434; }
Print Pin Rate
Ingredients
8″ Chocolate Cake
- 500 g unsalted butter/baking spread
- 500 g light brown sugar
- 400 g self raising flour
- 100 g cocoa powder
- 10 medium eggs
Buttercream
- 600 g unsalted butter (not stork) (room temp)
- 1200 g icing sugar
- 1 tsp vanilla extract
- 1 tsp pink food colouring
Decoration
- Rose gold paint
- 100 g sprinkles
- Feature sprinkles
Instructions
For the 8″ Chocolate Cake!
-
Preheat your oven to 170ºC/150ºC Fan, and line two 8″/20cm deep cake tins with parchment paper.
-
Add the butter and sugar to a bowl, and beat until light and fluffy.
-
Add in the flour, cocoa powder and eggs and beat again until a lovely smooth cake mixture is formed.
-
Split evenly between the two tins and bake in the oven for 50-60 minutes (or until a skewer comes out clean!)
-
Once baked, leave to cool in the tin for 10 minutes, and then leave to cool fully on a wire rack.
Buttercream
-
Beat the unsalted butter on its own for a while in your mixer until its smooth and supple.
-
Add in your icing sugar a little at a time and beat fully until its light and fluffy and add the vanilla extract and food colouring!
-
(If the mixture is really stiff, add in 1-2tbsp of boiling water and beat fully to smooth out)
Decoration
-
Level the cakes off if necessary. Split the two cakes into two so you have four layers in total
-
Add your first cake to a cake board or flat serving plate and secure with a small amount of buttercream.
-
Spread some buttercream onto the first layer, add the second sponge. Repeat until you reach the top layer of cake.
-
Spread some buttercream around the sides to fill in the gaps and create a crumb coat. Refrigerate the cake for at least 30 minutes.
-
Once refrigerated, using an angled spatula, spread a thin layer of buttercream around the middle section of the cake and carefully press in the sprinkles with the palm of your hand and then smooth around using a large metal scraper.
-
Chill the cake again for another 30 minutes.
-
Once chilled, pipe or spread some more buttercream in a thicker layer around the top section and bottom section of the cake and then smooth around using a large metal scraper. Smooth some buttercream on to the top of the cake as well.
-
Refrigerate the cake for another 30 minutes.
-
I then used some rose gold paint to paint around the edges of the fault line, and then also flicked some onto the other sections of the cake.
-
Pipe some swirls of the leftover buttercream on top using a medium 2D closed star piping tip and decorate with the sprinkles.
Notes
- This cake will last for 3-4 days once made.
- In this recipe I used:
ENJOY!
Find my other recipes on my Recipes Page!
You can find me on:
Instagram
Facebook
Pinterest
Twitter
Youtube
J x
© Jane’s Patisserie. All images & content are copyright protected. Do not use my images without prior permission. If you want to republish this recipe, please re-write the recipe in your own words and credit me, or link back to this post for the recipe.