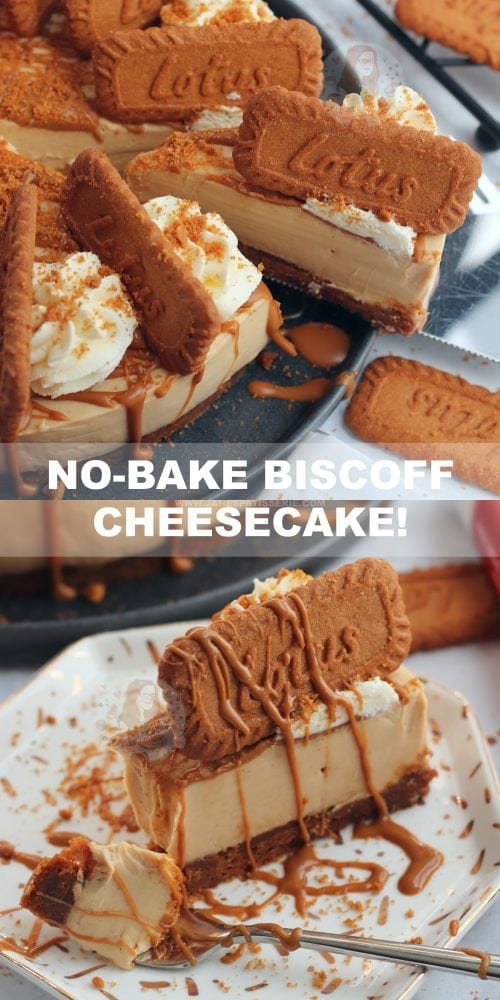
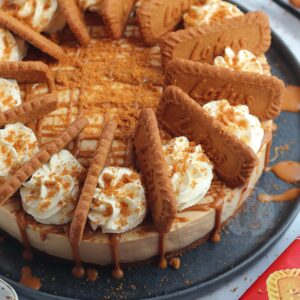
A delicious no-bake Biscoff cheesecake, with a Biscoff biscuit base, creamy Biscoff cheesecake filling, sprinkled with more biscuits and whipped cream and a Biscoff drizzle.
Biscoff cheesecake
Okay, so I am a little obsessed with cheesecake as you might have noticed… but there’s nothing wrong with that? Right? Anyway… this is utterly delicious and different to my other cheesecakes – the Biscoff spread creates a delicious spiced cookie flavour compared to the sweetness of the others on my blog.
This cheesecake suits all of the needs of loving Speculoos/Biscoff, no-bake recipes, and cheesecake in general. It’s utterly scrumptious! I always get a little confused as to whether there is any difference between Speculoos, Lotus, or Biscoff, but the fact that even my local supermarkets in the UK sell something similar at least makes me very happy.
Biscoff
I always thought that I could only get it from the rare american candy shop I came across in the UK or when a friend of mine would bring me back some from the US, but now I can get it all the time! You can find the Biscoff spread in the supermarkets near the Nutella and such!
Honestly, though, Biscoff is genuinely one of my favourite things. My Biscoff cake, Biscoff cookie butter cupcakes and Speculoos/Biscoff cookie butter fudge are just some of the other recipes on my blog using it already. Honestly, its an ever so slight addiction. I even saw some articles about Biscoff spread saying the UK had ‘compared it to crack’ on how good it was when it was introduced a few years ago…
Simple recipe
I’ve made no-churn crunchy cookie butter ice-cream for a while now as my dad loves the flavour of it, but the idea of making a cheesecake just HAD to happen. This recipe is so simple to make, and very very similar (if not the basically the same) method as my no-bake caramel Rolo cheesecake.
Simply mix the biscuit and melted butter to make the base, and whip up all of the cheesecake ingredients and spread it over the base – leave to set and HUZZAH! It’s done! And then I obviously decorate it in some form or another, but this is all optional. The only bits that you really do need is the base and filling ingredients!


Recipe updates
I’ve updated this recipe quiiiiteeee a few times, but that’s just because I have never been a fan of the pictures I have used. Often I will end up remaking something due to the photos and nothing else, but when I originally updated this I did change the recipe ever so slightly. The original ingredients are listed in the notes section of the recipe!
I just utterly adore and LOVE Biscoff, and I know a lot of you guys do as well. It’s sweet and spicy at the same time, which makes it a perfect addition to a cheesecake. The spread on top gives a nice rich addition, along with the Lotus biscuits on the bottom. If you don’t want it to be quiiiiteee as Biscoff like, then use 300g of digestives on the bottom with 150g unsalted butter.
Cheesecake filling
When you whisk the mix up, it really doesn’t take too long at all – it takes me about 45 seconds to make the mixture. I whisk the cream cheese, biscoff, icing sugar and vanilla for about 10 seconds. Then, I add the cream in! This then takes another 30 seconds or so, and it’s lovely and thick. This is, of course, dependant on a few things – the temperature of the ingredients, brand of ingredients etc!
I switch between using my stand mixer and my electric hand whisk – but both work very well. You can use either, or neither. When you make a cheesecake without an electric mixer you just have to work a lot harder! It’s also best to whip the cream separately to make sure it’s thick enough! Either way – it will be delicious. You will adore the creamy and delicious taste because of HEAVENLY BISCOFF.
Obsession
This post is very long – and that’s because I could talk about Biscoff cheesecake over and over. I adore it. I have a short video for this on my youtube channel. I am OBSESSED.
Honestly, I don’t actually know how many times I have made this recipe now – it’s the best. Of course, if you don’t like Biscoff… you won’t like this cheesecake or blog post so sorry in advance!
Decoration
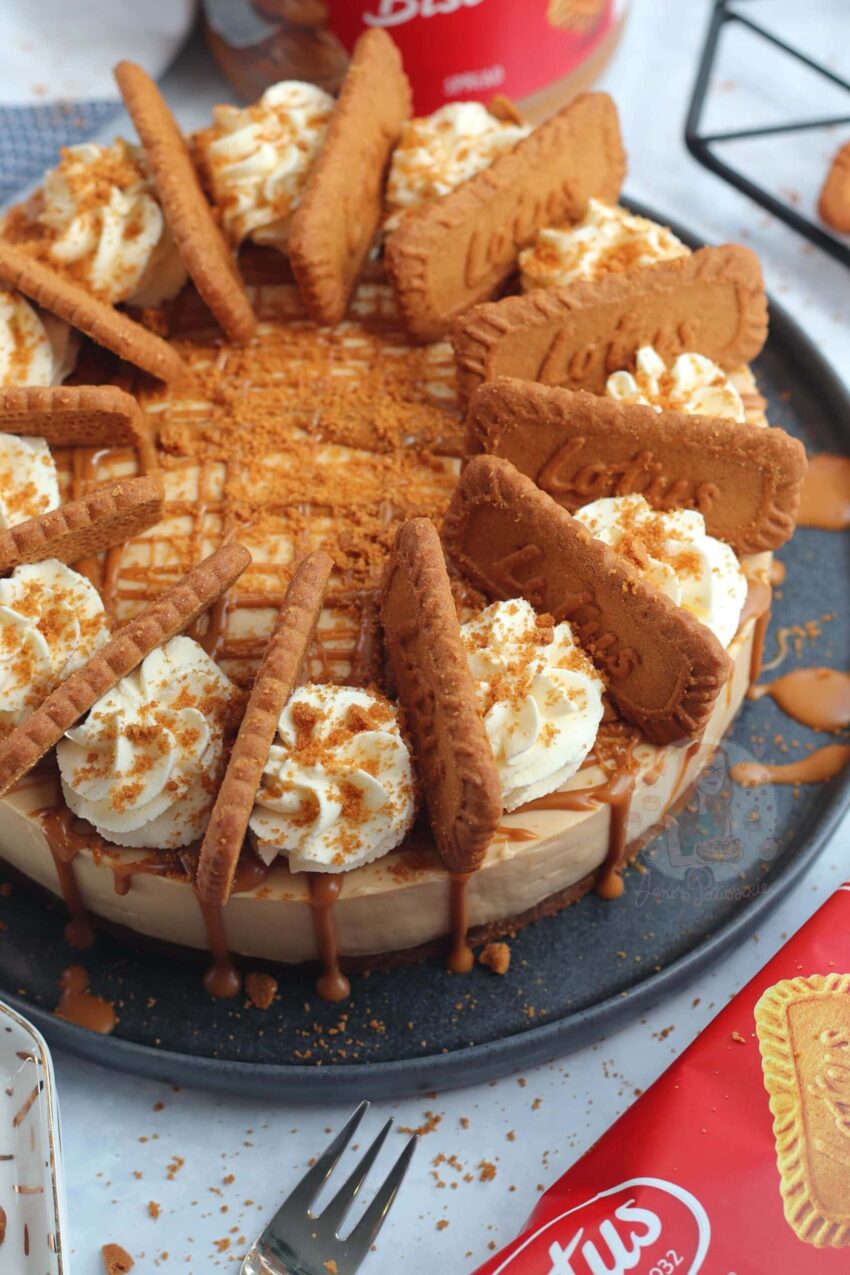
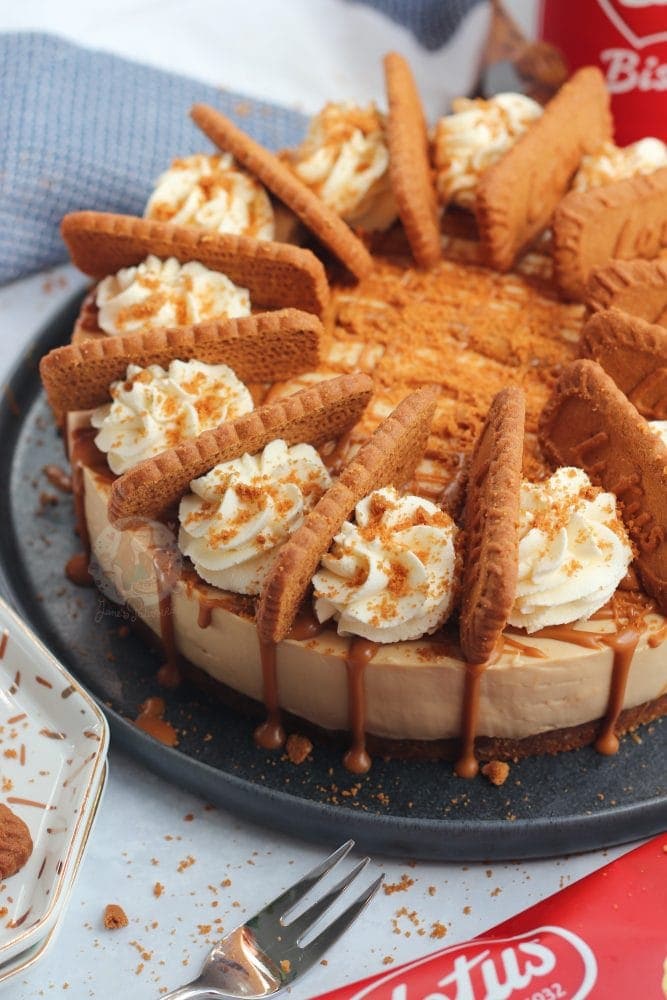
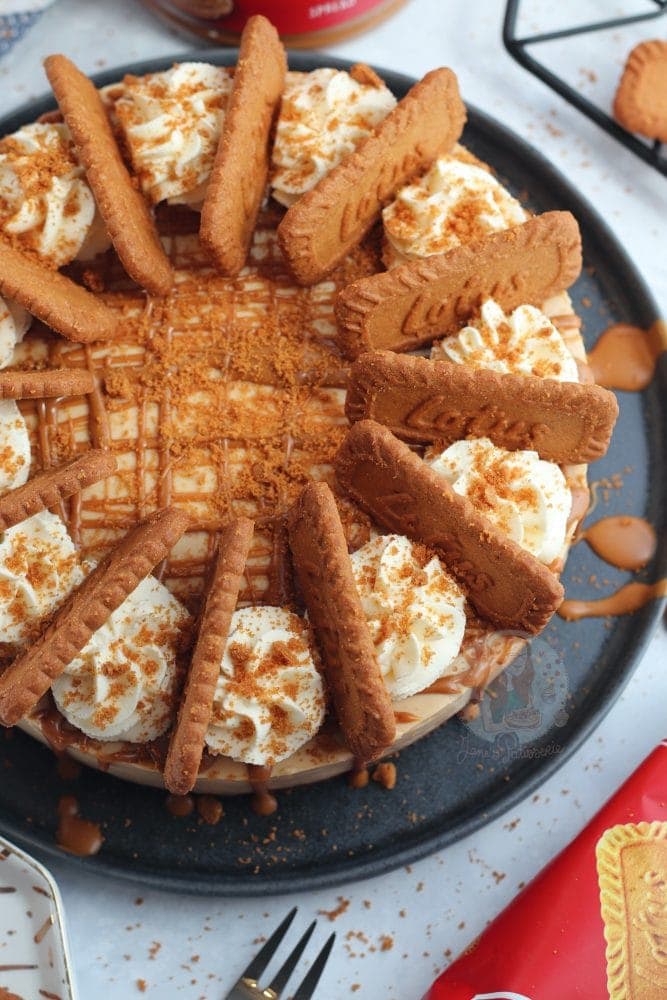
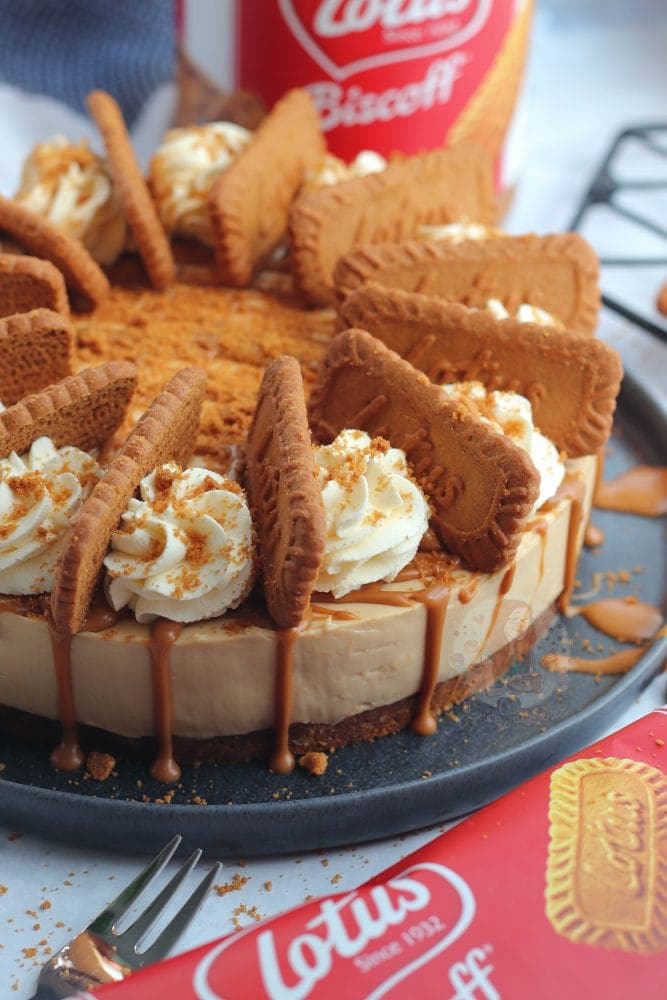
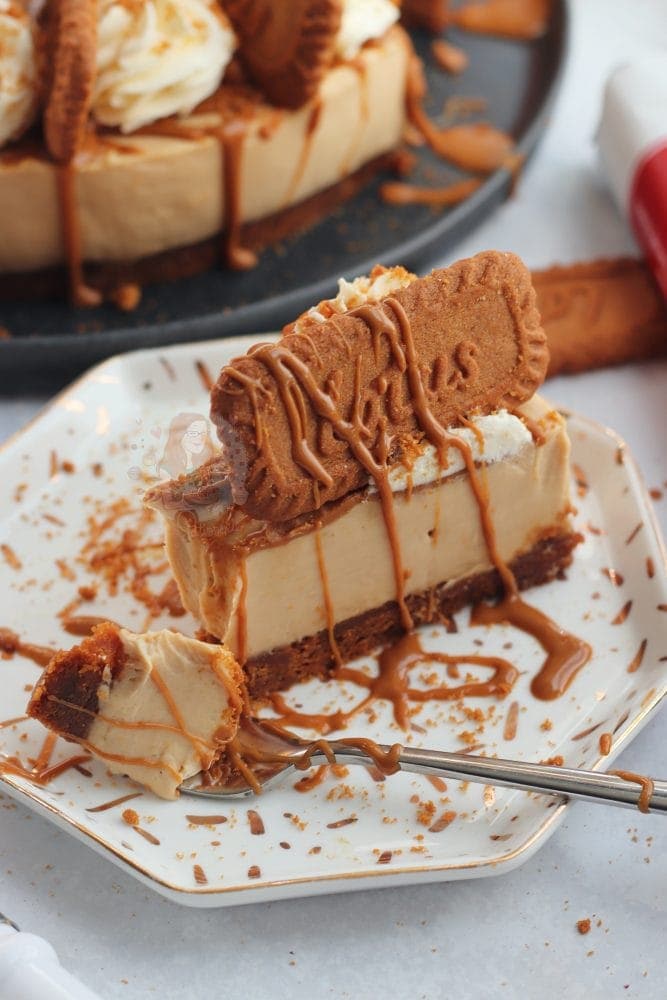
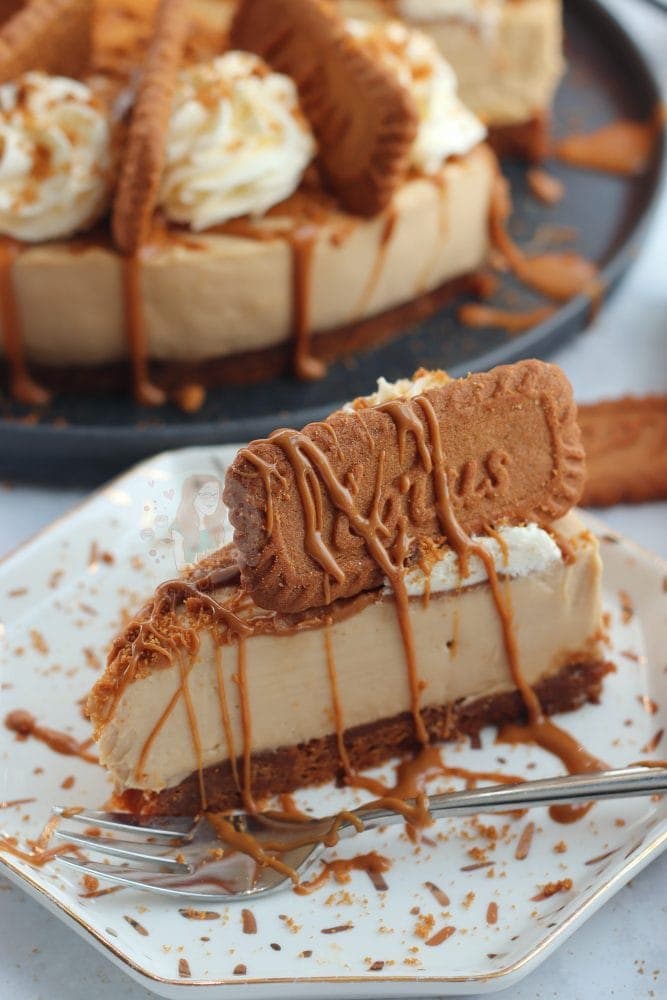
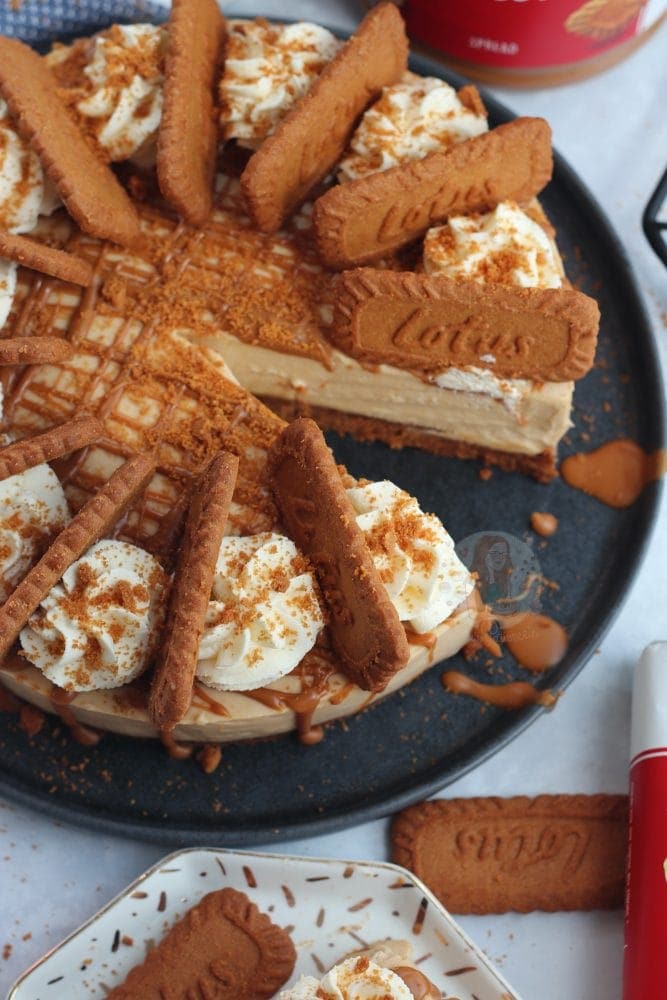
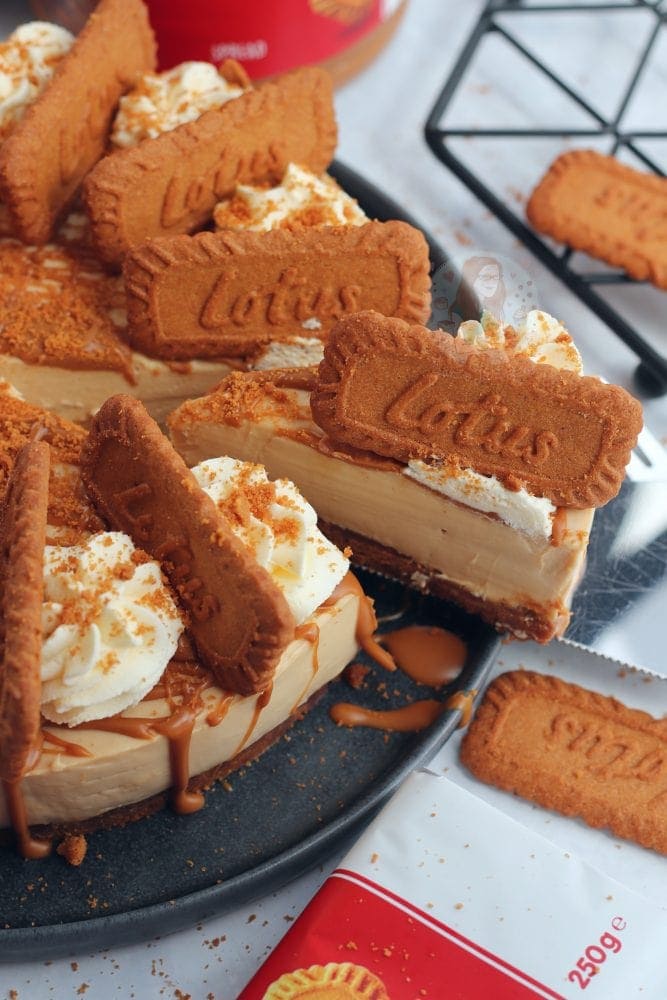
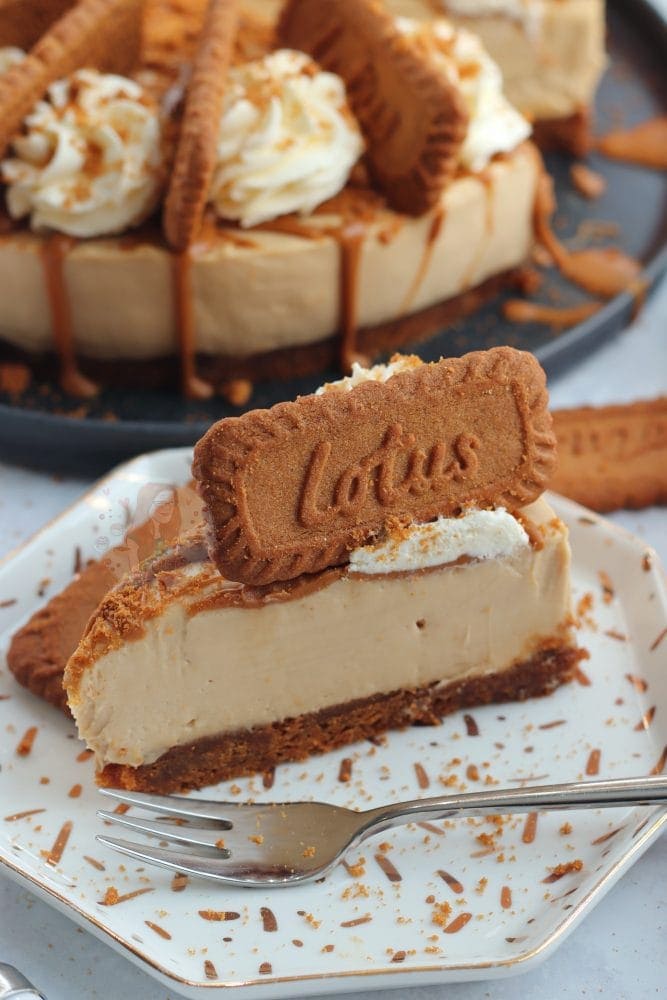
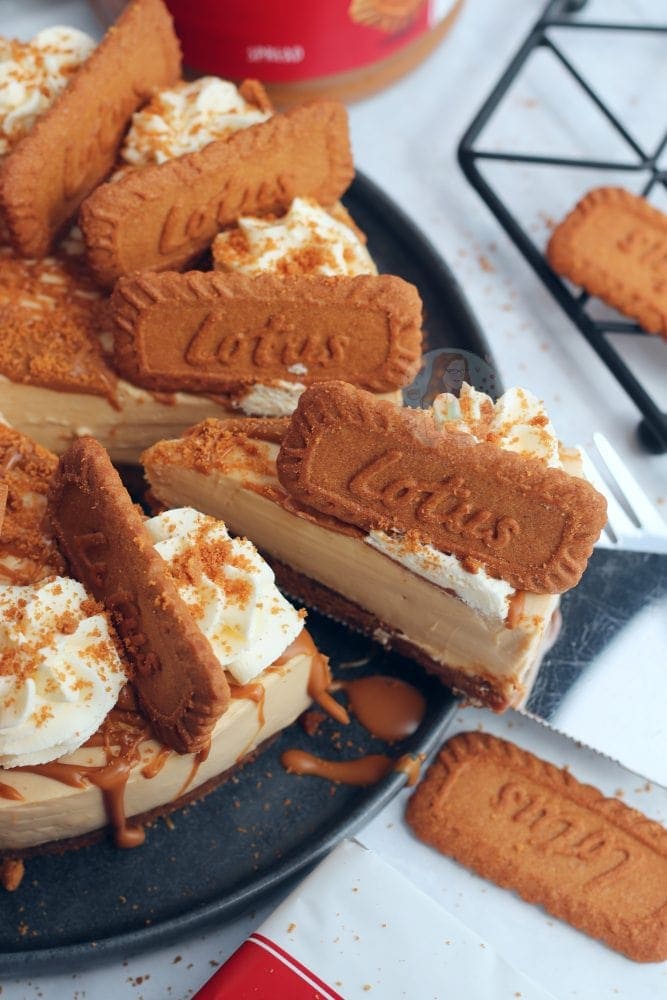
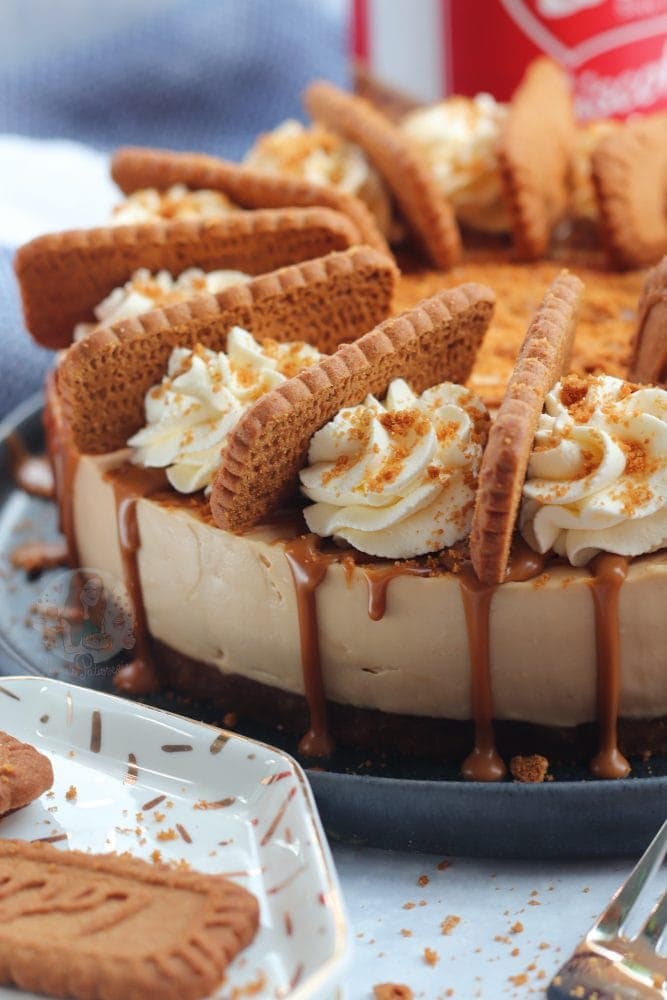
Any decoration for the top of my cheesecakes are obviously completely optional. I like to drizzle the spread on top (best to microwave it for about 30 seconds), or I spread the spread all over… and now I think I have said spread too many times.
The whipped cream is obviously optional too as I know lots of you aren’t a fan – and the biscuits are too! Obviously, the biscuits will go soft after a while, so if you prefer crunchy biscuits, you will want to leave those till last minute to serve! Enjoyyyy! x
No-Bake Biscoff Cheesecake!
#wprm-recipe-rating-8 .wprm-rating-star.wprm-rating-star-full svg * { fill: #343434; }#wprm-recipe-rating-8 .wprm-rating-star.wprm-rating-star-33 svg * { fill: url(#wprm-recipe-rating-8-33); }#wprm-recipe-rating-8 .wprm-rating-star.wprm-rating-star-50 svg * { fill: url(#wprm-recipe-rating-8-50); }#wprm-recipe-rating-8 .wprm-rating-star.wprm-rating-star-66 svg * { fill: url(#wprm-recipe-rating-8-66); }linearGradient#wprm-recipe-rating-8-33 stop { stop-color: #343434; }linearGradient#wprm-recipe-rating-8-50 stop { stop-color: #343434; }linearGradient#wprm-recipe-rating-8-66 stop { stop-color: #343434; }
Print Pin Rate
Ingredients
Biscuit Base
- 300 g Lotus/Biscoff biscuits
- 125 g unsalted butter (melted)
Cheesecake Filling
- 500 g cream cheese (full fat)
- 100 g icing sugar
- 250 g Biscoff spread (smooth/crunchy)
- 1 tsp vanilla extract
- 300 ml double cream
Optional Decorations
- 150 ml double cream
- 2 tbsp icing sugar
- 75 g Biscoff spread (melted)
- Biscoff biscuits
Instructions
-
Blitz the biscuits for the base in a food processor until they’re a fine crumb. Mix with the melted butter and press down firmly into an 8″/20cm deep springform tin.
-
With an electric mixer (I use my KitchenAid) mix the cream cheese, vanilla, icing sugar and Biscoff spread until smooth.
-
Mix in the double cream and whisk until its thick and holds itself completely! (Don’t whip it too fast, slow and steady wins the race). Alternatively, you can whip the cream separately to stiff peaks and fold through!
-
Spread the mixture evenly over the biscuit base and chill in the fridge for at least 5-6 hours, but preferably overnight.
-
Remove from the tin and decorate how you like.
-
I whipped together the double cream and icing sugar and piped it on, adding a biscoff biscuit per slice and drizzled over some melted biscoff!
Video
Notes
- I updated this post in May 2017. The original recipe used:
- 150g of digestives
- 150g of Lotus biscuit
- 150g unsalted butter
- And 2x 280g of the Philadelphia cream cheese
- For this recipe you can use either mascarpone or Philadelphia, both work perfectly. However, either MUST be full fat!
- I used the crunchy version of the spread in the cheesecake filmed, and photographed!
- You might find it easier to melt the spread for 10 seconds before you try and decorate with it!
- This cheesecake will last for 3 days in the fridge, once set.
- If it looks like your cheesecake isn’t setting, or its a but sloppy, or you’re even not sure.. try it anyway. Try to set the mix anyway! If it still doesn’t set, freeze it and have an ice cream cheesecake!
ENJOY!
Find my other Cheesecake & Biscoff Recipes on my Recipes Page!
You can find me on:
Instagram
Facebook
Pinterest
Twitter
Youtube
J x
© Jane’s Patisserie. All images & content are copyright protected. Do not use my images without prior permission. If you want to republish this recipe, please re-write the recipe in your own words and credit me, or link back to this post for the recipe.
SaveSave
SaveSave