A Creamy, Sweet and Utterly Delicious No-Bake Custard Cream Cheesecake – perfect twist on a Delicious & Classic Biscuit!

Recipe updated November 2018
I have shared a fair few Cheesecake recipes now, but this is one that people have been probably requesting for over a year. I have always wanted to do it, but my recipe request list from you guys really is SO long, it kinda got pushed to the bottom of the pile… I of course seriously regret this. After making it for my family several times now I really wish I had made it sooner!
I took inspiration from my No-Bake Oreo Cheesecake as the principal is basically the same – basing a cheesecake on a biscuit means you have to use the biscuit enough! However, in my No-Bake Oreo Cheesecake, I use Oreos in the actual cheesecake mix which is delicious don’t get me wrong.. but having tried it on this one, I feel like it looks a little odd as the biscuits are so light in colouring it almost looks curdled?!
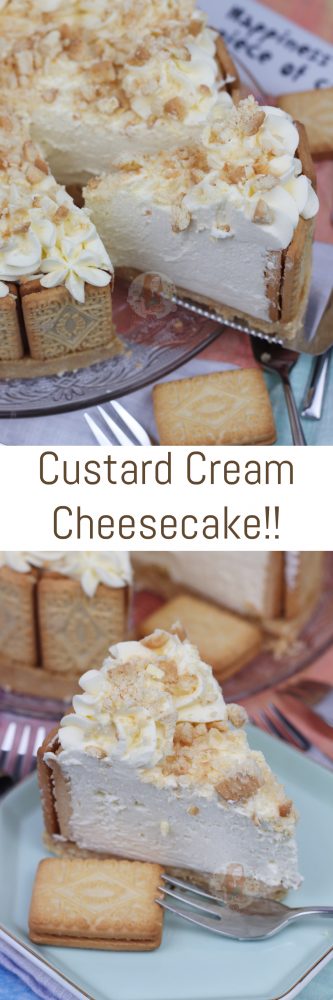
Therefore.. a nice thick Custard Cream biscuit base and biscuits all over the top. However, to make it a little more custardy I decided to use the Foodie Flavours Custard Flavouring again like I did in my Custard Cream Cake and it was perfect.
The filling itself I just wanted to taste of Vanilla and Custard with the flavourings so I went for a simple mix of Cream Cheese, Cream and Icing sugar for the base of the cheesecake with the Vanilla and Custard flavouring added to it. I loved how the filling in my No-Bake Creme Egg Cheesecake turned out, so I tried it again for this and it was perfect.
I did change a couple of things though about this recipe after a few tries at it! I usually do a basic mix of 300g of butter to a certain amount of butter – however, I did this and I believe because of the amount of filling a custard cream has it sort of mushed together, so you need to use much less butter than usual.
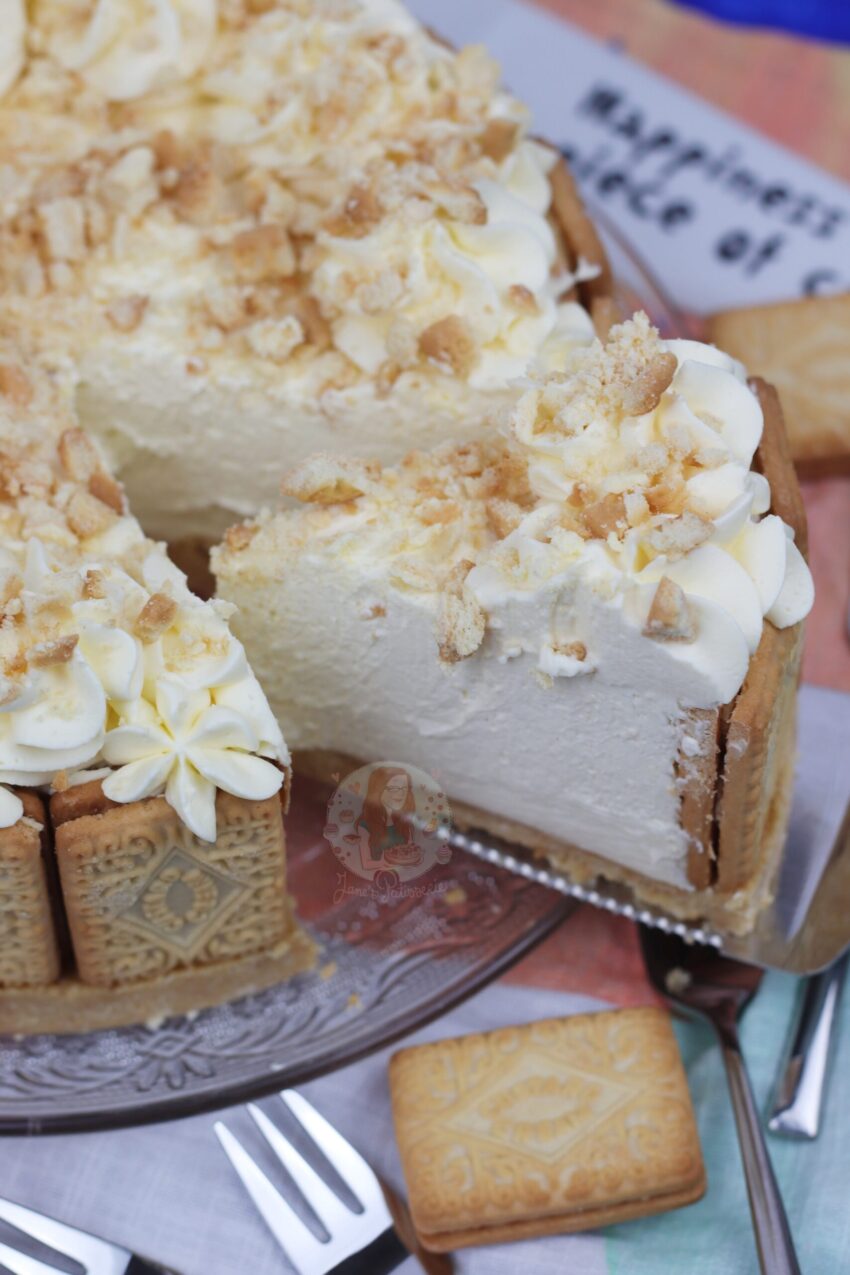
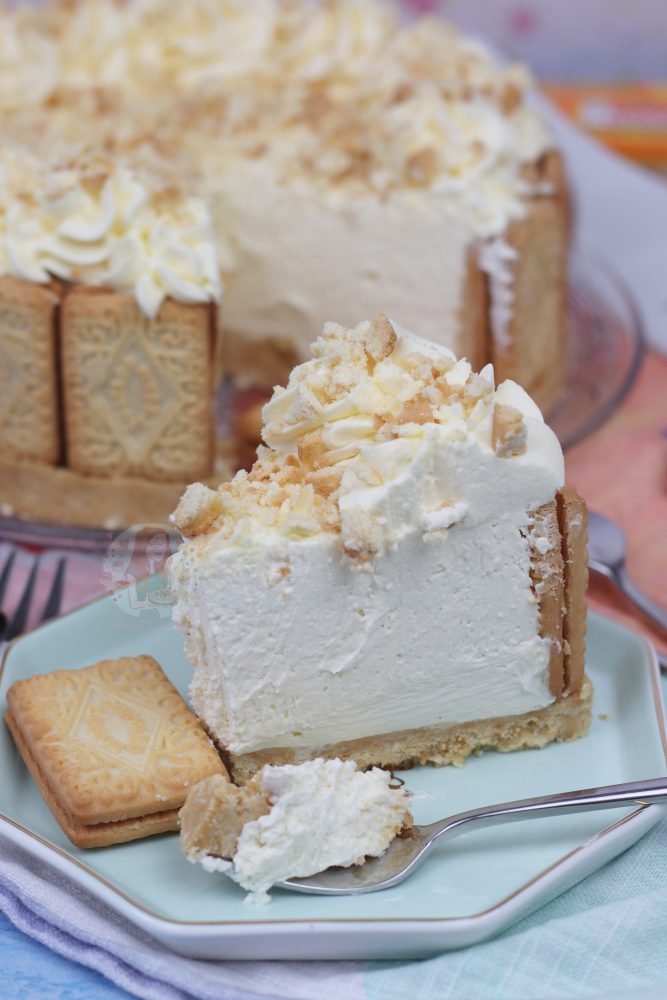
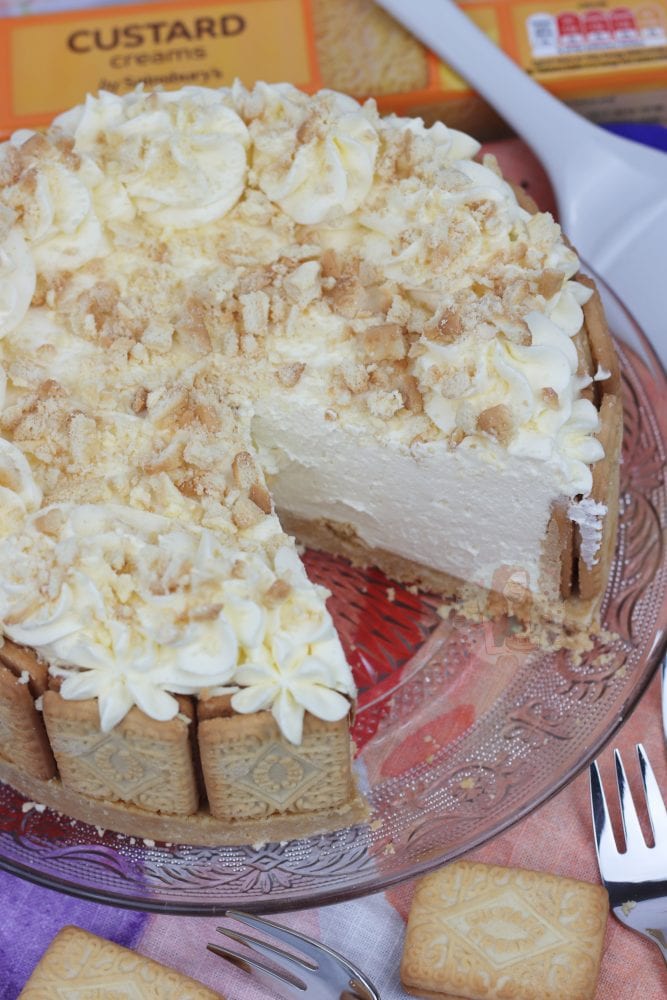
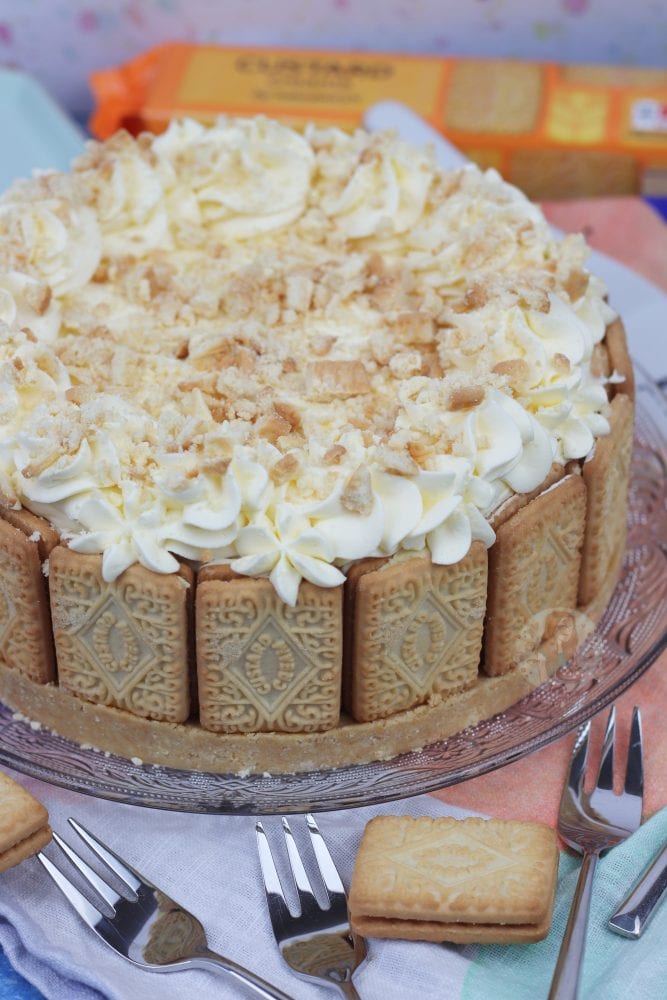
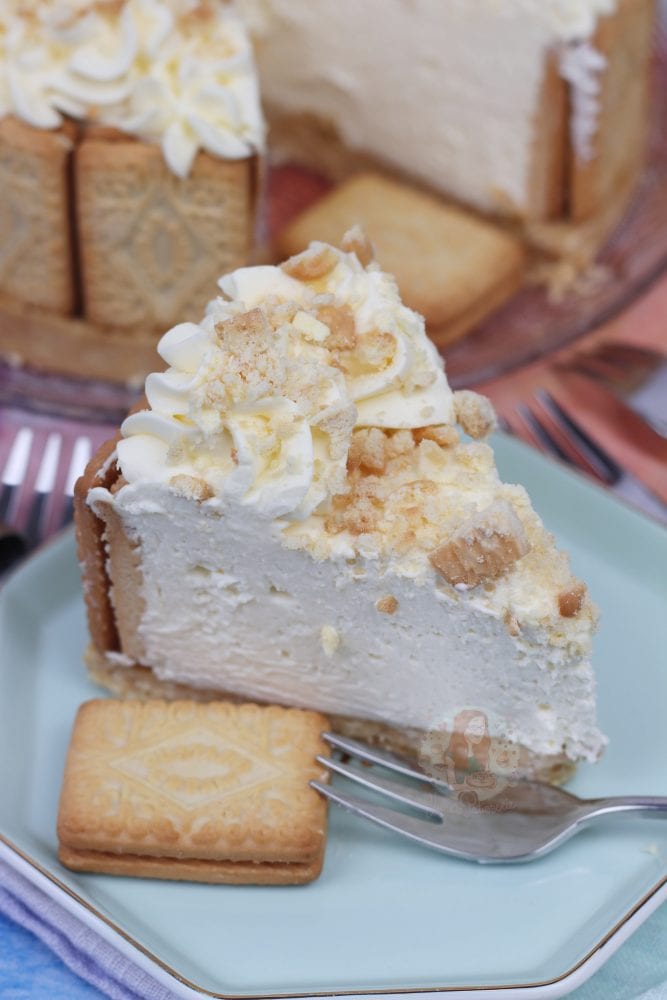
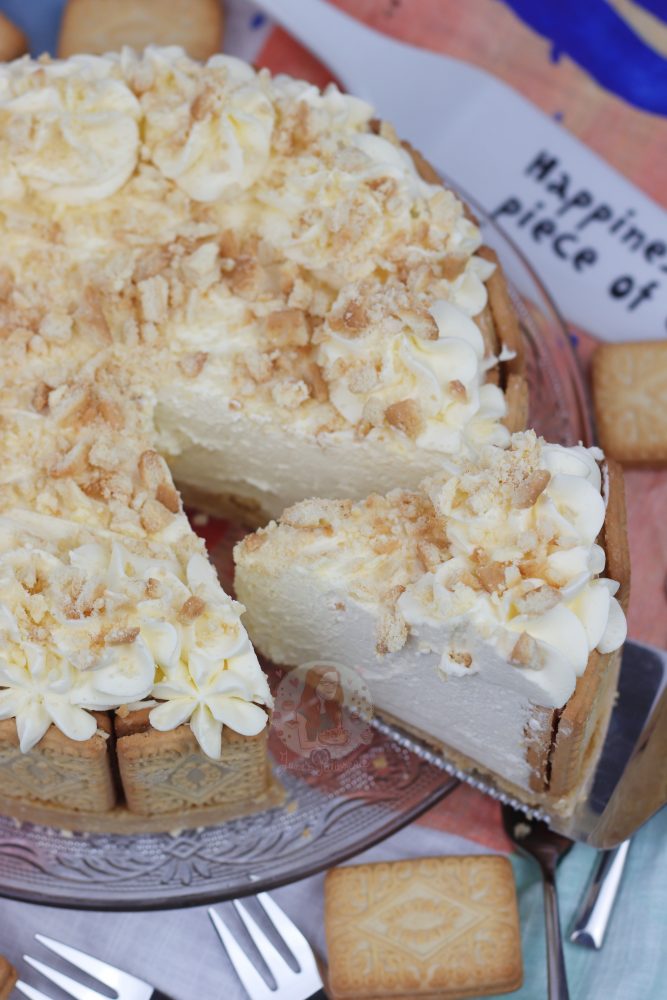
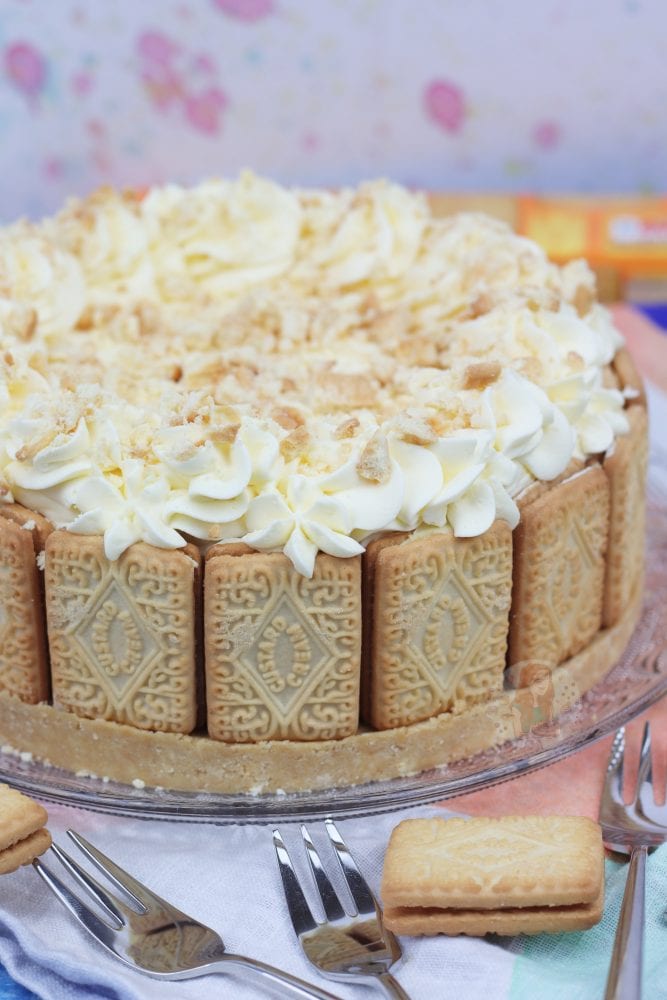
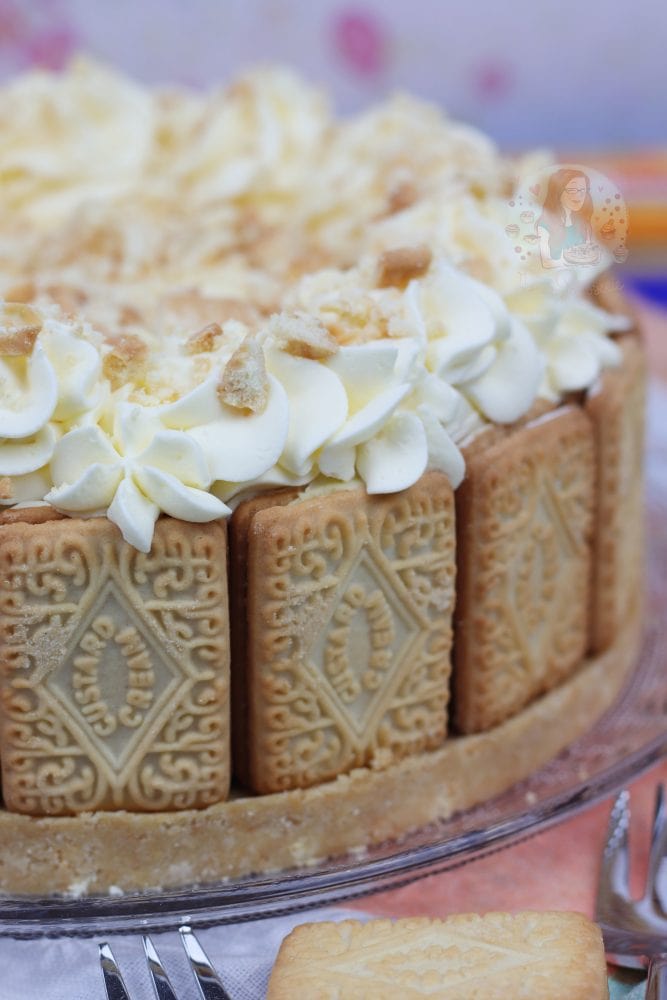
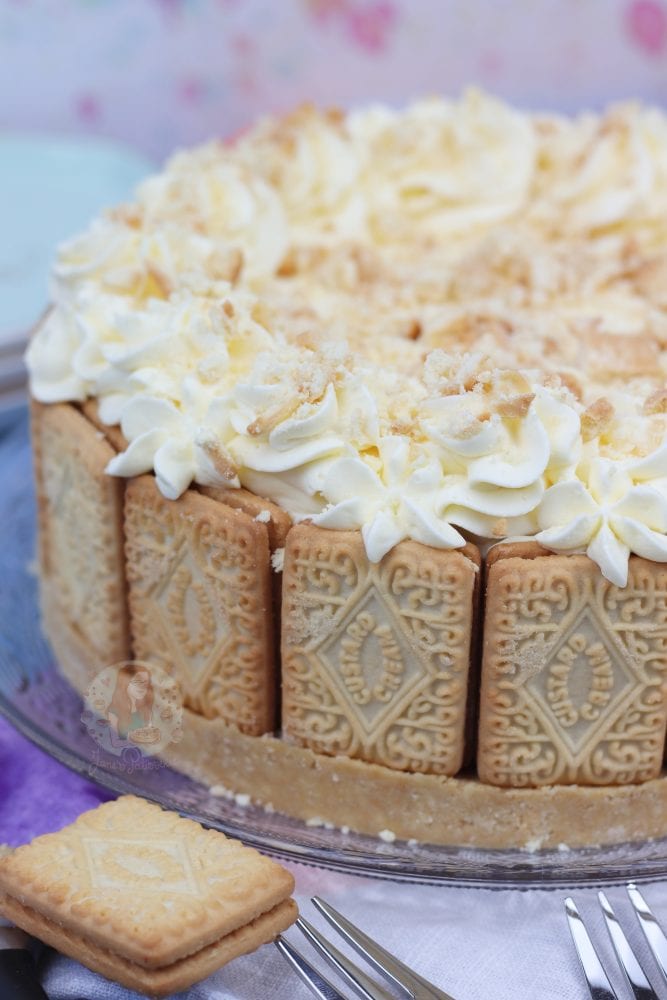
85g of melted Unsalted Butter was the perfect mix with the 300g of biscuits. I then decided to use biscuits around the edge of the cheesecake, to really switch things up a bit and make it delicious. I’m not going to lie, I did forget to count the number of Custard Creams you need to go round the edge of the cheesecake, but out of a 200g packet from Sainsbury’s, I had five leftover.
I used the Foodie Flavours Custard Flavours as mentioned in the recipe – alternatively, you could just use the vanilla essence instead of the both, but to make it more custardy I used it. You don’t have to use the custard flavouring if you can’t get access to it, but I do recommend Foodie Flavours in general if you are after high quality flavourings for all baking! The custard flavouring is my fave.
Alternatively, you can use 150g of ready-made custard. I use good quality ready made custard if I do buy shopbought, and you can’t add too much otherwise it’ll end up being a sloppy mess. The good thing is because you have the biscuits around the edge of the cheesecake, you can afford to have the filling a bit softer than usual. I utterly adore this recipe, and I hope you all love it! Enjoy!

Custard Cream Cheesecake!
#wprm-recipe-rating-3 .wprm-rating-star.wprm-rating-star-full svg * { fill: #343434; }#wprm-recipe-rating-3 .wprm-rating-star.wprm-rating-star-33 svg * { fill: url(#wprm-recipe-rating-3-33); }#wprm-recipe-rating-3 .wprm-rating-star.wprm-rating-star-50 svg * { fill: url(#wprm-recipe-rating-3-50); }#wprm-recipe-rating-3 .wprm-rating-star.wprm-rating-star-66 svg * { fill: url(#wprm-recipe-rating-3-66); }linearGradient#wprm-recipe-rating-3-33 stop { stop-color: #343434; }linearGradient#wprm-recipe-rating-3-50 stop { stop-color: #343434; }linearGradient#wprm-recipe-rating-3-66 stop { stop-color: #343434; }
Print Pin Rate
Ingredients
Biscuit Base
- 300 g Custard Creams
- 85 g Unsalted Butter
Cheesecake
- 15-20 Custard Creams
- 600 g Full-Fat Cream Cheese
- 75 g Icing Sugar
- 300 ml Double Cream
- 2 tsp Custard Flavouring (see notes below)
- 1 tsp Vanilla Extract
Decoration
- 150 ml Double Cream
- 2 tbsp Icing Sugar
- Custard Cream Crumbs
Instructions
For the Biscuit Base
-
Blitz the biscuits in a food processor to a fine crumb, or mash them up in a bag and add the melted butter – pulse a few times until it is combined well.
-
Tip into an 8″/20cm Deep Springform Tin and press down firmly – chill in the refrigerator whilst you do the rest!
For the Cheesecake Filling
-
Place your custard creams around the edge of the tin. You can gently push them slightly into the biscuit base to help them stay in place for now.
-
In your stand mixer/large bowl, add your Cream Cheese and Icing Sugar, and whip till smooth.
-
Add in the Double Cream, Custard Flavouring, and Vanilla Extract and whip till really thick.
-
Spread into the middle of the biscuit circle, and smooth over the top.
-
Leave your cheesecake to set in the fridge for 5-6 hours, or preferably overnight.
For the Decoration
-
Remove your cheesecake from the tin!
-
Whip together the Double Cream and Icing Sugar, and pipe onto your cheesecake. I used a 2D closed star tip.
-
Sprinkle over some custard cream crumbs!
Notes
- I used the Foodie Flavours Custard Flavouring for this cheesecake!
- If you don’t have flavouring, you can use 150g of ready-made custard. I use good quality ready made custard if I do buy shopbought!
- Or, you can add in 50g custard powder along with the icing sugar!
- I always set my cheesecakes in the fridge overnight otherwise they risk being a little sloppy still – you’re more likely to get a better result for the longer you leave it!
- I recommend using an 8″/20cm Deep Springform Tin for this recipe!
- This Cheesecake will last covered in the fridge for 3 days!
- The Custard Creams around the edge of the cheesecake are optional but delicious. In total, I use 3 packets of custard creams in this recipe!
- The recipe was updated in November 2018 – the only difference is the base used to have 400g of biscuits, and 150g of butter. And there were no biscuits around the edge!
ENJOY!
Find my other Recipes on my Recipes Page!
You can find me on:
Instagram
Facebook
Pinterest
Twitter
Bloglovin’
Youtube
J x
© Jane’s Patisserie. All images & content are copyright protected. Do not use my images without prior permission. If you want to republish this recipe, please re-write the recipe in your own words and credit me, or link back to this post for the recipe.
This post may contain Affiliate Links.