Easy no-bake chocolate KitKat cheesecake with a biscuit base, chocolate cheesecake filling, ganache topping and KitKat shell!
Kitkat cheesecake
It’s been a while since I shared a showstopper of a cheesecake, so this may be the best way to change that. I love a good chocolate cheesecake, but I always like to take things a step further to make it a showstopper… and this Kitkat cheesecake did just that.
I have had requests after requests for a Kitkat cheesecake after my Twix cheesecake went down so well – I was nervous no-one would even like the Twix cheesecake as it’s one of the most underrated chocolate bars, but my god… it still keeps going.
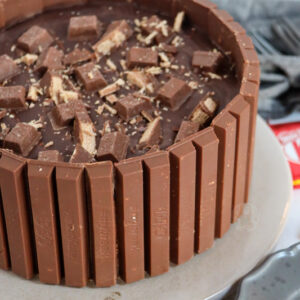
Shelled cheesecake
I wanted to make this slightly different to my Twix one, but still insane enough to make all your jaws drop… but it’s quite hard to make it different enough to wow you guys! However, my bourbon biscuit cheesecake may have played a large role in the inspiration here as well.
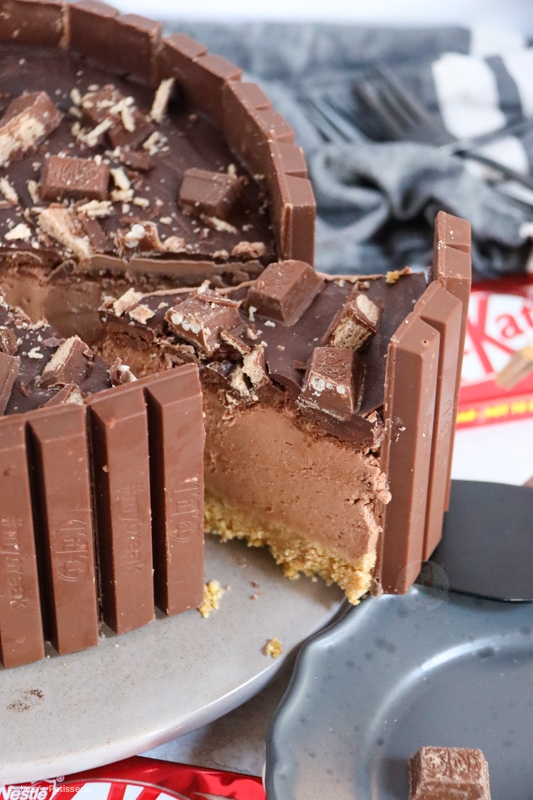
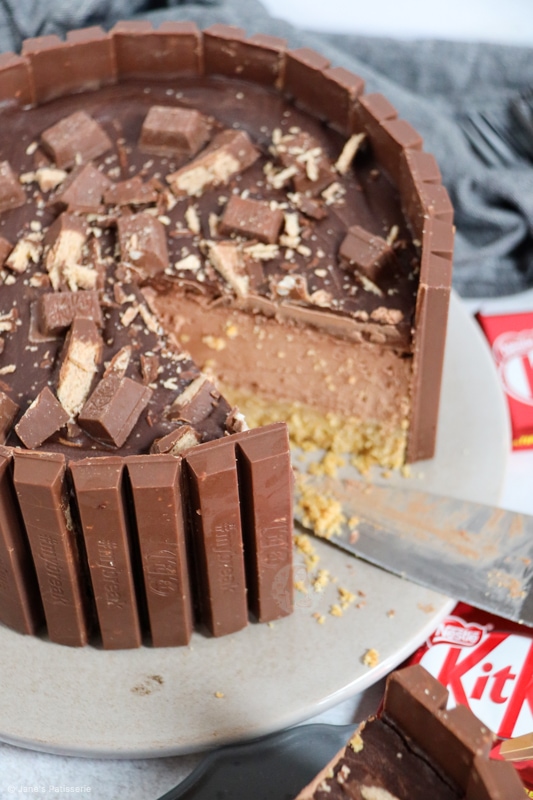
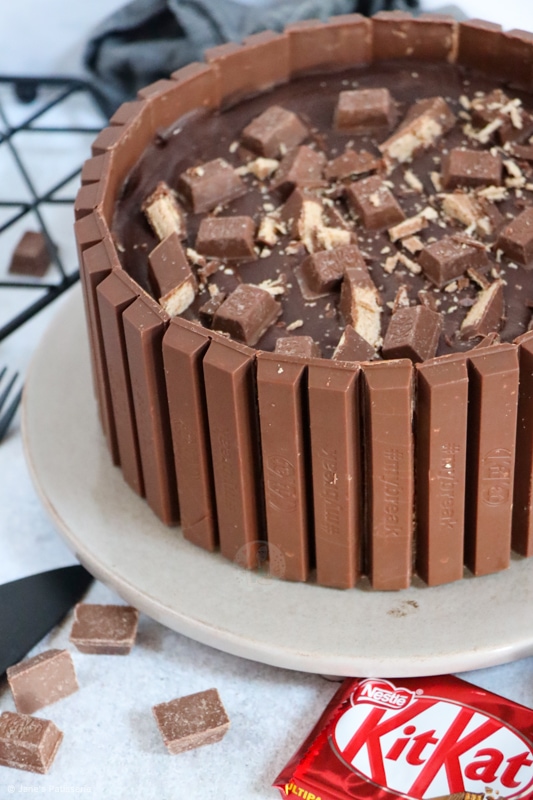
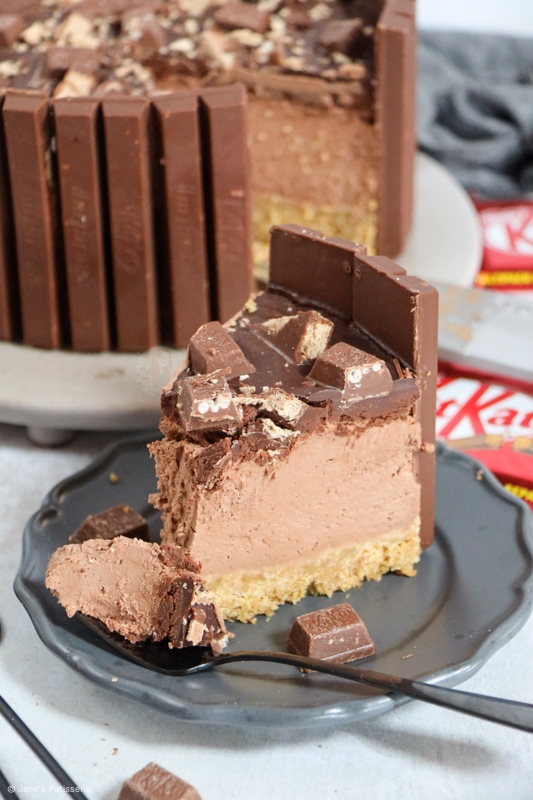
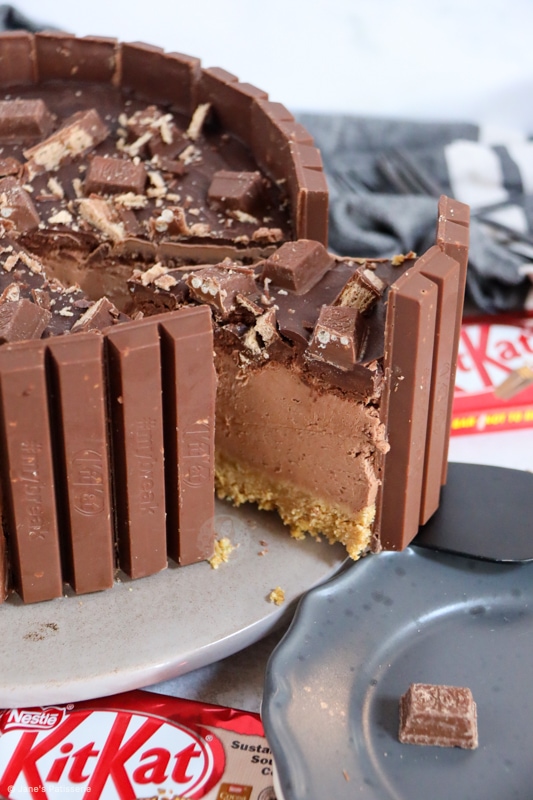
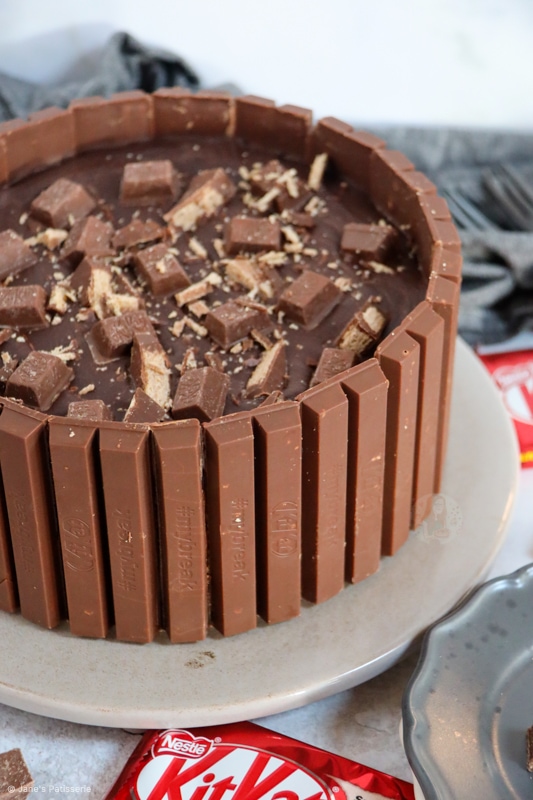
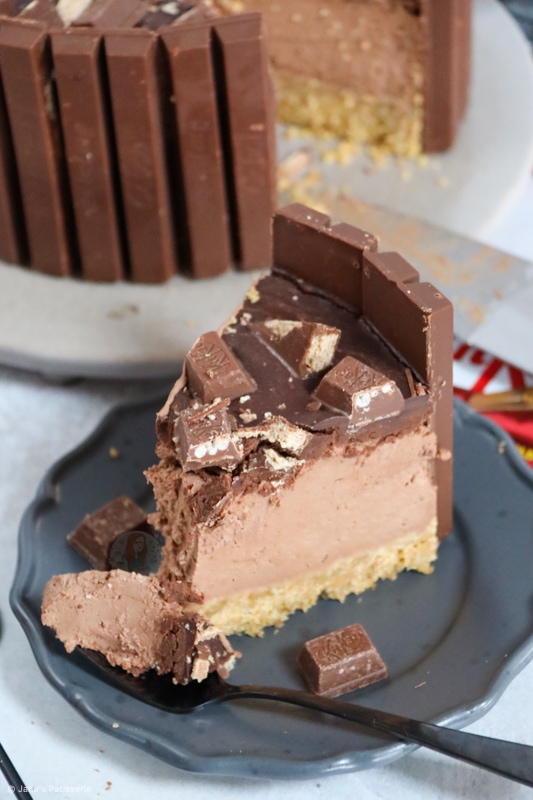
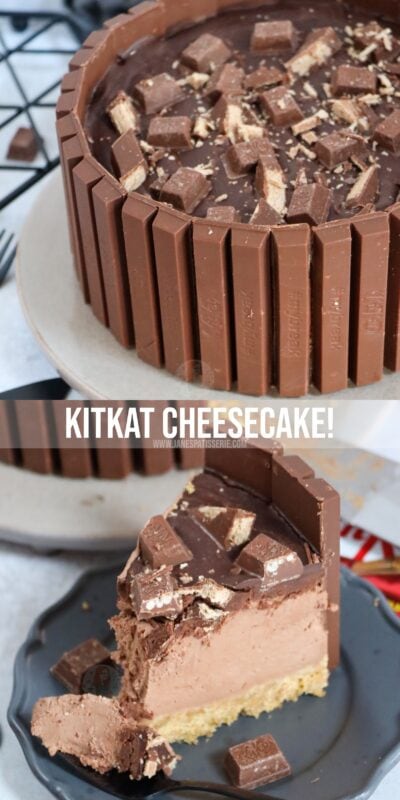
Who doesn’t love a cheesecake with a shell?! Not only does it make it look amazing, but it makes it a hell of a lot easier to get out of the tin, and just more amazing in general! I realise it can mean using up a lot of KitKats, but it’s worth it!You can of course skip the KitKat shell bit if you fancy – but I just love how massive the slices are because of it. It makes it all look INSAAAANE.
Ganache
I use a ganache on my Kitkat cheesecake and it is the perfect topping! I simply make the ganache by heating the cream, pouring over some finely chopped chocolate, letting it sit and then stirring. If your ganache splits (goes grainy), just whisk in a smidge more cream or full fat milk and it should come back easily!
Decoration
Regardless of how it looks, there is actually minimal decoration with this cheesecake as I wanted the shelled outer layer to be the appeal here! I just used some broken Kitkat fingers and some Kitkat bites you can get in share bags and popped them in my ganache to give the sunken look. I also crushed a few Kitkat fingers to get my ‘wafer dust’ I then added to the ganache also.
Assembly
I made this slightly differently to my bourbon biscuit cheesecake because the KitKat’s are taller than the bourbon biscuits, so I put the KitKat’s in first, and then added the biscuit base into that. It’s slightly faffy, but worth it in the end.
Pour the cheesecake mix on the biscuits, pour the ganache on the cheesecake, decorate with any more KitKats if you are using – and let it set! Once it’s set, you just have to take it out the tin and then enjoy to your hearts content!
Tips and tricks
I used a 8″/20cm springform tin for my cheesecake – I use these religiously so I stick with them! You can decorate your cheesecake however you like – I prefer mine simple but if you wanted to add some sprinkles or drizzle, you do you!
I did just use the classic KitKat’s because they were on offer – but you can use any of the magical flavours they sell if they are your preference! Nowadays you can even get birthday cake flavoured Kitkats! Enjoy! x
No-Bake KitKat Cheesecake!
#wprm-recipe-rating-6 .wprm-rating-star.wprm-rating-star-full svg * { fill: #343434; }#wprm-recipe-rating-6 .wprm-rating-star.wprm-rating-star-33 svg * { fill: url(#wprm-recipe-rating-6-33); }#wprm-recipe-rating-6 .wprm-rating-star.wprm-rating-star-50 svg * { fill: url(#wprm-recipe-rating-6-50); }#wprm-recipe-rating-6 .wprm-rating-star.wprm-rating-star-66 svg * { fill: url(#wprm-recipe-rating-6-66); }linearGradient#wprm-recipe-rating-6-33 stop { stop-color: #343434; }linearGradient#wprm-recipe-rating-6-50 stop { stop-color: #343434; }linearGradient#wprm-recipe-rating-6-66 stop { stop-color: #343434; }
Print Pin Rate
Ingredients
For the Base/Shell
- 18.5 KitKats (18 doubles, one single)
- 300 g digestives
- 150 g unsalted butter
For the Cheesecake
- 125 g milk chocolate
- 125 g dark chocolate
- 500 g full-fat cream cheese (room temp)
- 75 g icing sugar
- 300 ml double cream
For the Topping
- 150 ml double cream
- 150 g dark chocolate
- KitKat Bites/KitKats
- Sprinkles
Instructions
For the Base/Shell
-
Prep your 8″/20cm deep springform tin with the KitKat’s around the edge – I use 18 whole standard KitKat’s, and then one half as there was a small gap.
-
Blitz your biscuits in a food processor to a fine crumb – or in a bowl with the end of a rolling pin.
-
Melt your butter, and mix in with the biscuits.
-
Press your biscuit mixture into the tin, inside the Kitkat shell. I press it down with a spoon, and make sure to be firm so the KitKat’s stay at the edge securely.
For the Cheesecake
-
Add your milk chocolate and dark chocolate to a bowl, and melt carefully. I do this in the microwave in short bursts!
-
Once melted, mix till smooth and leave on the side to cool briefly.
-
Add your cream cheese and icing sugar to a bowl, and whisk until smooth – I use my Kitchenaid with the whisk attachment.
-
Add in your melted chocolate, and whisk till smooth.
-
Pour in the double cream, and whisk again till smooth and really thick!
-
Spread the mixture carefully inside the KitKat shell, and smooth over!
For the Topping
-
Add your double cream and dark chocolate to a bowl, and microwave in 20 second bursts, mixing well each time.
-
Mix and melt till smooth and delicious – spread over the top of the cheesecake.
-
Add on some KitKat Bites or chopped KitKats as decoration, and some sprinkles if you are using them!
-
Leave the cheesecake to set in the fridge overnight for the best possible set!
-
Enjoy!
Notes
- I bought a 21x multipack of KitKats for this recipe, and a bag of KitKat Bites for the decoration.
- They are the 20.8g bars – which should be about an inch taller than the tin I used!
- You can use all milk or all dark chocolate for the filling – but for the ganache you should use dark. If you want to use milk, you need to use 300g milk chocolate as the ratio is 2:1.
- I used a 8″/20cm deep springform tin for this recipe!
- This recipe will last for 3 days in the fridge!
ENJOY!
Find my other Recipes on my Recipes Page!
You can find me on:
Instagram
Facebook
Pinterest
Twitter
Youtube
J x
© Jane’s Patisserie. All images & content are copyright protected. Do not use my images without prior permission. If you want to republish this recipe, please re-write the recipe in your own words and credit me, or link back to this post for the recipe.