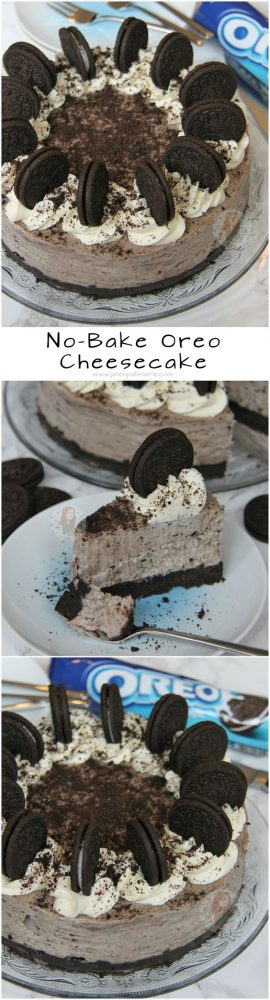
Oreo base, Oreo cheesecake filling, Oreo decoration.. Oreo heaven!
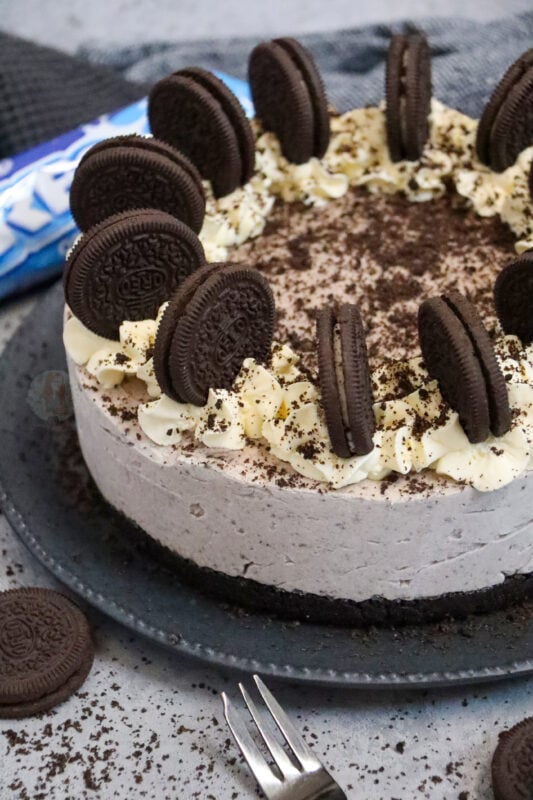
Oreo cheesecake
I have had an insane amount of requests for this recipe (even though there are so many already!!) so I hope it doesn’t disappoint! Oreo’s, as you might have noticed, are a big thing for me as they’re yummy and very popular all over the world.
I know that some people aren’t a fan of them, but they do so many different flavours now you probably will find some that you like! Mixing the Oreo flavouring with the cream cheese & the rest of it makes it such a DELICIOUS treat!
Cheesecakes
I know I have done many a cheesecake recipe, but I feel like a couple more wouldn’t hurt too much! They are 100% my favourite dessert though still, no matter how much of it I eat!
I prefer no-bake cheesecakes so much more than baked ones as to me they are creamier and easier to make, and to me they are a more guaranteed success in comparison to other desserts because I have made so many over my time on this blog now!
Whipping
The whipping of the ingredients in my method is second nature to me – once you have whipped a cheesecake to the perfect texture, it is the same every time!
The rules are – don’t whip too fast, and don’t be too scared – then you’ll be fine and you will want to make them again and again! If you want to strip the basics of cheesecake making down, take a look at my back to basics recipe here – if you can nail this recipe then you are good to go on many others!
Recipe updated September 2017
I use classic Oreos in mine, but you can use any flavour you like! I went to the supermarket last week and found they have mint, raspberry and vanilla, brownie and even birthday cake which would be fun to experiment with!
When using Oreos for the base of this cheesecake, I just blitz the Oreos to a crumb whilst intact. I dont remove the cream from the middle as theres no need, and it also helps bind the base together! Enjoy!
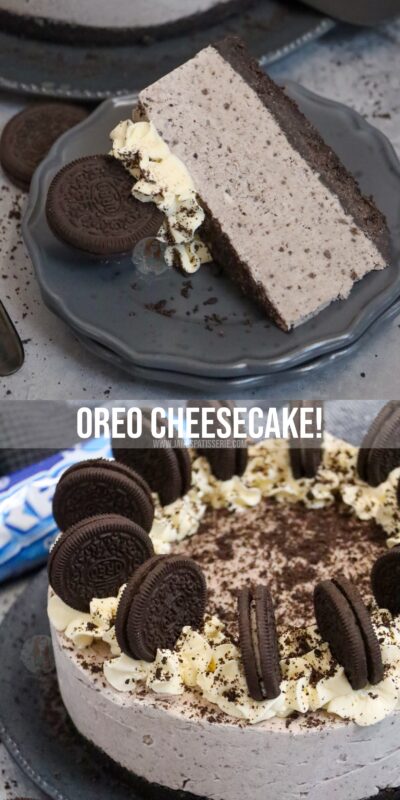
No-Bake Oreo Cheesecake!
#wprm-recipe-rating-7 .wprm-rating-star.wprm-rating-star-full svg * { fill: #343434; }#wprm-recipe-rating-7 .wprm-rating-star.wprm-rating-star-33 svg * { fill: url(#wprm-recipe-rating-7-33); }#wprm-recipe-rating-7 .wprm-rating-star.wprm-rating-star-50 svg * { fill: url(#wprm-recipe-rating-7-50); }#wprm-recipe-rating-7 .wprm-rating-star.wprm-rating-star-66 svg * { fill: url(#wprm-recipe-rating-7-66); }linearGradient#wprm-recipe-rating-7-33 stop { stop-color: #343434; }linearGradient#wprm-recipe-rating-7-50 stop { stop-color: #343434; }linearGradient#wprm-recipe-rating-7-66 stop { stop-color: #343434; }
Print Pin Rate
Ingredients
Cheesecake Base
- 300 g Oreos
- 100 g unsalted butter (melted)
Cheesecake Filling
- 750 g full fat cream cheese/mascarpone
- 125 g icing sugar
- 1 tsp vanilla extract
- 300 ml double cream
- 150 g Oreos, crushed
Decoration
- 150 ml double cream
- 2 tbsp icing sugar
- 12 Oreos + Oreo Crumb
Instructions
For the Base
-
Blitz the Oreos in a food processor until they’re a fine crumb. I don’t remove the creme filling as I like it to bind the biscuits together!
-
Mix the biscuits in with the melted butter and press down into the bottom of an 8″/20cm deep springform tin and refrigerate whilst you make the filling!
For the Cheesecake Filling
-
Using an electric stand mixer cream together the cream cheese, icing sugar, and vanilla until smooth. Add the double cream and whisk the two mixes together.
-
I use my KitchenAid as it whisks the mixture to the perfect texture. It shouldn’t take too long to whisk, but I set mine to a medium/high setting and whisk it till it holds itself (like meringue does!)
-
Be careful not to over whisk though – there is always a limit to a mix, it might curdle – so keep an eye on it, you will know when its ready (took my mix 2 minutes!)
-
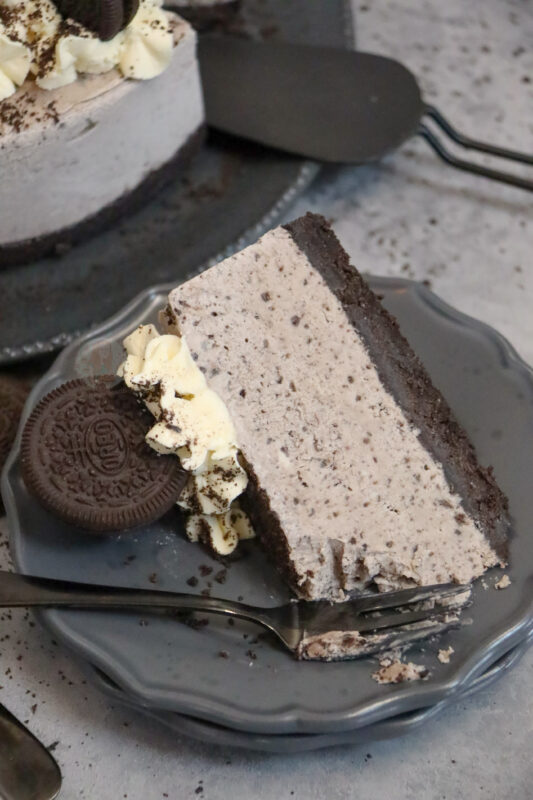
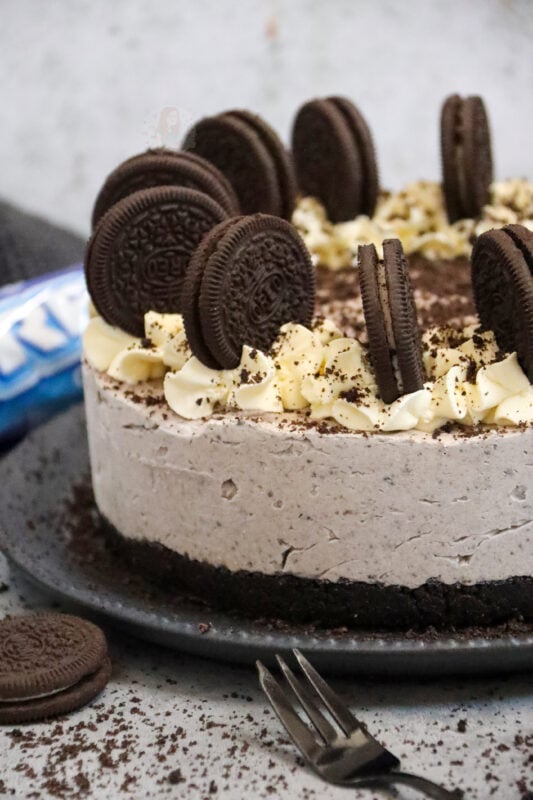
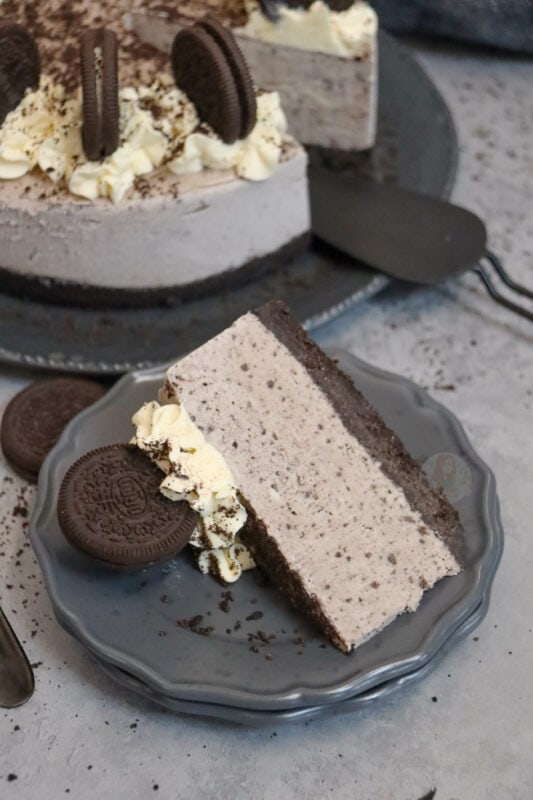
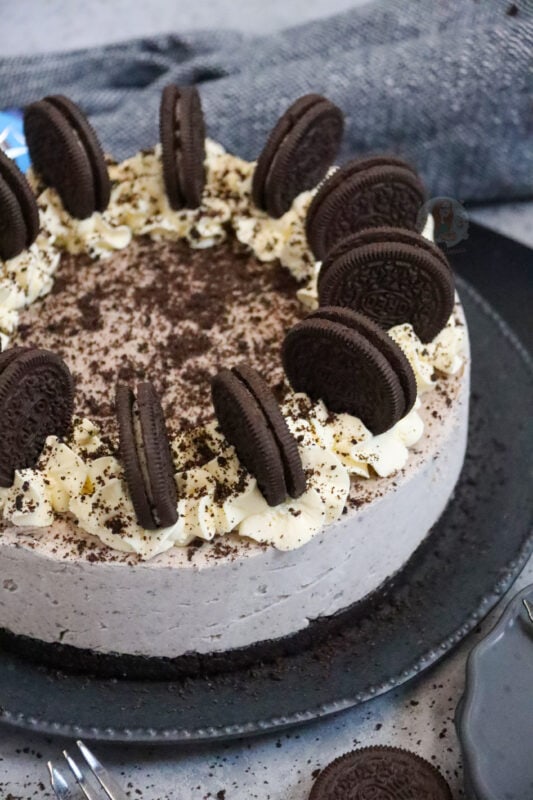
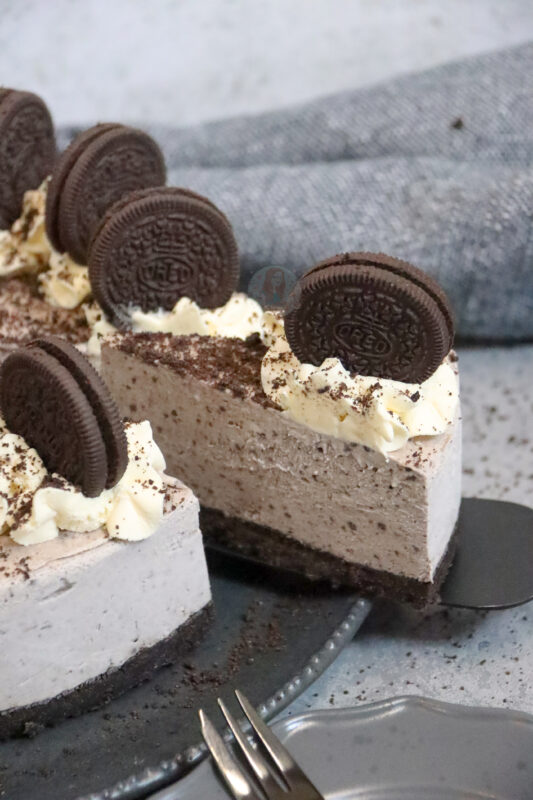
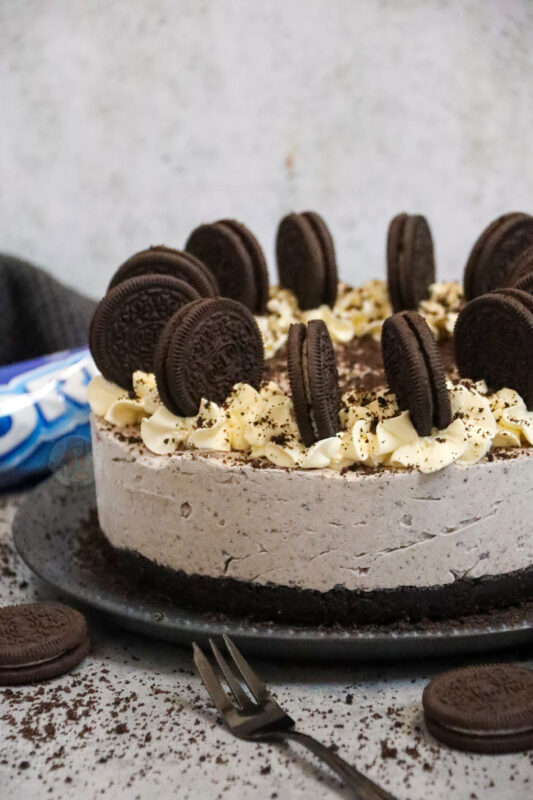
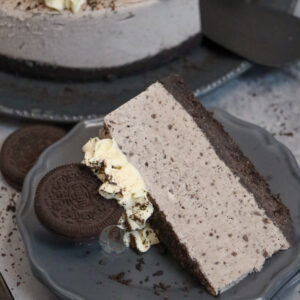
When whisked – fold through the finely crushed Oreos and spread on top of the biscuit base! Make sure to keep 12 of the Oreos whole for the decoration, and a spoonful or two of the crumbs.
-
Set the cheesecake in the fridge for 5-6 hours, or preferably over night!
For the Decoration
-
Once set, remove the cheesecake from the tin. Whip together the double cream and icing sugar and pipe onto the cheesecake using a disposable piping bag, and a 2D closed star piping tip.
-
Then, decorate with the whole Oreos, and some Oreo crumbs! Enjoy!
Notes
- If it looks like your cheesecake isn’t setting, or its a but sloppy, or you’re even not sure.. try it anyway. Try to set the mix anyway! If it still doesn’t set, freeze it and have an Ice Cream Cheesecake!
- I recommend using a 8″/20cm Deep Springform Tin in this recipe!
- Like I said in the Method, I use one mixer to make my cheesecake filling – but I use a stand mixer. If using an electric hand-held whisk then try not to use too high a setting as this might cause it to over whip and go all icky! So take your time, it will be smooth and hold itself when the mix is ready!
- Using Full-Fat cream cheese is 100% needed so that it sets – if you would rather use a lower fat one be careful when you mix so that it doesn’t split, and it probably needs to set in a dish as it won’t hold itself!
- This recipe will last 3 days, covered, in the fridge!
ENJOY!
Find my other recipes on my Recipes Page!
You can find me on:
Instagram
Facebook
Pinterest
Twitter
Youtube
J x
© Jane’s Patisserie. All images & content are copyright protected. Do not use my images without prior permission. If you want to republish this recipe, please re-write the recipe in your own words and credit me, or link back to this post for the recipe.
SaveSave
SaveSave
SaveSaveSaveSaveSaveSave