A delicious No-Bake Cheesecake packed full of a Salted Caramel Cheesecake filling with Pretzels & Popcorn! – A delicious dessert perfect for every occasion!
YES – That’s right… SALTED CARAMEL CHEESECAKE! Hello my actual heaven. After the undoubted & continued success of my No-Bake Caramel Rolo Cheesecake I decided that it was time to share this beauty – which in my opinion is utterly scrumptious. How can it not be? Its no-bake, its creamy, its delicious, and its heavenly salted caramelly – with popcorn & pretzels involved!
The recipe is very similar to my No-Bake Caramel Rolo Cheesecake as its the same sort of base recipe, with a couple of alterations to fit the delicious salty sweet flavouring. This Cheesecake is so incredibly easy to make – simply crush the biscuits & pretzels, mix with the butter, and press to make the base. Cream together the cream cheese, vanilla, and sugar in an electric mixer, add the caramel and mix again, and the cream & salt and mix again and its all done! Decorate how you please!
I have had several comments over my year of blogging about how amazing my cheesecakes are (thank you!) and that I am indeed the Cheesecake Queen (I’m blushing) but I have had many many many questions about how they set so well without any additions to help it – if you use FULL FAT ingredients, you follow my method, and you’re brave – there is no reason why it won’t work!
You have to stick at it – you have to make sure the mixture is thick and delicious, but not be impatient and make it too quickly – because the mixture might fail! I have personally never ever had a problem – but I do make them pretty damn often as you can tell!
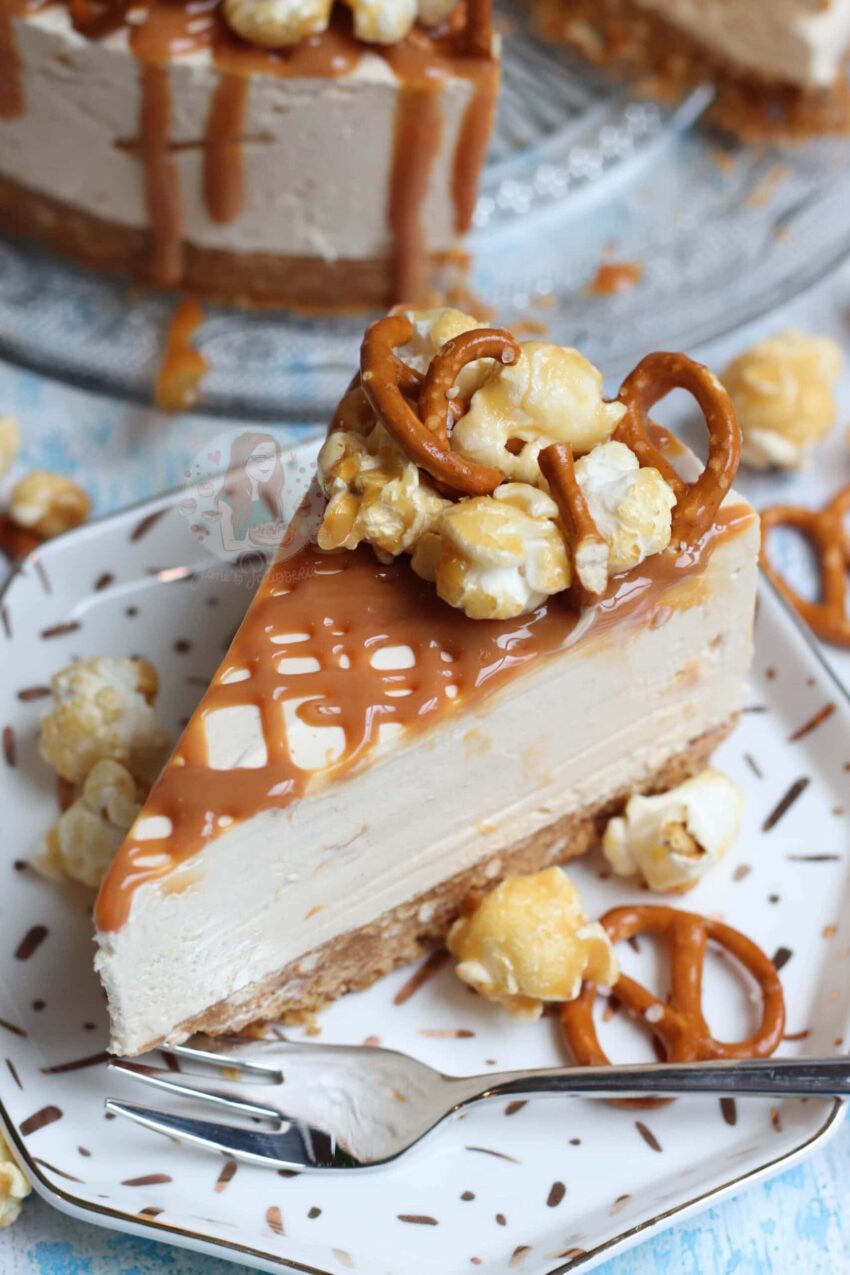
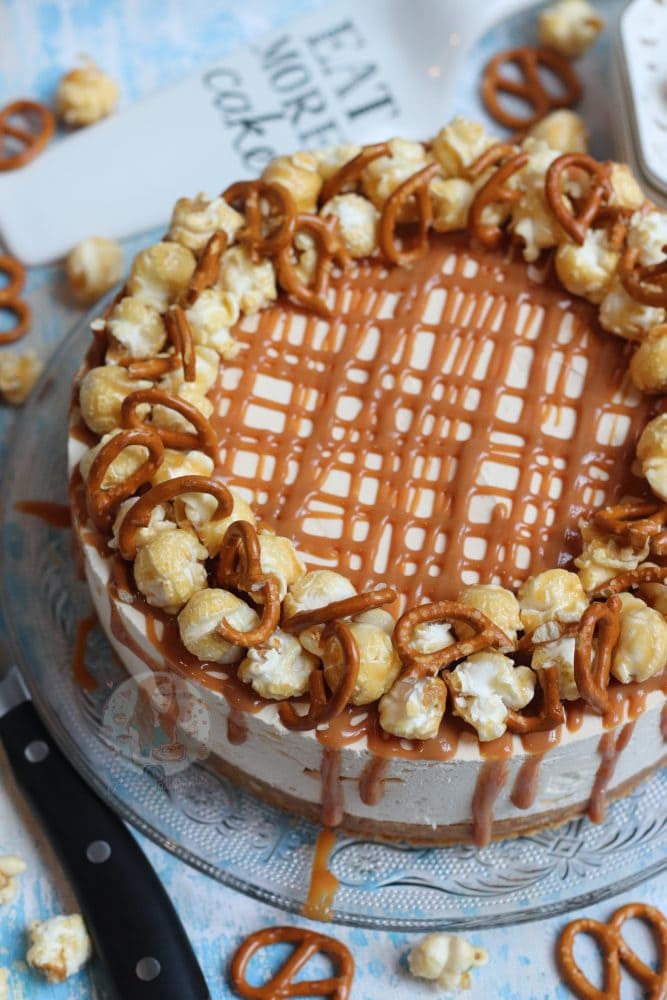
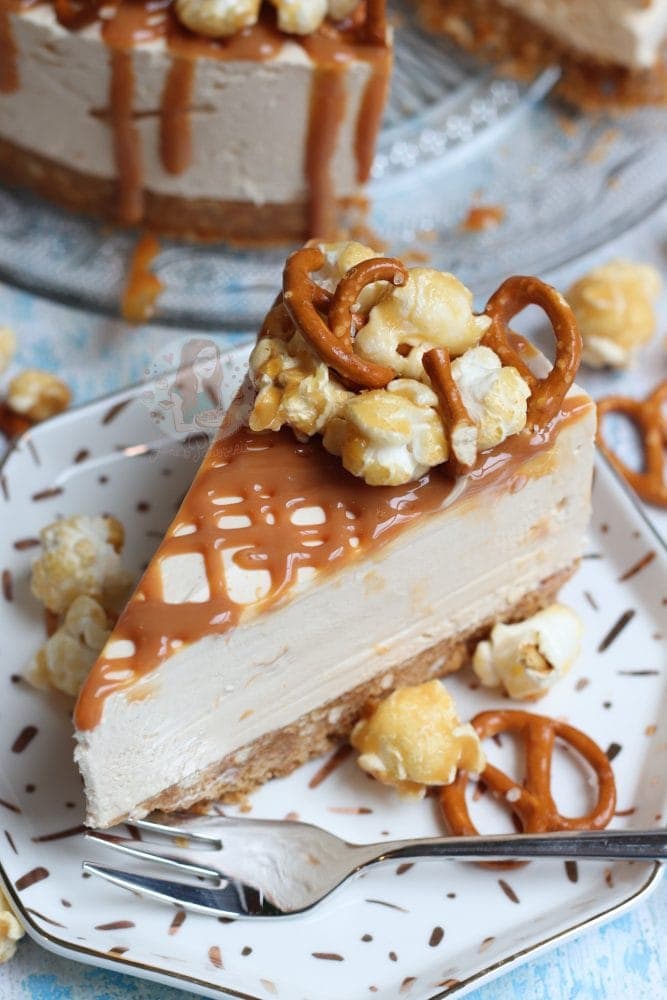
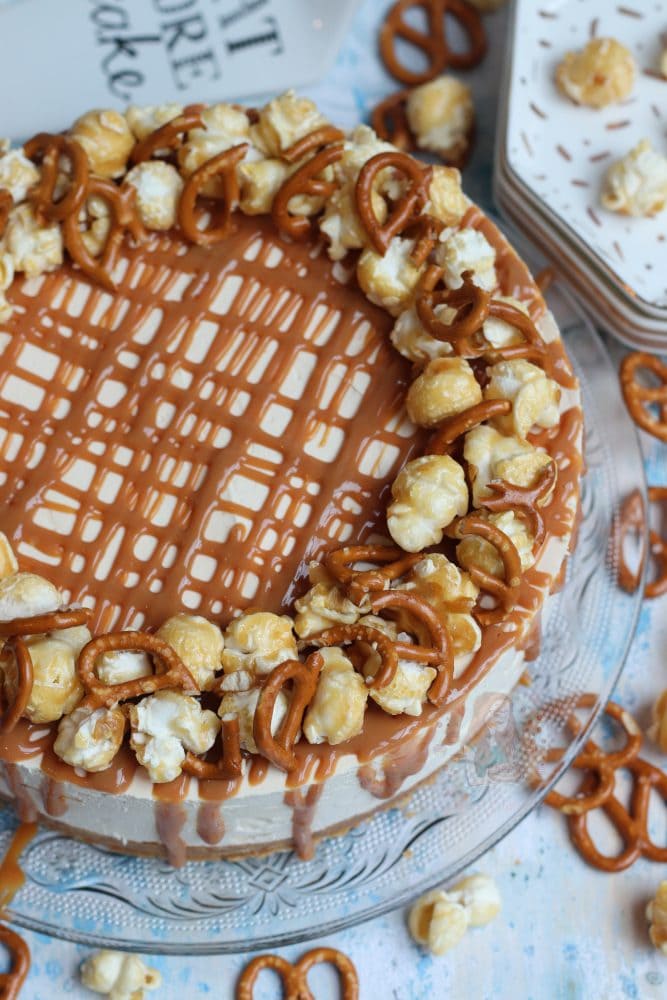
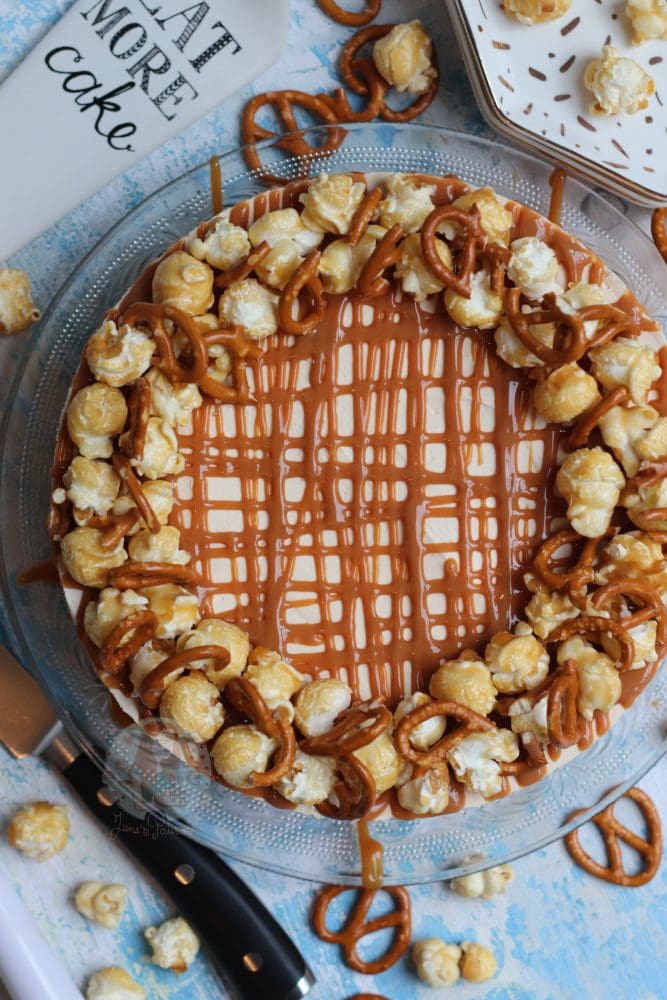
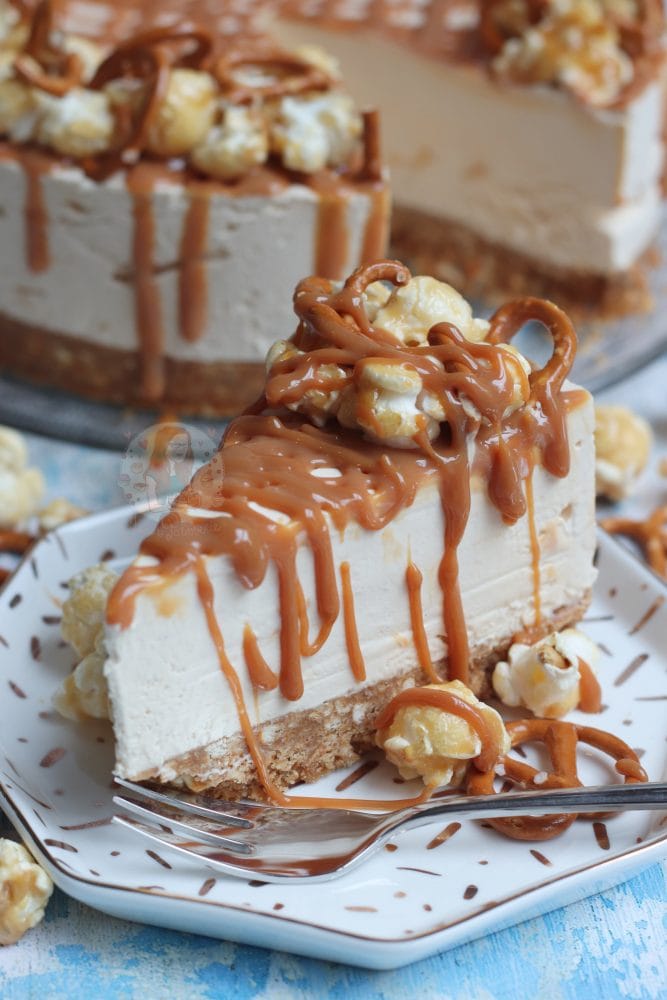
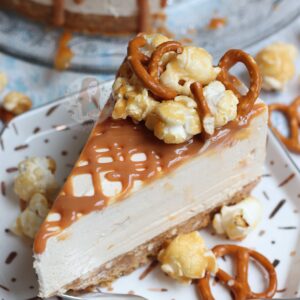
The Pretzels in the base of the cheesecake give it the slightly salty edge that the base desires, with even more pretzels and TOFFEE POPCORN on top, and of course – oodles and oodles of caramel sauce! Seriously though – I adore this recipe, its is delicious, and I know you will all love it too!

No-Bake Salted Caramel Cheesecake!
#wprm-recipe-rating-3 .wprm-rating-star.wprm-rating-star-full svg * { fill: #343434; }#wprm-recipe-rating-3 .wprm-rating-star.wprm-rating-star-33 svg * { fill: url(#wprm-recipe-rating-3-33); }#wprm-recipe-rating-3 .wprm-rating-star.wprm-rating-star-50 svg * { fill: url(#wprm-recipe-rating-3-50); }#wprm-recipe-rating-3 .wprm-rating-star.wprm-rating-star-66 svg * { fill: url(#wprm-recipe-rating-3-66); }linearGradient#wprm-recipe-rating-3-33 stop { stop-color: #343434; }linearGradient#wprm-recipe-rating-3-50 stop { stop-color: #343434; }linearGradient#wprm-recipe-rating-3-66 stop { stop-color: #343434; }
Print Pin Rate
Ingredients
Biscuit Base
- 250 g Digestives/Shortbread Biscuits
- 75 g Salted Pretzels
- 135 g Unsalted Butter (or Stork, melted)
Cheesecake Filling
- 500 g Full Fat Cream Cheese
- 1 tsp Vanilla Extract
- 100 g Icing Sugar
- 150 g Caramel (I used Carnations)
- 1-2 tsp Maldon Sea Salt Flakes
- 300 ml Double Cream
Decorations
- 100 g Caramel
- Toffee Popcorn
- Pretzels
Instructions
For the Biscuit Base
-
Blitz the Biscuits and the Pretzels in a food processor and mix the biscuits with the melted Butter.
-
Spread on the bottom of an 8″/20cm Deep Springform Tin and press down firmly. Leave to set in the fridge whilst you make the rest!
For the Cheesecake Filling
-
Using an electric mixer, I use my KitchenAid with the whisk attachment, whisk together the Cream Cheese, Vanilla, and Icing Sugar until smooth.
-
Add the Caramel and whisk again until smooth and lump free – this could take a little while, I whisk it at half speed so not too quick or slow!
-
Pour in the Double Cream & Salt flakes and continue to whisk for a couple of minutes until its very thick and mousse like.
-
I mix it on a medium speed, level 6/10 – Now this could take up to 5 minutes, or 30 seconds depending on your mixer, but you seriously have to stick at it. It will hold itself completely when finished mixing (like a meringue does!)
-
If you don’t mix it enough it will not set well enough, but don’t get impatient and whisk it really quick because that’ll make it split. Once mixed, spread over the biscuit base and leave to set in the fridge overnight.
For the Decoration
-
Remove the Cheesecake from the tin carefully and decorate the cheesecake – I drizzled over some of the spare caramel, and then some Toffee Popcorn and more Pretzels!
Video
Notes
- If it looks like your cheesecake isn’t setting, or its a but sloppy, or you’re even not sure.. try it anyway. Try to set the mix anyway! If it still doesn’t set, freeze it and have an Ice Cream Cheesecake!
- I recommend using an 8″/20cm Deep Springform Tin in this recipe!
- It is very important to use salt flakes, not finely ground salt – but if you have to, then use 1/4tsp and taste test it till you reach your desired taste, it is a lot more concentrated when finely ground!
- You have to make sure that it is Full-Fat cream cheese that you use so you know its going to set
- I also always set my cheesecakes in the fridge overnight otherwise they risk being a little runny still and slipping off the biscuit base but if you want to risk it then go for it! If you think its not setting, 99% of the time its because you didnt whip it enough!
ENJOY!
Find my other Cheesecake recipes on my Recipes Page!
You can find me on:
Instagram
Facebook
Pinterest
Twitter
Bloglovin’
Youtube
J x
© Jane’s Patisserie. All images & content are copyright protected. Do not use my images without prior permission. If you want to republish this recipe, please re-write the recipe in your own words and credit me, or link back to this post for the recipe.
SaveSave