Delicious, Creamy and Ridiculously Easy No-Churn Strawberry Cheesecake Ice Cream that the whole family will enjoy!
So, everyone loves strawberry, and you guys have been looooving my ice creams so much, for example my Kinder Bueno Ice Cream, Oreo Ice Cream, Biscoff Ice Cream, and my Terry’s Chocolate Orange Ice Cream, so another one had to happen.
However, not just any strawberry ice cream.. A cheesecake themed ice cream. THAT’S RIGHT! CHEESECAKE!
As you all know, I obviously adore cheesecake, and this is no different. To make it even easier for you guys, I made this into another no-churn recipe as you all seem to love them so much – and so do I!
I decided to make a strawberry themed cheesecake rather than just a plain cheesecake ice cream as it makes it taste even better, it makes it look better, and I just utterly adore it.
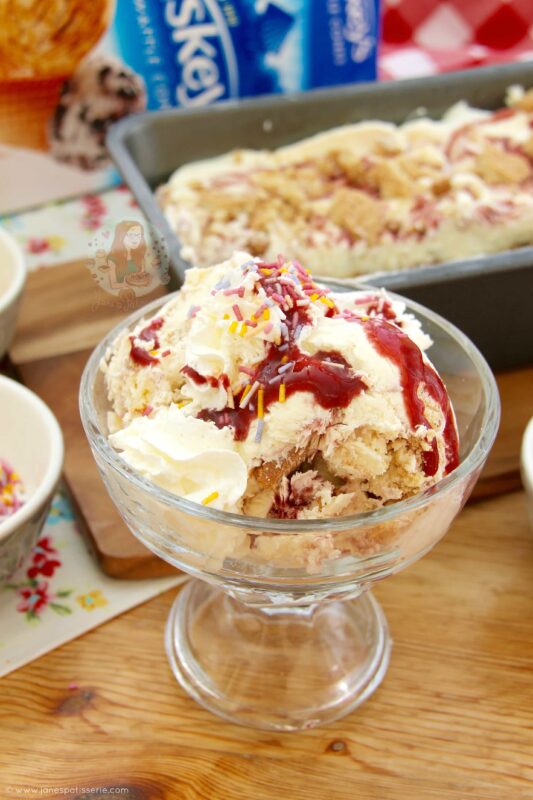
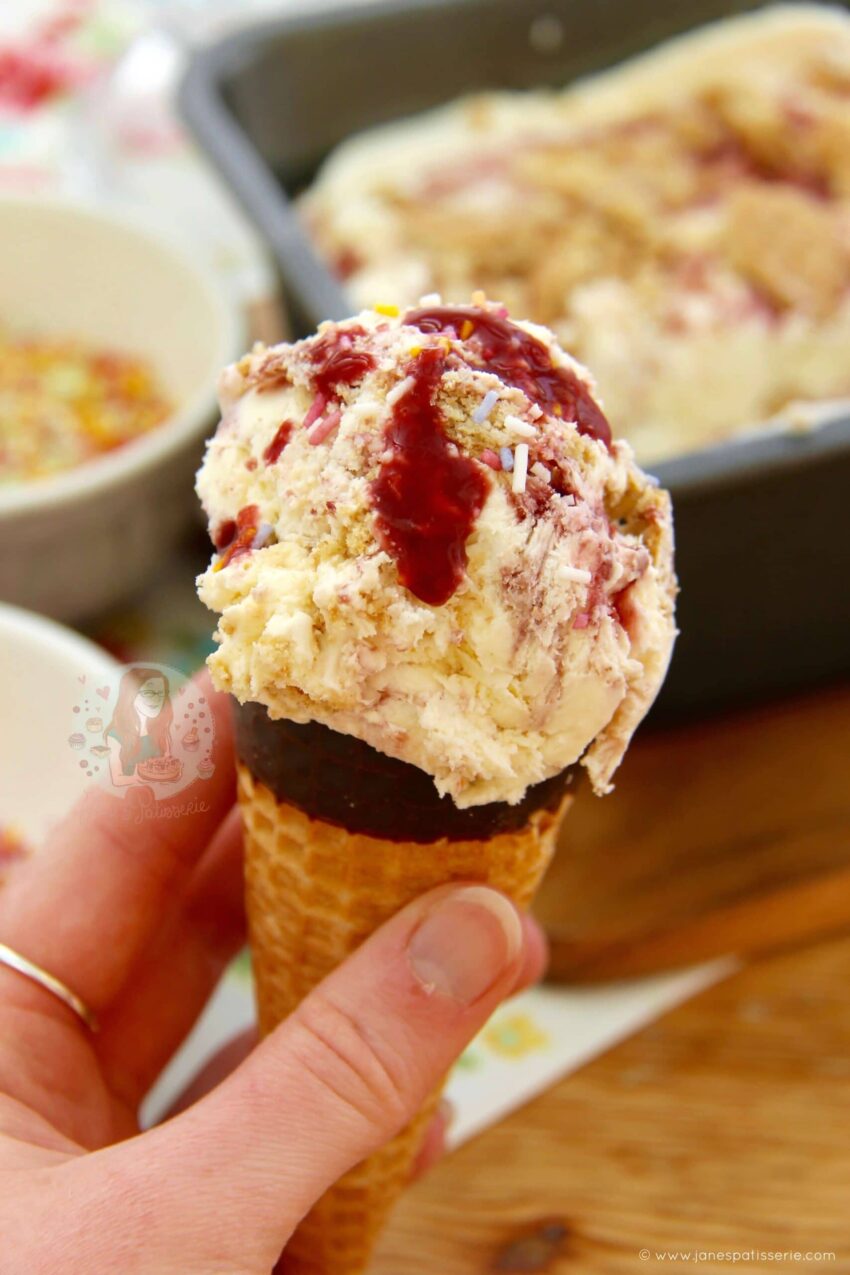
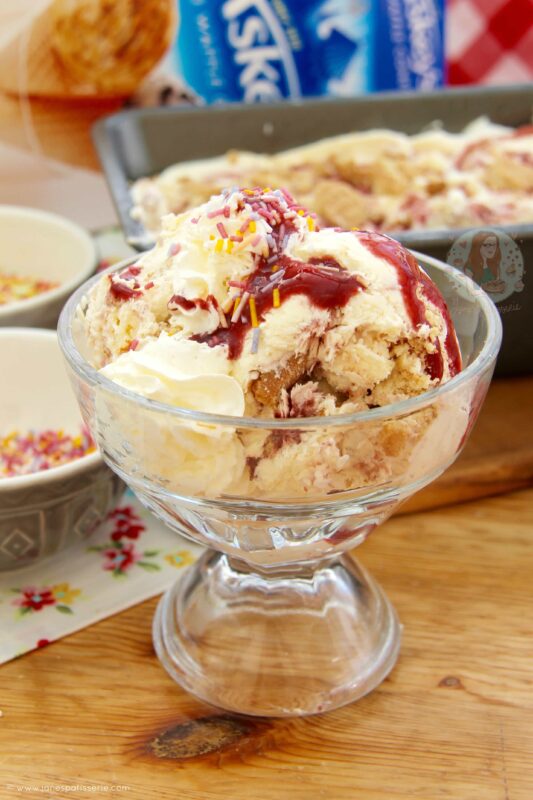
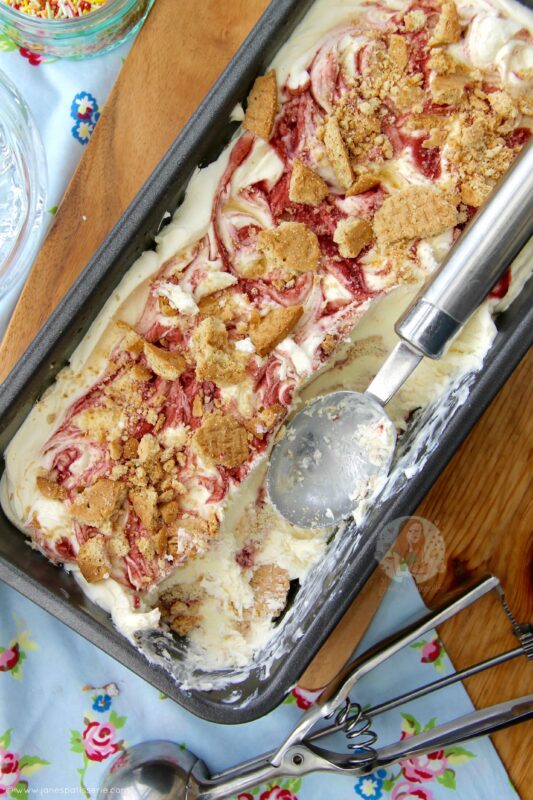
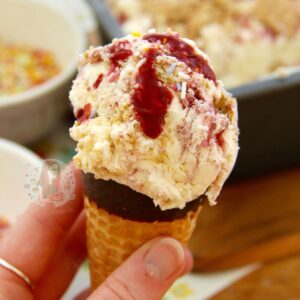
I swirl through some home-made coulis into my no-churn ice cream because it really is oh so easy to make and tastes amazing. You can of course buy coulis, but I always have an abundance of strawberries round my house as I always go strawberry picking when I can, so strawberry coulis just happened.
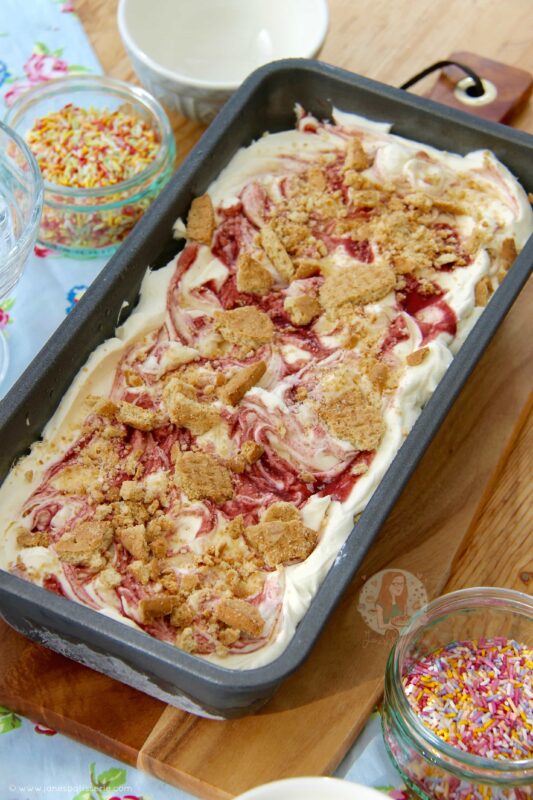
The ice cream itself really is so easy to make – literally whipping the ingredients together till thick, and swirling through the coulis with some crushed biscuits.
Cheesecake ice cream is a delicious invention, that no – I didn’t come up with it, but I tried to put my own spin on it.
I tend to gobble up some of the mixture before it even gets to the freezer, so I don’t blame you if this happens yourself. I don’t judge.

No-Churn Strawberry Cheesecake Ice Cream!
Print Pin Rate
Ingredients
Ice Cream
- 450 ml double cream
- 397 g condensed milk
- 280 g full fat Philadelphia cream cheese
- 1/2 tsp vanilla bean extract
- strawberry coulis (see below)
- 6 digestive biscuits (roughly chopped)
Strawberry Coulis
- 300 g strawberries
- 100 g caster sugar
Instructions
Strawberry Coulis
-
Chop the the strawberries into quarters and remove the tops,
-
Add the chopped strawberries in to a pan with the caster sugar and heat on a medium heat.
-
Mash the strawberries with a fork and carry on heating and stir until the sugar has dissolved and the fruit has become saucy.
-
Pass the mixture through a sieve into a bowl and bin the mushy bits that are left.
-
Refrigerate until needed.
Cheesecake Ice cream
-
Whisk together the double cream, condensed milk, full fat Philadelphia cream cheese and vanilla bean extract on a medium speed until smooth – can take a couple of minutes. (Use a stand mixer with the whisk attachment or a large bowl with a hand-held whisk)
-
Spoon 1/3 of the cheesecake ice cream mixture into the bottom of a 2lb loaf tin or similar, and add 2 tbsps of coulis on top.
-
Marble the coulis and ice cream mixture together with the end of a skewer.
-
Sprinkle over 1/3 of the roughly chopped digestives, then repeat the previous two steps again twice more!
-
Cover with a lid or some cling film and freeze for at least 4-5 hours, or over night.
To Serve
-
Remove from the freezer AT LEAST 30 Minutes before you want to serve it – as its homemade it will be a lot harder than most shop bought ice-creams – you haven’t done anything wrong, this is because it hasn’t got a load of added preservatives in it!
-
Serve how you like – add some coulis, cream, berries, sprinkles or whatever you fancy and enjoy!
Notes
- If the cream cheese has lots of liquid in the packet, try and get rid of it first as it’s a bit manky, and isn’t very nice – but don’t worry if you can’t see it – it’ll be fine!
- You could swap up the flavours of the sauce you use if you like and make raspberry coulis, blueberry, blackberry etc – any would work well with the cheesecake mixture.
- You could even make the coulis slightly more tart by using 200g strawberries and 100g of raspberries with the same amount of sugar. Same applies with the biscuits, any biscuit will do really, but I love digestives!
- This will last in the freezer for 1 month!
- This is the 2lb loaf tin I used.
ENJOY!
Find my other recipes on my Recipes Page!
You can find me on:
Instagram
Facebook
Pinterest
Twitter
Youtube
J x
© Jane’s Patisserie. All images & content are copyright protected. Do not use my images without prior permission. If you want to republish this recipe, please re-write the recipe in your own words and credit me, or link back to this post for the recipe.