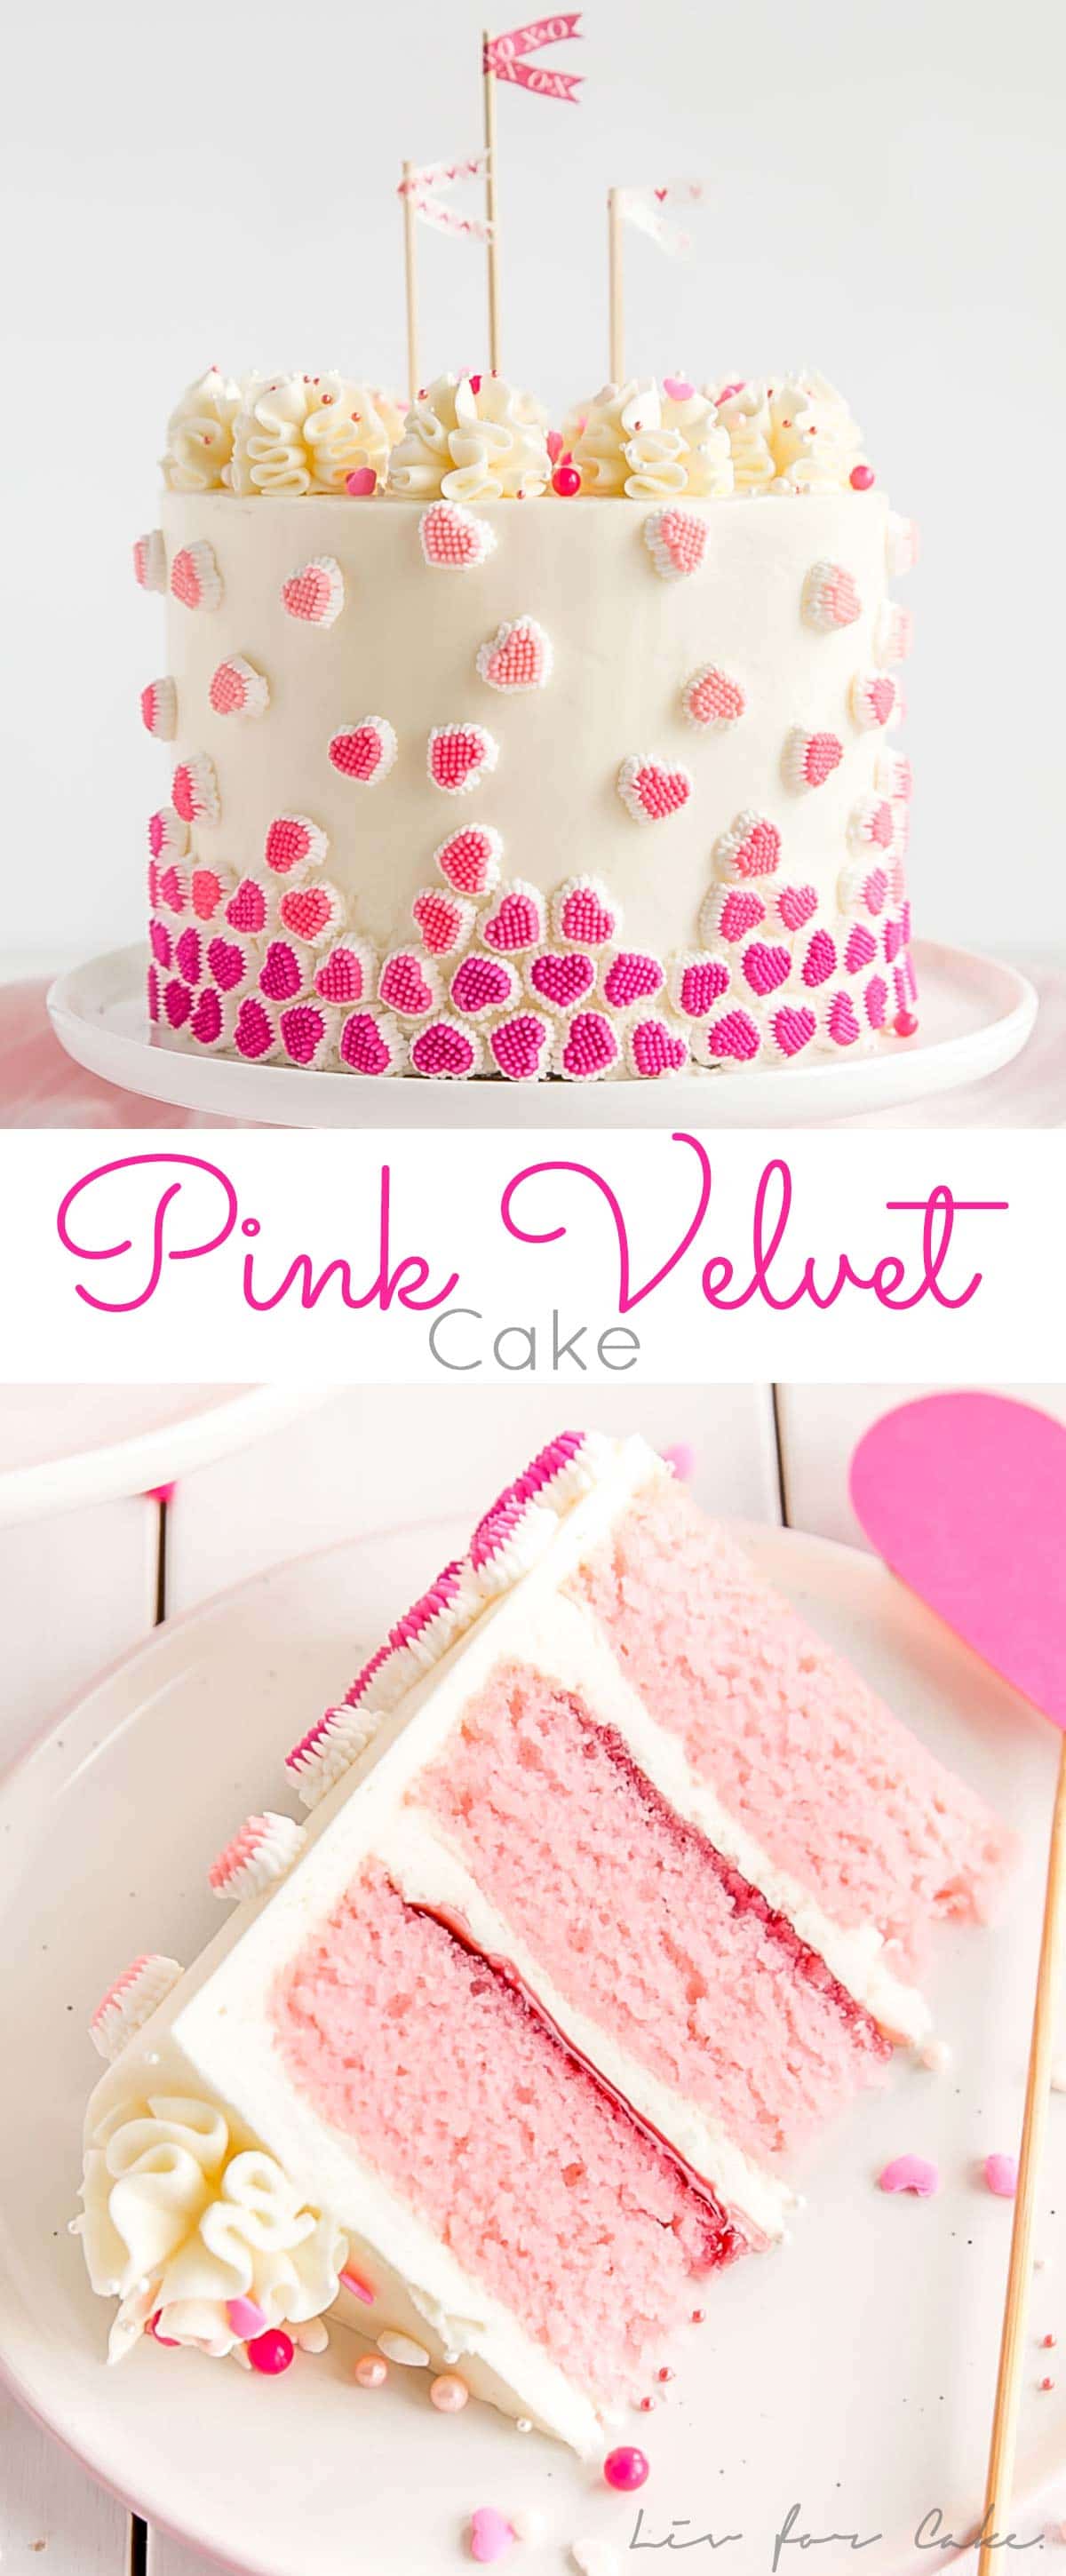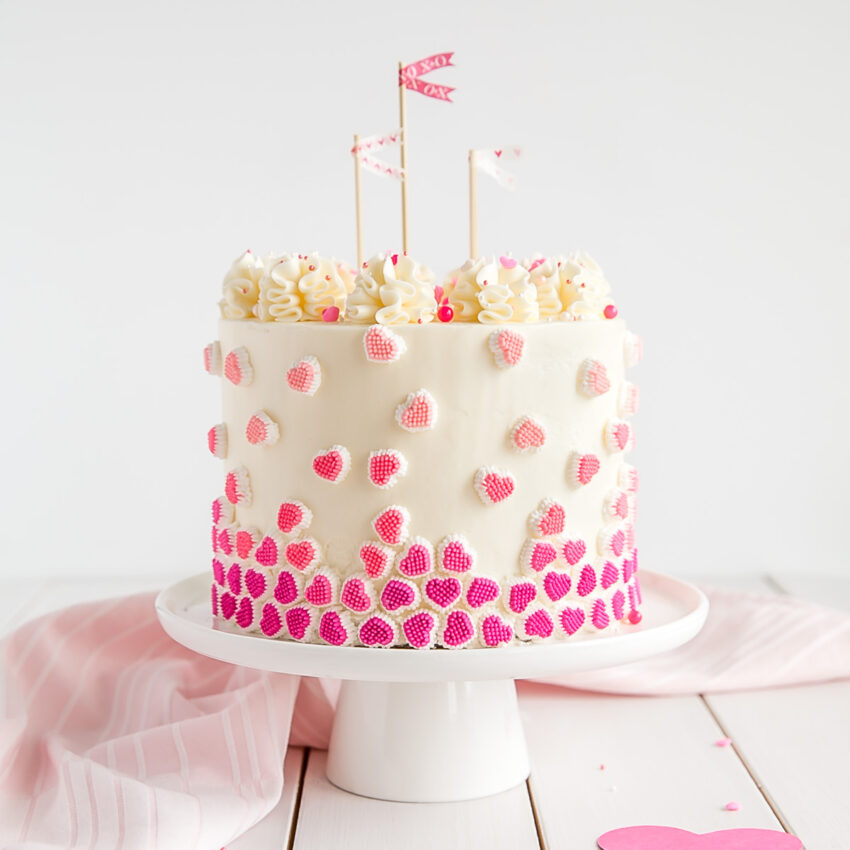
This candy heart studded Pink Velvet Cake is the perfect way to celebrate Valentine’s Day with the one you love!
This Pink Velvet Cake was 100% unplanned. It all started when I was in Michaels looking for Valentine’s Day props for another post (coming soon) and I spotted them. The CUTEST pink ombre candy hearts I had ever seen.
I had to have them. Four packs of them, apparently. They were on clearance for some reason, and I worried they’d be discontinued, so I grabbed a bunch in case I want to use them again next year or something.
My first plan was just to cover the entire side of the cake with them in an ombre fashion. My inspo for that was from this Mini Egg Cake. Adorable, right? So simple, yet so pretty!
I worried it might be a bit much though, since the hearts are much smaller than the eggs, and I’d easily go through all 4 packs if I did it that way. So I started brainstorming other ideas and laying the hearts out in different patterns on my kitchen counter.
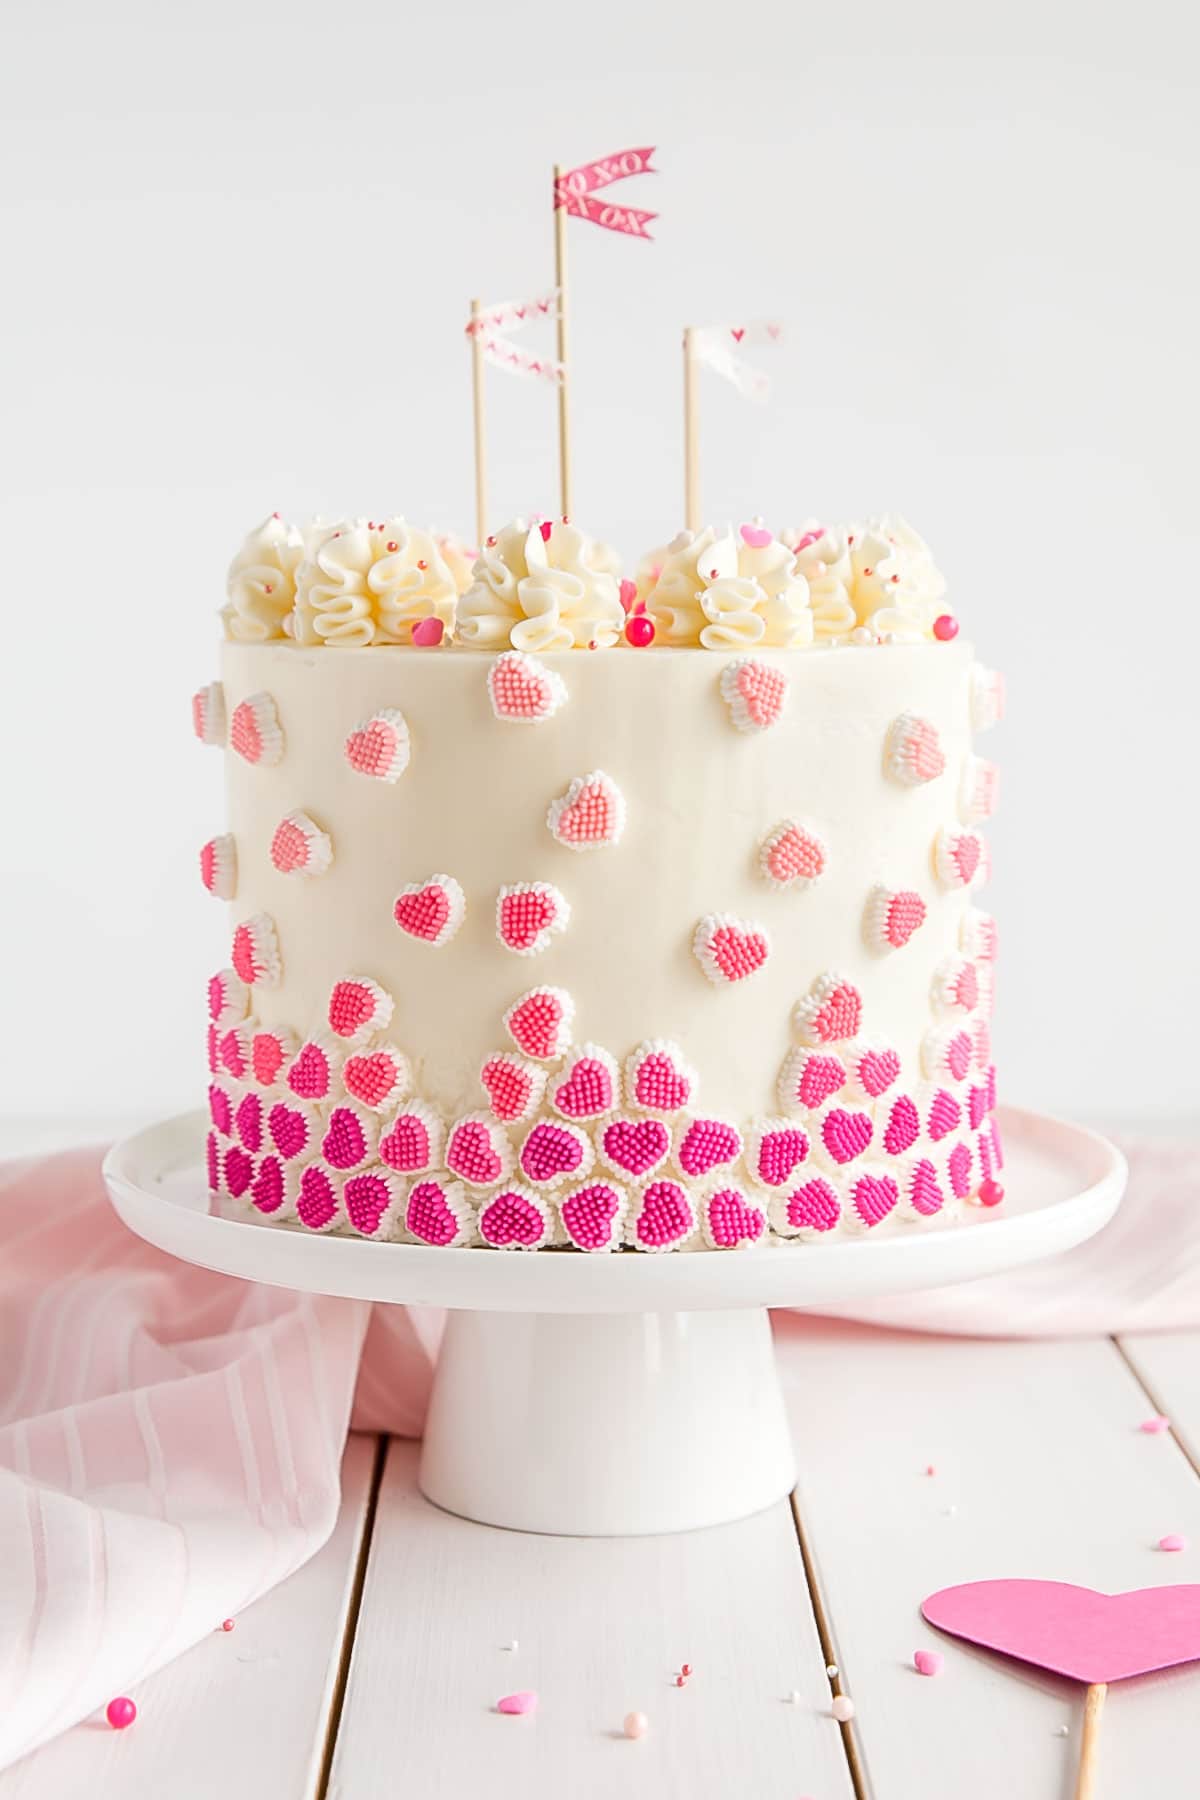
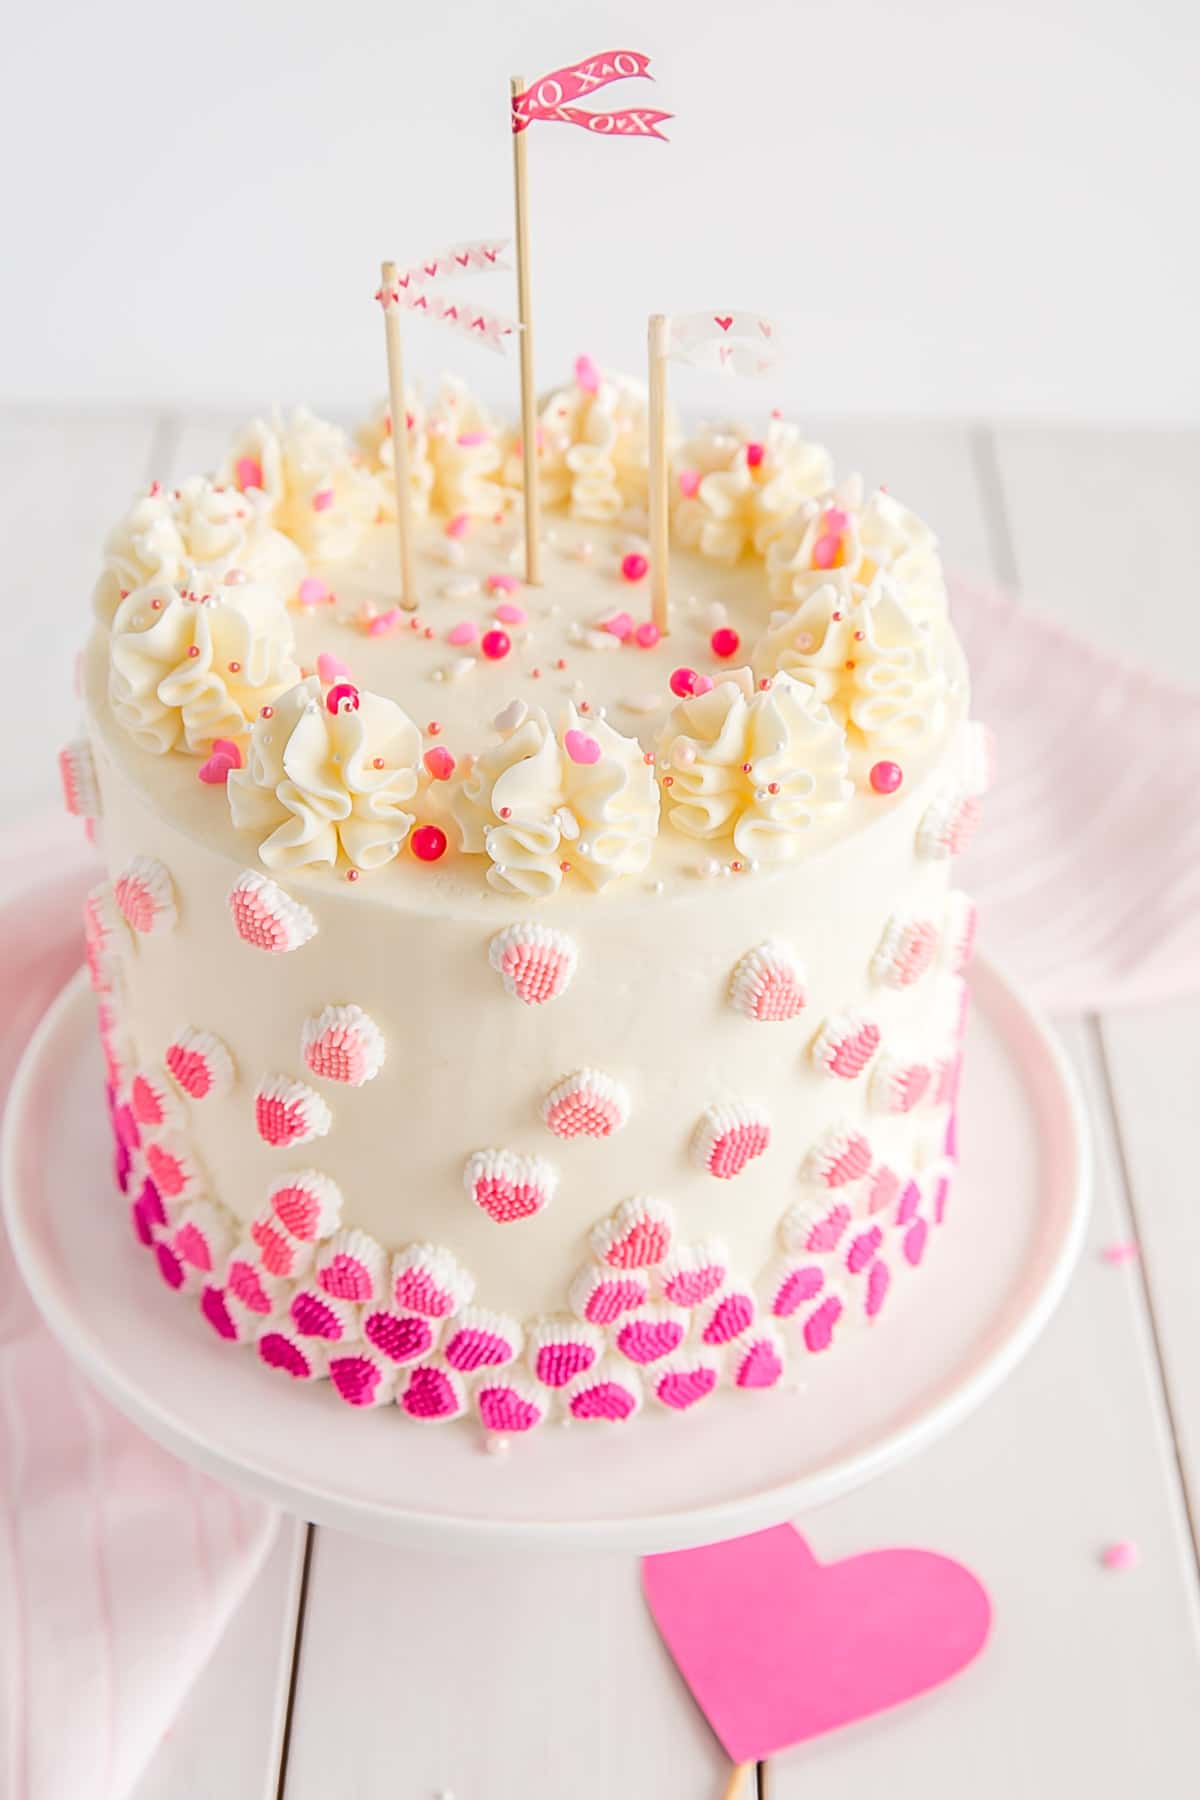
I finally settled on a random, crazy pile of hearts that looked like they were raining down and getting darker as they hit the bottom. I’m actually surprised at how well it turned out.
I planned to do this kind of thing before with my Froot Loops Cake and it was a total fail when I was making, so I went with something simpler there. But on this one, the hearts worked! Yay!
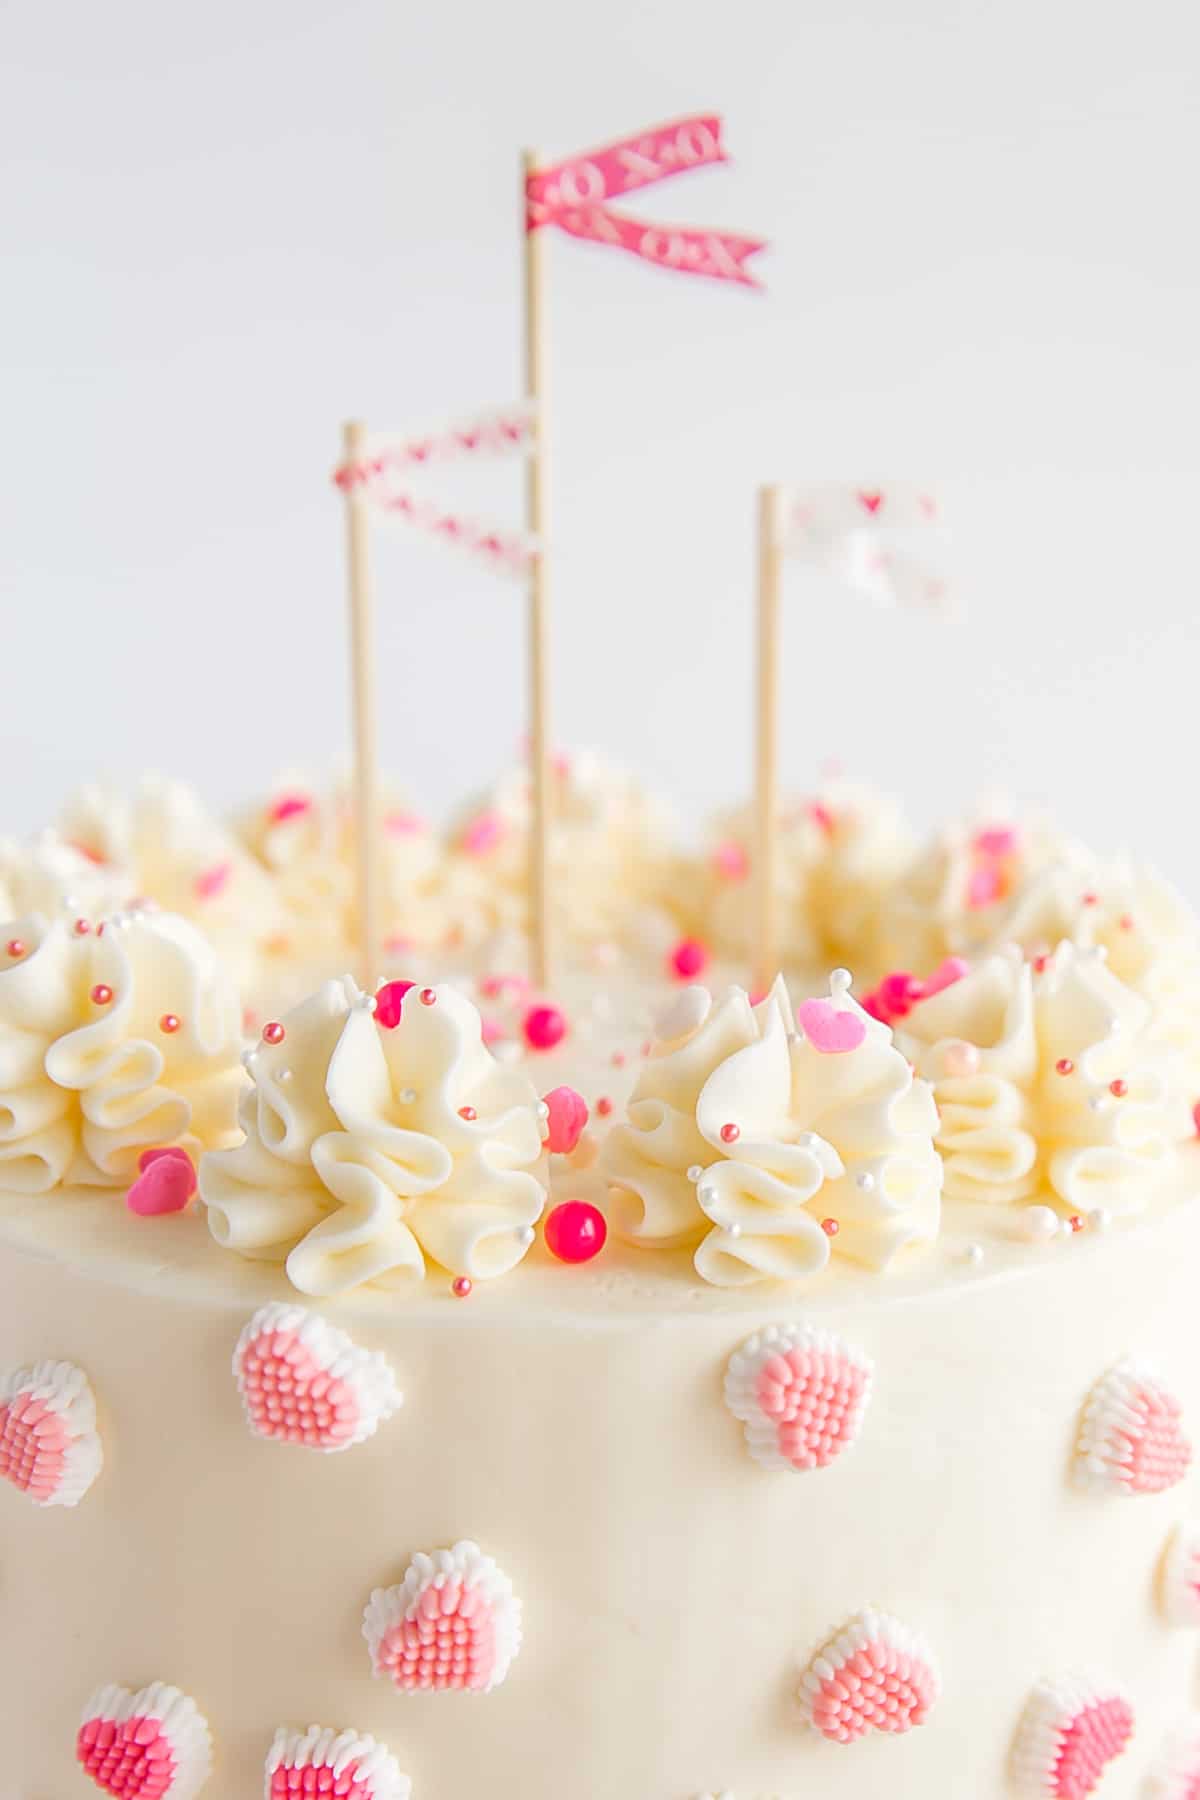
I was going to leave the top plain, but I decided it needed some kinda rosettes or dollops on top, and while I was rifling through one of my baking drawers, I spotted another Valentine’s Day prop/accessory that I’d totally forgotten about (this happens way too often).
I had bought some heart-themed washi tape to make little flags. I’d learned about this technique from Lindsay over at Coco Cake Land. I loved the little cake flags she showed off on her cake, so I bought the tape. I had no idea where I intended to use that either, but I thought it would be better to have it than not, right? I couldn’t find any wider Valentine themed tape (at least not pretty ones), so I bought a 5 pack of thinner ones. I think they worked ok, but I’ll definitely try to find wider washi tape next time.
The little flags are SO easy to make. Literally all you need is bamboo skewers, washi tape, and scissors.
It’s not often that the exterior design of a cake dictates the inside, at least not for me. Usually, I come up with a flavor combination I think would be good, and then stress about the decorating on the day of. This time though, I had to figure out what would be inside this Valentine’s day themed cake.
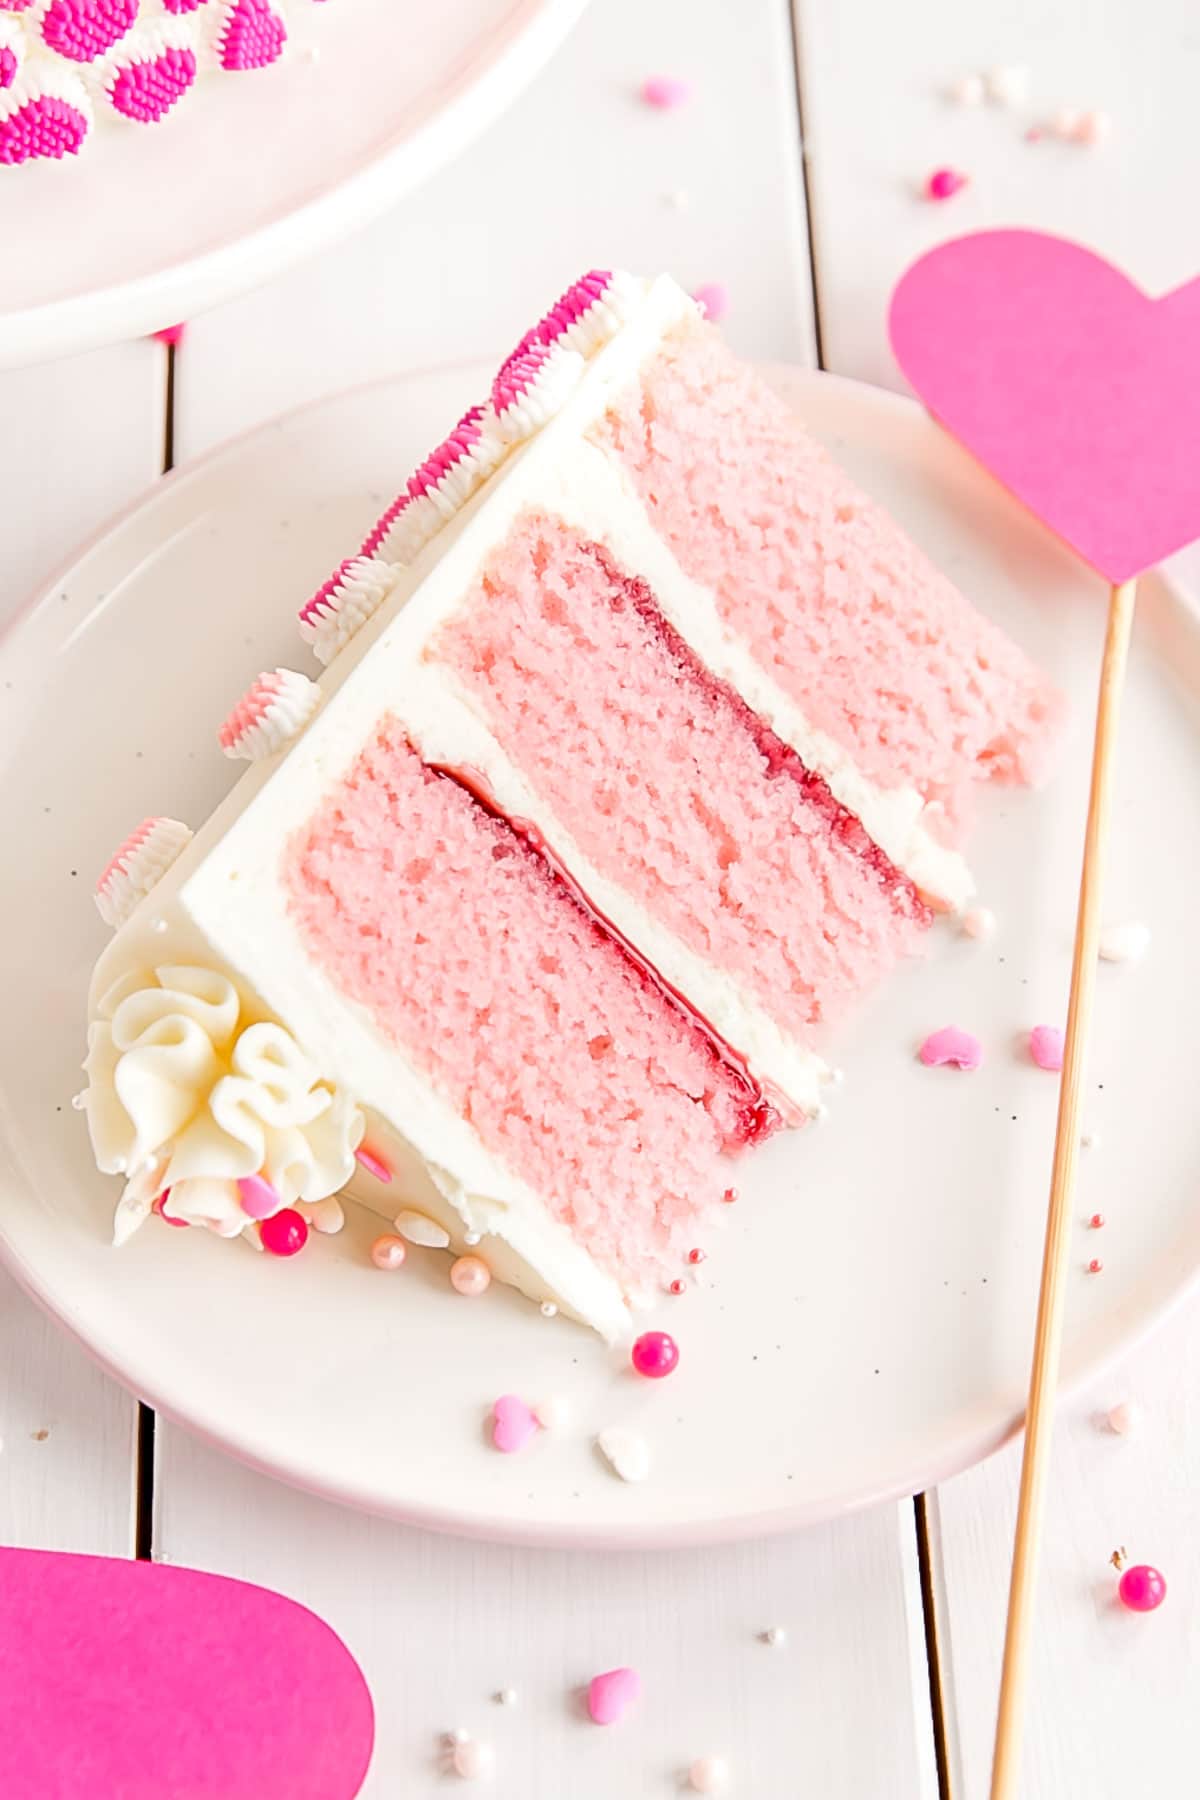
I tossed around a few ideas with Ryan, and ultimately decided on a pretty Pink Velvet Cake.
Pink Velvet is nothing more than a name here. I just thought it would be a fun play on red velvet cake. It doesn’t have the traditional elements of a red velvet cake though — no cocoa powder or vinegar. If this upsets you, I’m sorry!
I colored the cake layers using pink color gel and for a bit more color and flavor I added some raspberry jam between the layers. You could use any flavor you like, or just leave this out.
Cake Tip!
***NOTE*** The cake layers are thinner than I normally make (just over 1″ thick) because I wanted a smaller, square cake. To make thicker layers, you can 1.5x the recipe to make a standard three layer 6″ or two layer 8″ cake.
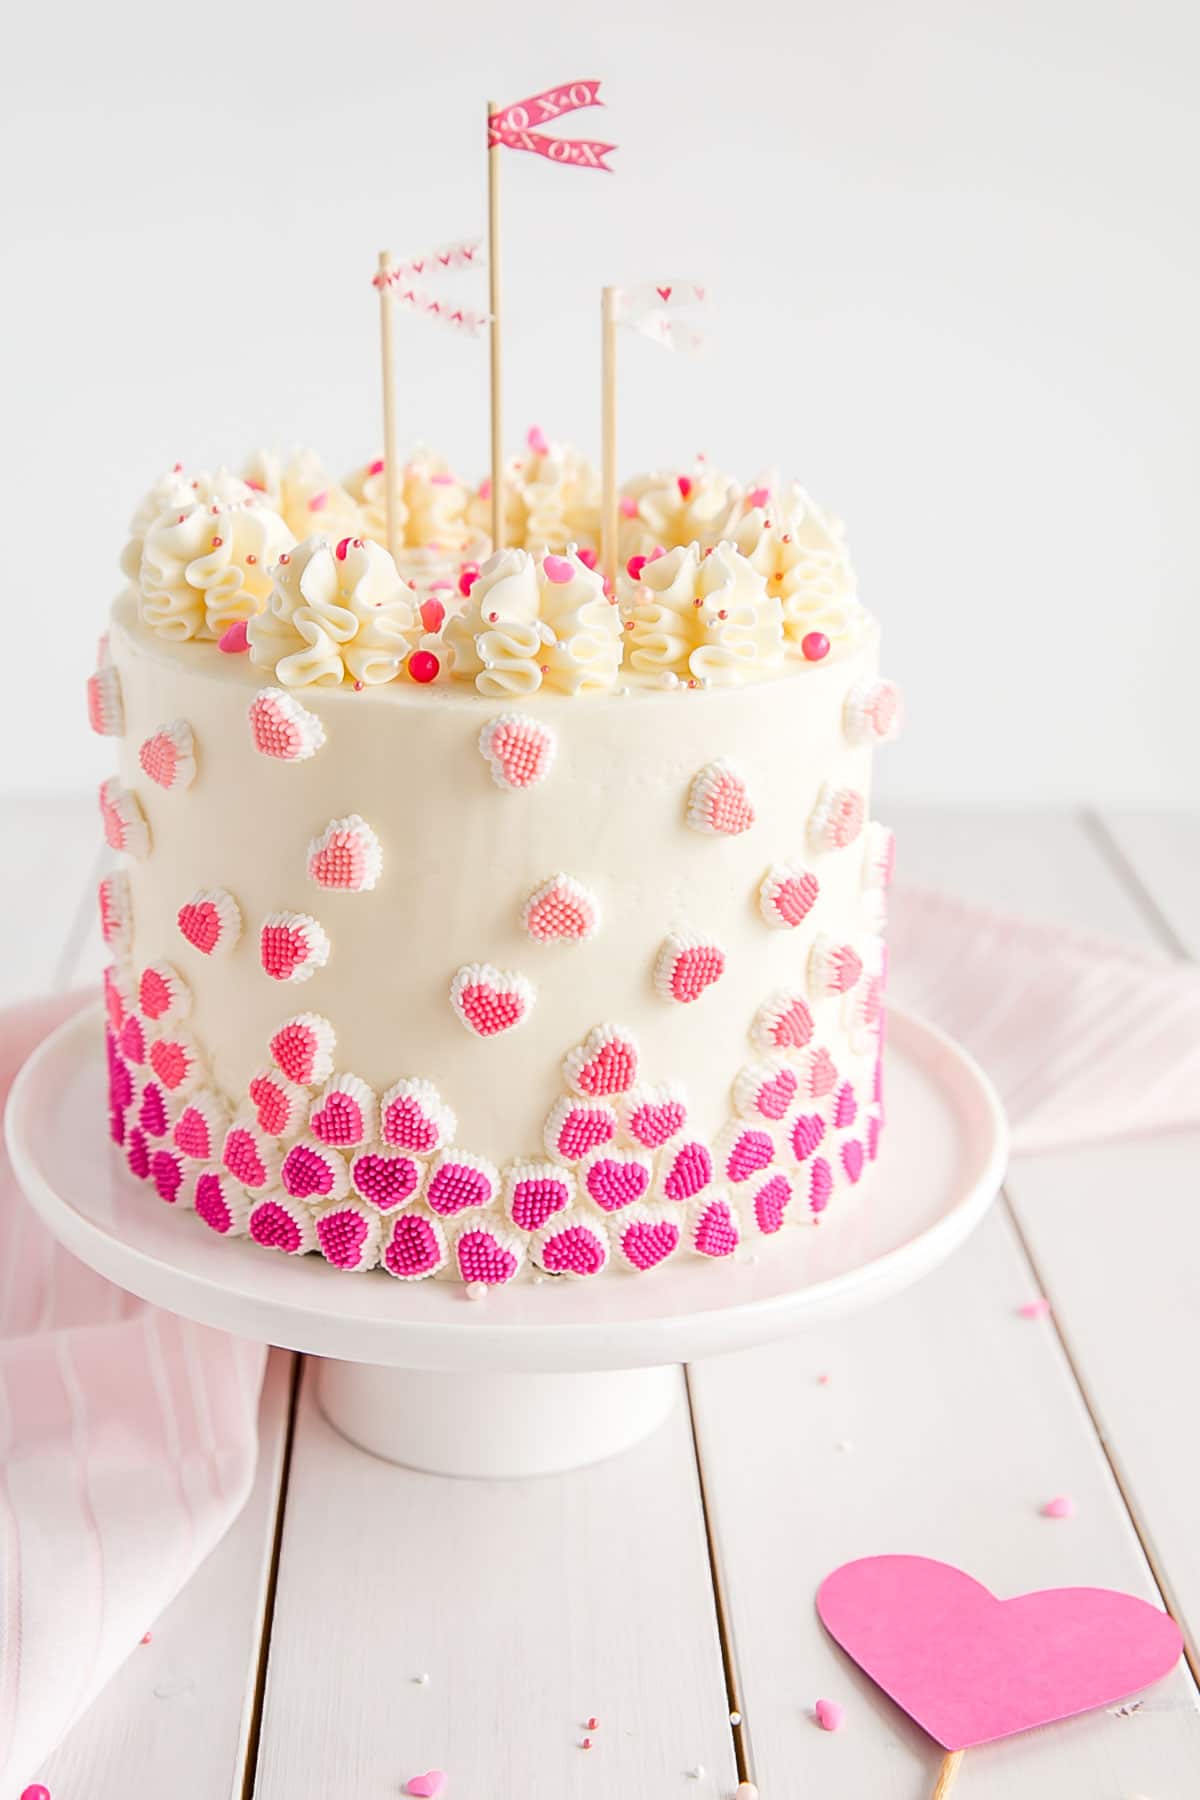
I LOVE how this cake turned out, both inside and out! It’s a really fun and easy way to make a festive dessert to celebrate with the one you love this Valentine’s Day!
Looking for more Valentine’s Day desserts??
- Strawberry Cake with Mascarpone Buttercream
- Valentine’s Heart Macarons
- Strawberry Cheesecake Cookie Cups
- Dark Chocolate Ganache Tart
- Chocolate Raspberry Cake
Frequently Asked Questions
How can I convert this recipe?
- ***NOTE*** The cake layers are thinner than I normally make (just over 1″ thick) because I wanted a smaller, square cake. To make thicker layers, you can 1.5x the recipe to make a standard three layer 6″ or two layer 8″ cake.
- The recipe as-is will also work in two 8″ pans. For three 8″ pans, 1.5x the recipe. Baking time may need to be adjusted.
- To make cupcakes, all you need to do is reduce the baking time — start checking at 15mins or so. The recipe will make 18-24 cupcakes depending on size.
- For other conversions go here.
Can I make it in advance?
- The cooled cake layers can be baked ahead of time, double wrapped in plastic wrap, and frozen for up to 3 months. Take out 2-3 hours before assembly.
- The frosting can be placed in an airtight container and refrigerated for 1 week for frozen for 3 months. Bring to room temp and rewhip before using.
- The finished cake (whole or sliced, stored airtight) can be frozen for up to 3 months.
Can I get the measurements by weight/grams?
- There is a Metric option in the recipe card. If you click it it will convert everything to grams.
- This conversion is done automatically and I cannot guarantee the accuracy but many readers have had success using the metric option on my recipes.
Tipe for Making this Pink Velvet Cake
- I used pink color gel to color the cake layers, be careful not to overmix the cake batter.
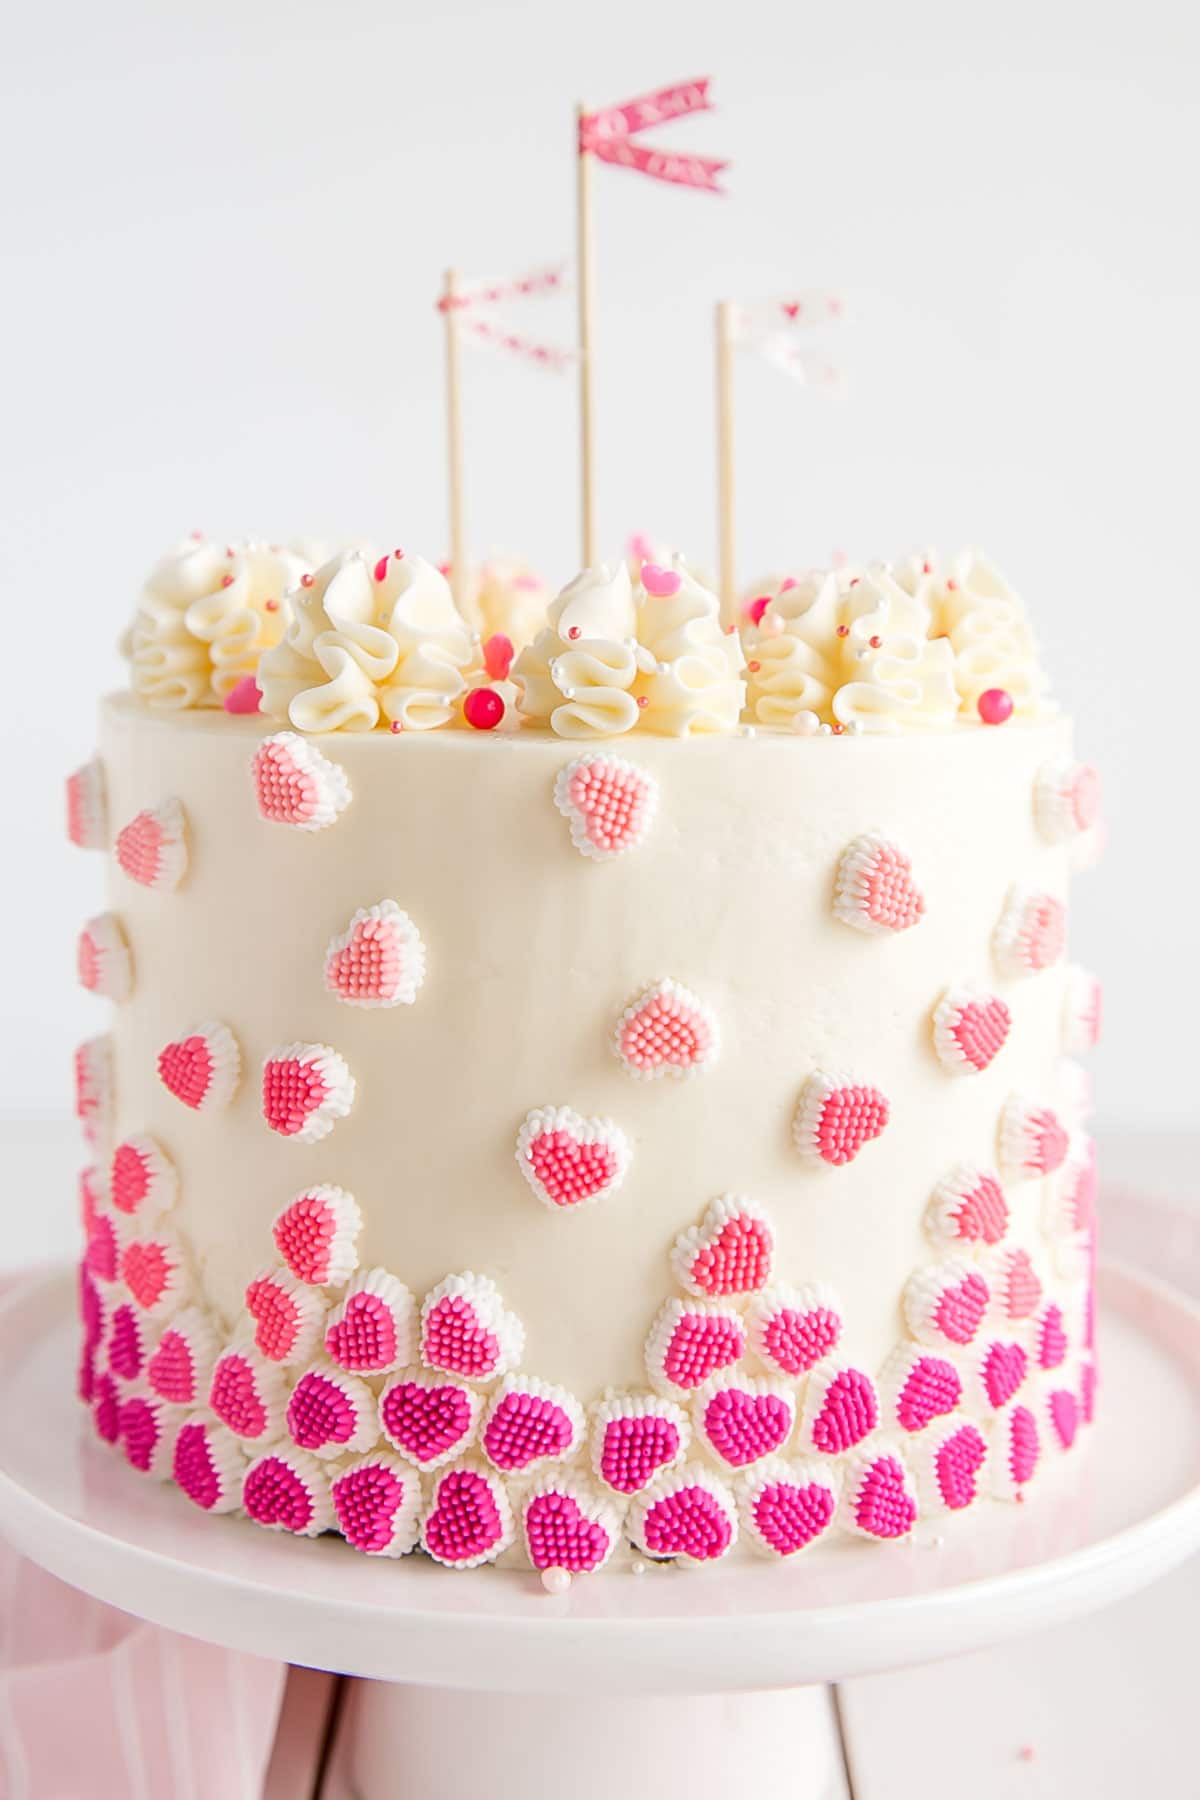
- I found the pink candy hearts at Michaels, but you can also buy them on Amazon.
- For the ruffle dollops on top, I used a 1M tip and piped straight down.
- I made the little flags using bamboo skewers and washi tape.
- For the sprinkles, I just used a bunch of random pink and heart sprinkles I had laying around.
- I like to prepare my cake pans using Homemade Cake Release then line with parchment.
- Be sure to check my Swiss Meringue Buttercream post for tips and troubleshooting.
- Learn how to keep your cakes moist using Simple Syrup.
- To help ensure your cake layers bake up nice and flat, check out my How to Bake Flat Cake Layers post!
Pink Velvet Cake
#wprm-recipe-rating-0 .wprm-rating-star.wprm-rating-star-full svg * { fill: #e87b99; }#wprm-recipe-rating-0 .wprm-rating-star.wprm-rating-star-33 svg * { fill: url(#wprm-recipe-rating-0-33); }#wprm-recipe-rating-0 .wprm-rating-star.wprm-rating-star-50 svg * { fill: url(#wprm-recipe-rating-0-50); }#wprm-recipe-rating-0 .wprm-rating-star.wprm-rating-star-66 svg * { fill: url(#wprm-recipe-rating-0-66); }linearGradient#wprm-recipe-rating-0-33 stop { stop-color: #e87b99; }linearGradient#wprm-recipe-rating-0-50 stop { stop-color: #e87b99; }linearGradient#wprm-recipe-rating-0-66 stop { stop-color: #e87b99; }
Ingredients
Pink Velvet Cake:
- 1 1/2 cups all-purpose flour
- 1 1/2 tsps baking powder
- 1/2 tsp salt
- 1/2 cup unsalted butter room temperature
- 1 cup granulated sugar
- 3 large egg whites room temperature
- 1 tsp vanilla
- 3/4 cup milk room temperature
- pink color gel
Vanilla Buttercream:
- 5 large egg whites
- 1 1/2 cups granulated sugar
- 1 1/2 cups unsalted butter room temperature, cubed
- 1 tsp clear vanilla extract
Assembly:
- 2 Tbsp seedless raspberry jam optional
- 2 packs Wilton Candy Hearts
- a variety of pink and white sprinkles if desired
Instructions
Pink Velvet Cake:
-
Preheat oven to 350F and grease and flour three 6″ cake rounds, line with parchment.
-
In a medium bowl, whisk flour, baking powder, and salt. Set aside.
-
Using a stand mixer fitted with the paddle attachment, beat butter until smooth. Add sugar and beat on med-high until pale and fluffy (2-3mins).
-
Reduce speed and add egg whites one at a time, fully incorporating after each addition. Add vanilla.
-
Alternate adding flour mixture and milk, beginning and ending with flour (3 additions of flour and 2 of milk). Fully incorporating after each addition.
-
Add a small amount of pink color gel using a toothpick. Mix to incorporate but try not to overmix.
-
Spread batter evenly into prepared pans. Smooth the tops with a spatula.
-
Bake for approx. 25 mins or until a toothpick inserted into the center comes out mostly clean.
-
Place cakes on wire rack to cool for 10mins then turn out onto wire rack to cool completely.
Vanilla Buttercream:
-
Place egg whites and sugar into the bowl of a stand mixer, whisk until combined.*
-
Place bowl over a hot water bath on the stove and whisk constantly until the mixture is hot and no longer grainy to the touch (approx. 3mins).
-
Place bowl on your stand mixer and whisk on med-high until the meringue is stiff and cooled (the bowl is no longer warm to the touch (approx. 5-10mins)).
-
Switch to paddle attachment. Slowly add cubed butter and mix until smooth. Add vanilla and continue to whip until smooth.**
Assembly:
-
Place one layer of cake on a cake stand or serving plate. Top with approximately 2/3 cup of frosting and spread evenly creating a bit of a lip on the edge. Fill with 1 Tbsp raspberry jam.
-
Repeat with remaining layers and apply a thin coat of frosting all over the cake. Chill for 20mins.
-
Frost and smooth the sides and pipe ruffle dollops on top using a 1M tip. Chill for 20mins.
-
Place candy hearts randomly around the cake — starting with the darker hearts at the bottom and working your way up to the top and lighter colors.
-
Sprinkle top of cake with a variety of pink and white sprinkles if desired.
Notes