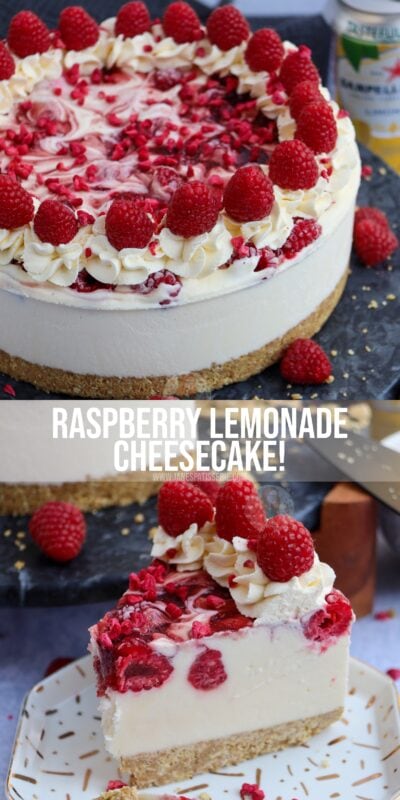
A no-bake raspberry lemonade cheesecake with a biscuit base, lemonade cheesecake filling dotted with raspberries and a coulis, and more!
As it is the beginning of summer I wanted to post a recipe that was sweet, delicious and super fresh for the summer months… and this raspberry lemonade cheesecake is definitely that recipe. It is sweet, sharp and utterly scrumptious.
In the past I have made cheesecakes with a more liquid base, such as my gin and tonic cheesecake, and my champagne cheesecake – and they have always worked super well! So, I thought I may as well try again with something that I was craving, and I don’t know why I was, but this cheesecake was born.
I have my raspberry and lemon cheesecake already, but I wanted to try something a little different, and oh my daaaaays it worked!
The base
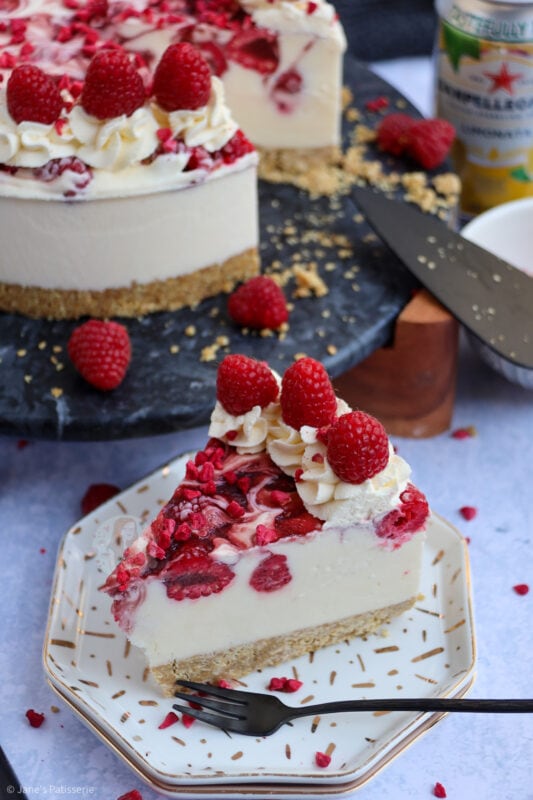
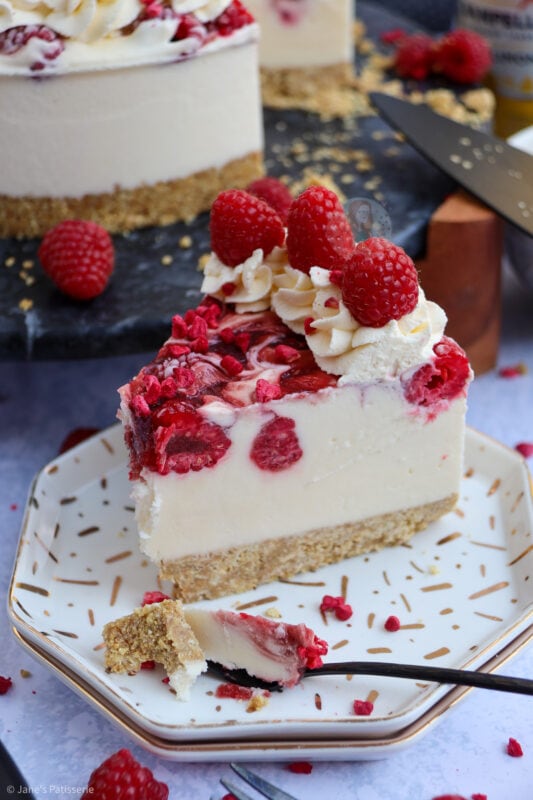
The base for a cheesecake is often the same – biscuits, and butter. I have done a few different variations on cheesecakes with cake bases (my lemon drizzle cheesecake anyone?!), but a classic is the biscuit base.
I have 75+ cheesecakes on this blog, and I imagine at least 55 of those use digestives as part of the base. This is because, for me at least, it creates the perfect flavour for the base. I use regular digestives (never the light ones!), mixed with unsalted butter and you are done.
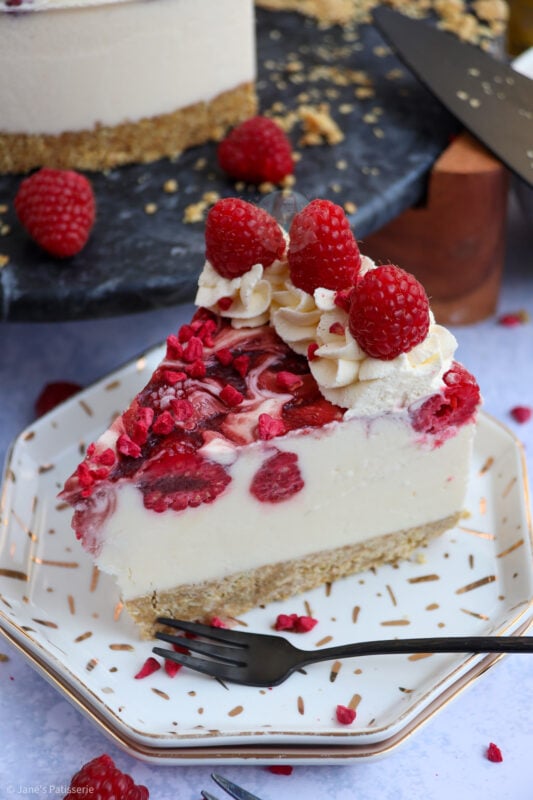
You want to make sure that the biscuits are blitzed up really finely, and then melt down the butter until its completely smooth, and mix together. I press the base into a springform tin as they’re much easier to get out compared to a regular loose bottomed cake tin.

The filling
For the filling this did mainly follow my gin and tonic cheesecake because I based it on the amount of liquid I wanted to add to the mixture, and that isn’t just as simple as pouring it in!
When you add liquid like this, you do need to use a setting agent for your cheesecake. I know it’s a little annoying, but if you want to enjoy this delicious beauty, it is a must.
The filling starts off with making a lemonade syrup, and adding the gelatine into this. This is enough liquid for the gelatine to melt into. Then, you add this liquid to a cheesecake mixture and whisk until smooth – don’t worry, it is naturally runnier because of the liquid.
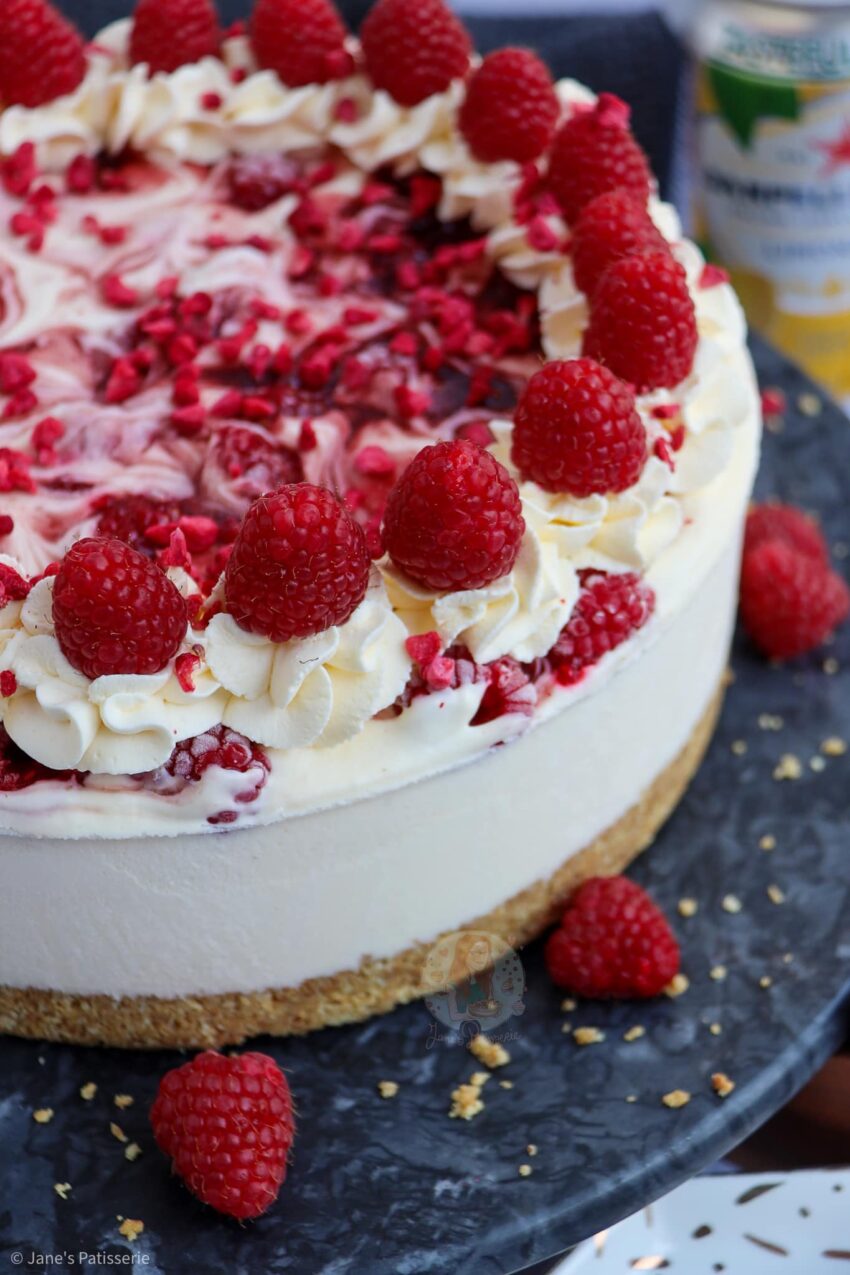
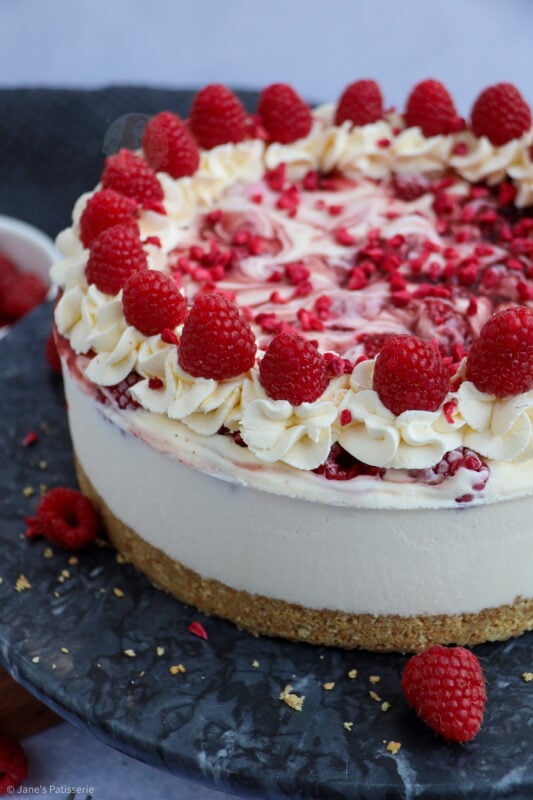
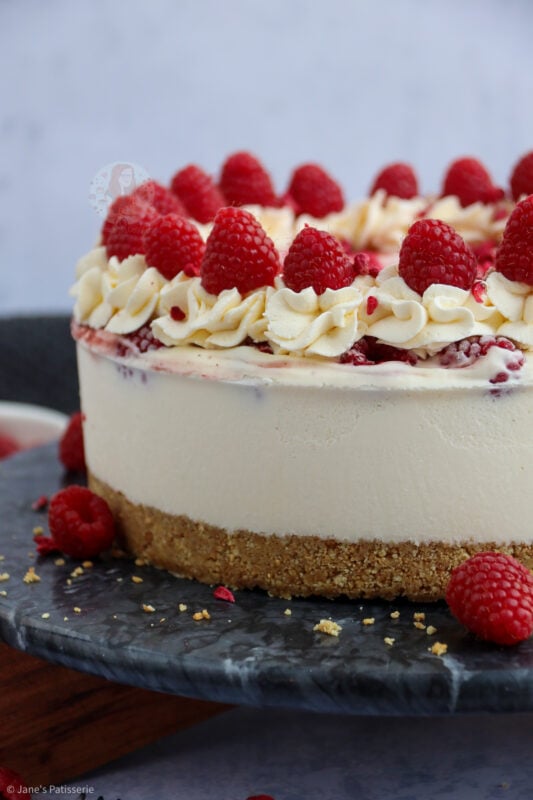
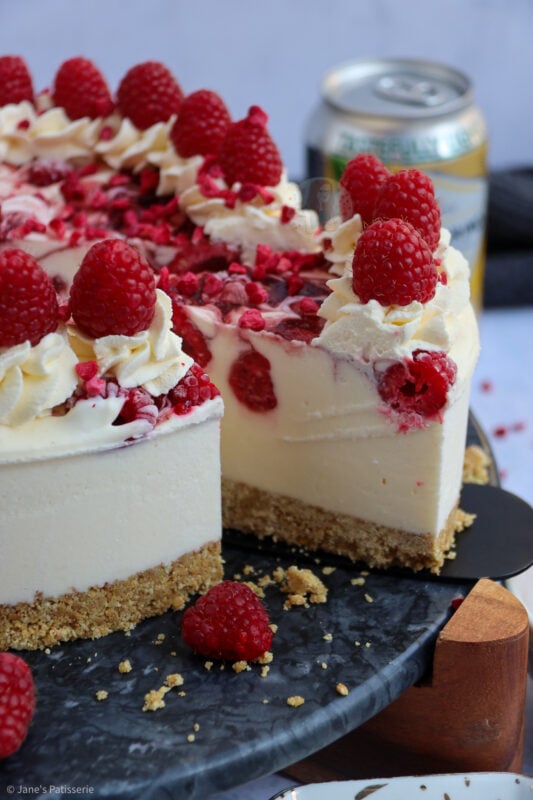
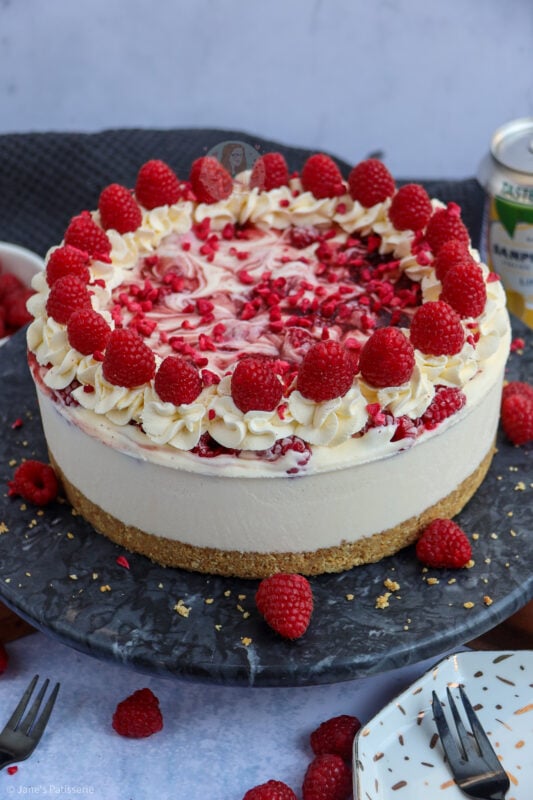
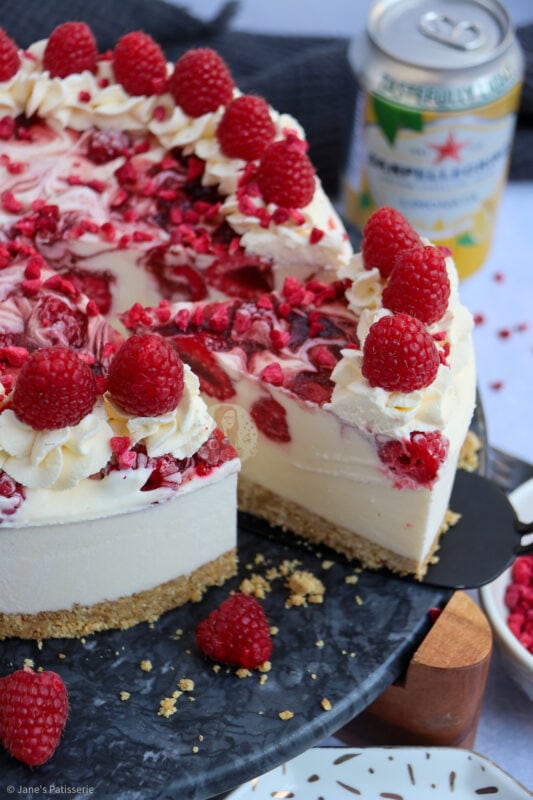
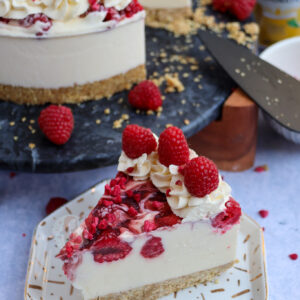
I then decided to use fresh raspberries and raspberry coulis swirled into the cheesecake to create this beauty and I am obsessed – it looks pretty, and the balance of flavours is just amazing. Lemons and raspberries together is such a wonderful combination.

The topping
I decided to just decorate my cheesecake with some whipped cream, freeze dried raspberries and fresh raspberries. It’s quite simple, but I always find decoration like this just looks absolutely beautiful on the dessert.
For the whipped cream its super important to use a double/whipping cream and whip it yourself – using squirty cream doesn’t work as it will deflate almost straight away once piped onto the raspberry lemonade cheesecake.
I always buy the same freeze dried raspberries these days because they’re just so good and make everything look great!
Top Tips
When making any form of cheesecake, it’s so important to remember that they are NOT quick to make, whether they are baked or not baked. They all require setting time, and for best results, that is always in the fridge overnight. The maximum time you can afford setting time, the better!
For this recipe I used a powdered gelatine – and I must say how important it is to check the strength of your gelatine or vegetarian alternative is as some brands need slightly less or more for the amount of liquid. I used 15g of gelatine powder for this cheesecake.
I use this springform tin when making my cheesecake, and it works wonders. If you struggle with tins and cheesecakes, you can try turning the base upside down so there isn’t a lip, or you can line the base of the tin, or even add a different base in from another tin that is already flat.
Raspberry Lemonade Cheesecake!
Print Pin Rate
Ingredients
Biscuit Base
- 300 g digestives
- 150 g unsalted butter
Filling
- 250 ml lemonade
- 75 g caster sugar
- 15 g gelatine powder
- 500 g full-fat cream cheese
- 300 ml double cream
- 100 g icing sugar
- 200 g raspberries
- 100 ml raspberry coulis
Decoration
- 150 ml double cream
- 2 tbsp icing sugar
- 200 g raspberries
- 10 g freeze dried raspberries
Instructions
Biscuit base
-
Blitz the biscuits to a fine crumb and melt the butter until smooth
-
Mix the two together until combined and press into the bottom of a 20cm/8″ deep springform cake tin
Filling
-
Pour the lemonade and caster sugar into a pan and heat on a medium heat, stirring until the sugar has dissolved
-
Take off the heat and immediately add in the gelatine, and whisk until this has dissolved completely. Leave to cool for 10 minutes, stirring every now and again.
-
In a new large bowl, add the cream cheese and icing sugar and beat together until smooth.
-
Add in the double cream and lemonade mixture and whisk until smooth
-
Pour this into the tin on top of the biscuit base.
-
Sprinkle on the raspberries (they may sink a little), and drizzle on the coulis – swirl slightly if you fancy
-
Set the cheesecake in the fridge overnight until set.
Decoration
-
Carefully remove the cheesecake from the tin
-
Whip the double cream with the icing sugar and pipe around the edge of the cheesecake
-
Add on the raspberries and freeze dried raspberries and enjoy!
Notes
- I use this tin for this recipe
- I use these freeze dried raspberries for this recipe
- This cheesecake lasts for 3+ days in the fridge once set
- This cheesecake can freeze for 3+ months (texture may change slightly)
- Please double check your gelatines setting amount as you may need more or less!
ENJOY!
Find my other recipes on my Recipes Page!
You can find me on:
Instagram
Facebook
Pinterest
Twitter
Youtube
J x
© Jane’s Patisserie. All images & content are copyright protected. Do not use my images without prior permission. If you want to republish this recipe, please re-write the recipe in your own words and credit me, or link back to this post for the recipe.


