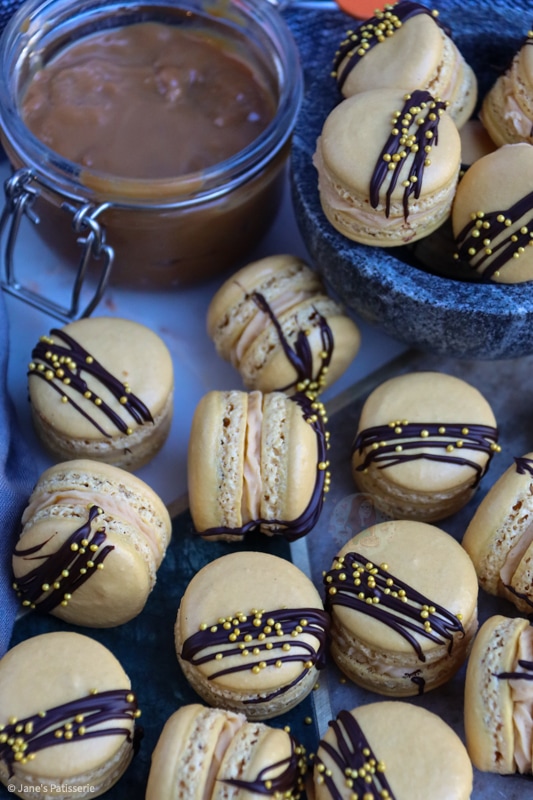
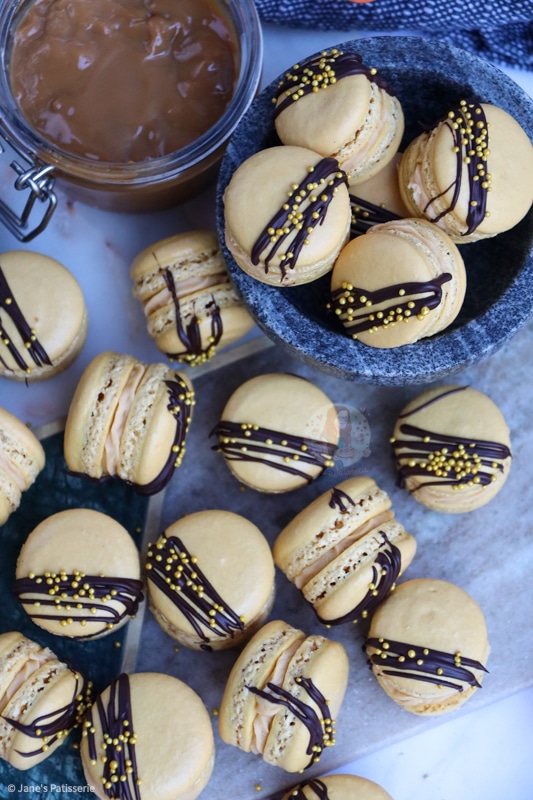
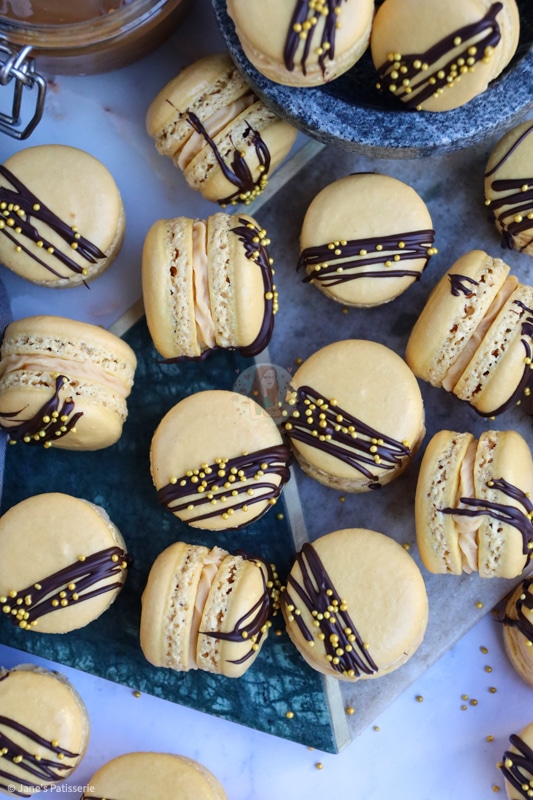
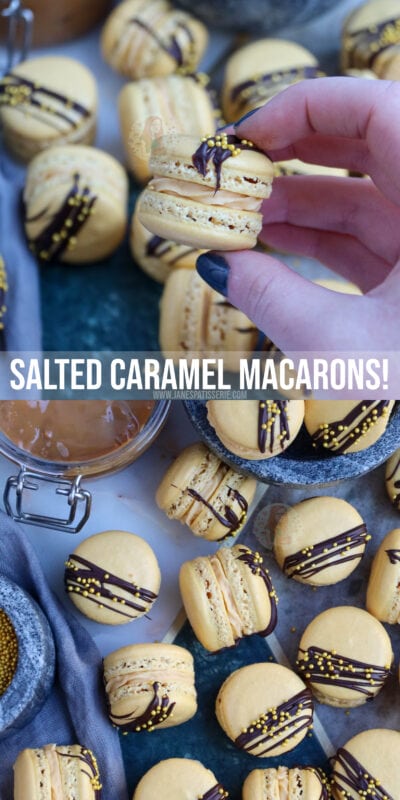
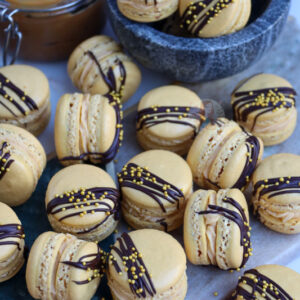
Salted caramel macarons filled with a salted caramel frosting and hidden caramel centre – perfect delicious treat!
I remember when posted my first macaron recipe – my halloween macarons – in 2015 and I was so nervous that I had got them wrong or they looked weird… but now I have various macaron recipes and I just want to post more… I have recipes for all sorts – valentines macarons, neapolitan macarons, even triple chocolate macarons!
I realise that some people don’t understand macarons, and to be honest… I don’t understand how they can cost nearly THAT much sometimes, but when you make them at home for yourself or others, you get the entire batch for a fraction of the cost! Yes, they take a bit of time to make, but it is worth it.
I am partial to a little afternoon tea, and often an accompaniment to these are macarons! There are important things to know here… these are macarONS ~not~ macarOONS. These are two very different things. macaroons are little balls of desiccated coconut, often mixed with condensed milk for example. They’re delicious, but they’re not macarons.
Macarons are actually a lot easier to make then first thought – you need to start off with icing sugar and ground almonds. These are two really important parts of the macarons – as they are the only dry ingredients! You need to blend them in a food processor, together, for a couple of minutes to grind down the almonds and mix them together really well.
Once you have blended them together, you MUST SIEVE THEM. I tend to sieve mine twice just to make sure. During the sieving process, you are making sure that there are no big lumps of almonds left (If there are any left in the sieve, remove them, don’t add them to the bowl). If there are too many lumps, you may get a lumpy shell.
When you whip the egg whites for the meringues to stiff peaks, then slowly add the caster sugar.. The mixture should look like a standard glossy meringue mixture! Add the icing sugar/ground almond mixture and fold together. You want to be gentle when you fold, so DO NOT use a mixer. Simply fold all the ingredients together until just about combined.
Once combined, you can add your colouring. I add the colouring before I have fully finished mixing the batter so that you don’t accidentally overmix. The mixture is ready when you pick the spatula out of the mix and it drops off the spatula showing a ‘V’ shape.
Sometimes, to get this batter perfect, you have to do something called ‘macaronage’. This is where you have folded the mixture together, add your colour, but it’s still a bit thick. You essentially use the spatula to wipe the mixture around the edges of the bowl to break it down slightly to get it softer (watch my social media videos for this recipe for this to make sense!).
When you pipe the macarons onto sheets, you can either mark out some circles so you find it easier to pipe consistent circles, or you can use a macaron mat, or you can wing it as I do! It’s a matter of practice to piping them; but generally, using a large piping bag, a small round nozzle, and piping directly downwards you shouldn’t have a problem.
Take your time, be confident, and enjoy them! You can add in some flavours, colour them how you want, decorate them how you want, have fun! The possibilities with macarons really are endless!
How I get the ‘perfect feet’ on my macarons… I use normal baking parchment onto a large baking tray with circles drawn on for how big I want them! I personally find the with macaron mats (as good as they are for sizing) they can sometimes stick.. so personally, I use baking parchment with folding the mixture together as little as possible!
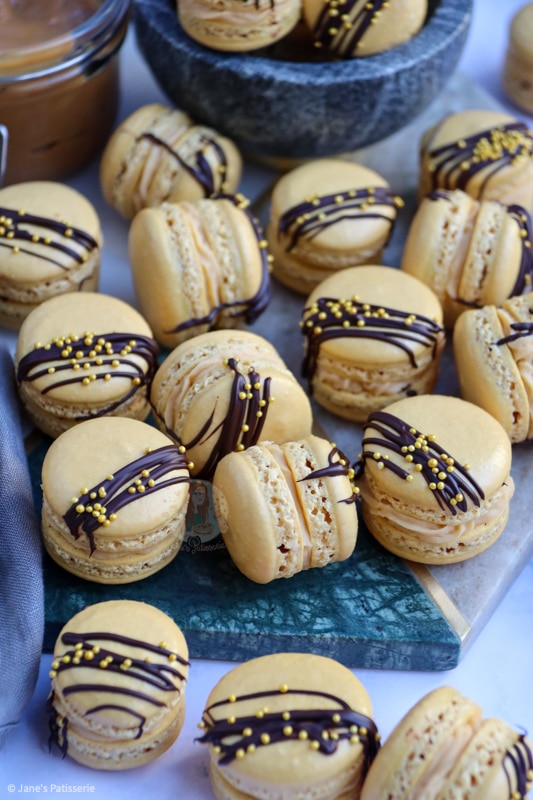
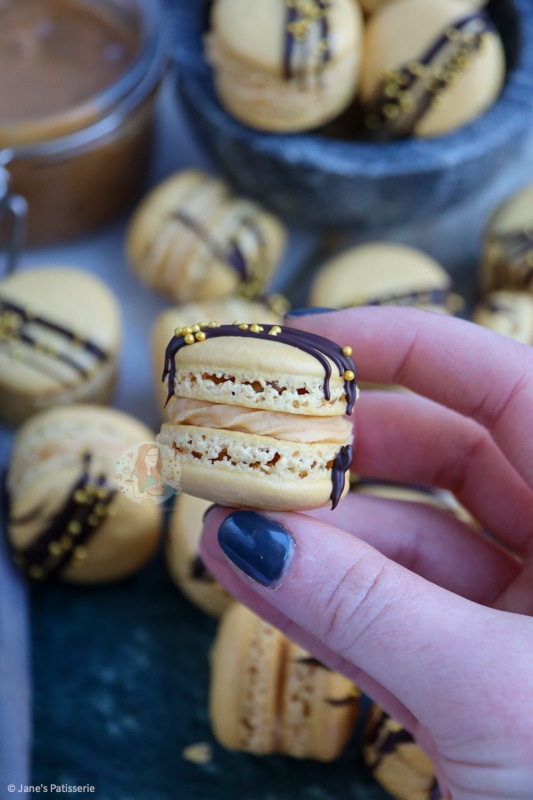
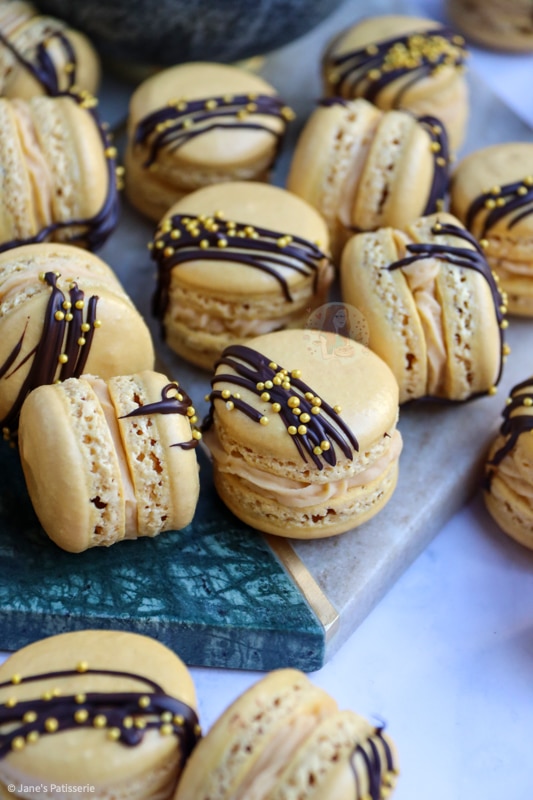
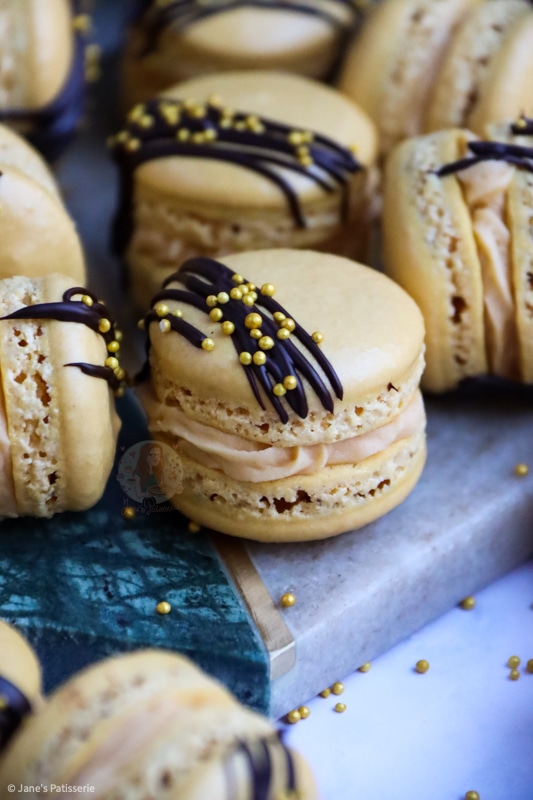
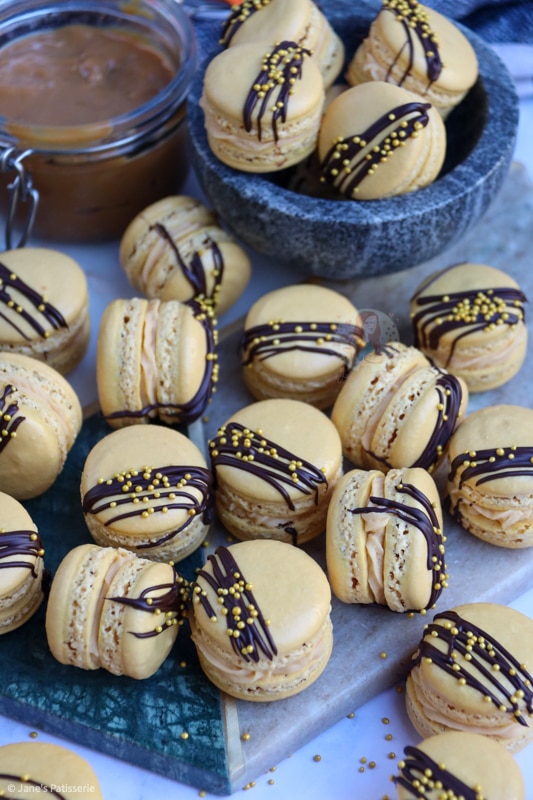
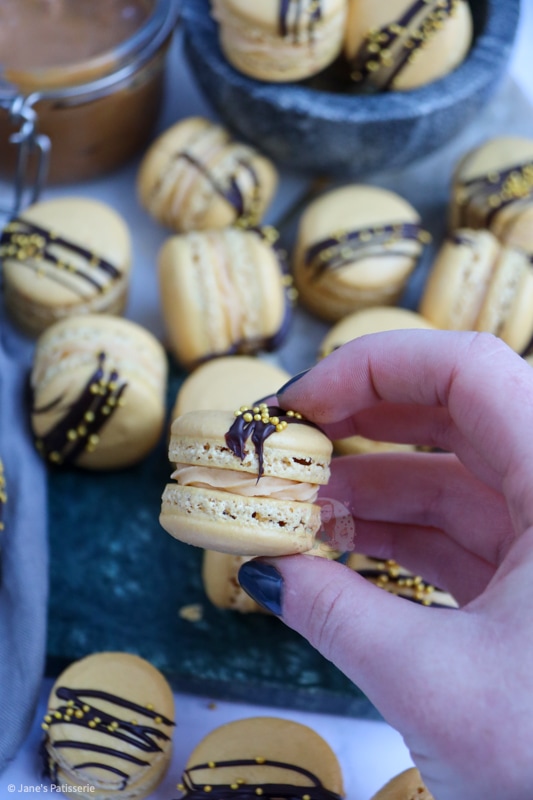
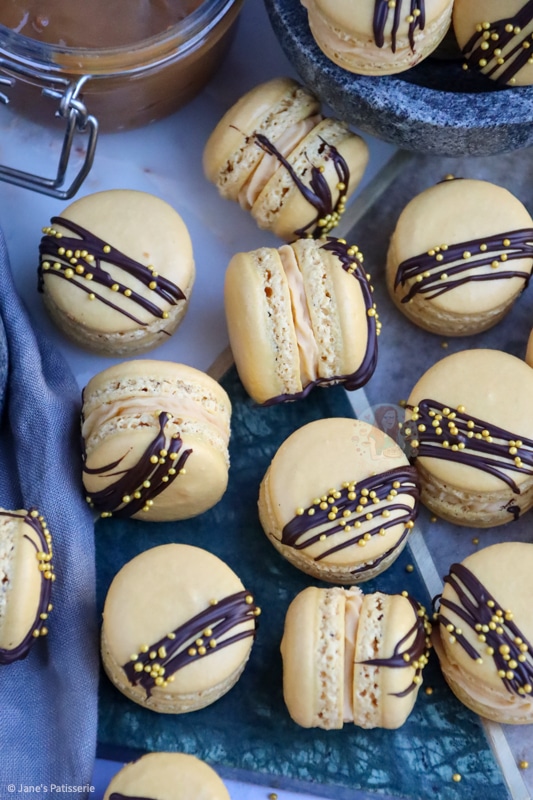
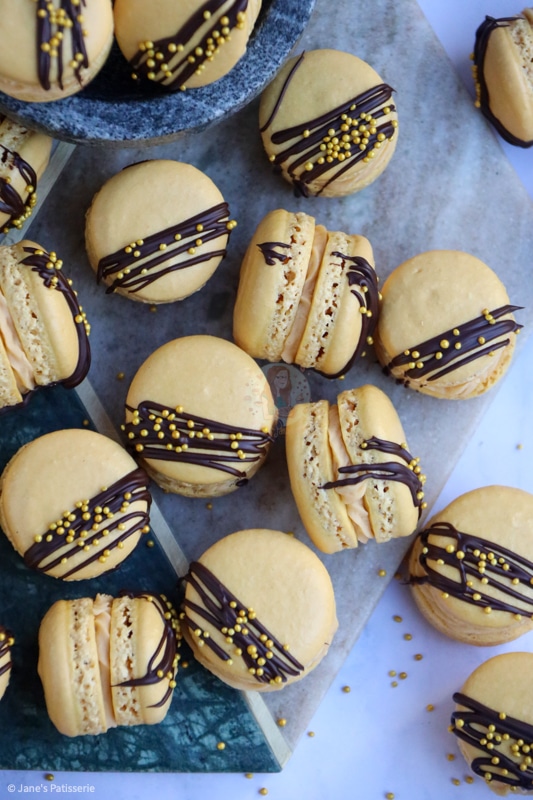
For the filling I used a salted caramel flavoured buttercream, with a hidden centre of salted caramel sauce for an extra addition of taste – and I am in love. I always go for the chocolate drizzle, a few sprinkles, and a delicious flavour – as its my favourite thing to do… but you can do whatever you like! Enjoy!
Salted Caramel Macarons!
#wprm-recipe-rating-5 .wprm-rating-star.wprm-rating-star-full svg * { fill: #343434; }#wprm-recipe-rating-5 .wprm-rating-star.wprm-rating-star-33 svg * { fill: url(#wprm-recipe-rating-5-33); }#wprm-recipe-rating-5 .wprm-rating-star.wprm-rating-star-50 svg * { fill: url(#wprm-recipe-rating-5-50); }#wprm-recipe-rating-5 .wprm-rating-star.wprm-rating-star-66 svg * { fill: url(#wprm-recipe-rating-5-66); }linearGradient#wprm-recipe-rating-5-33 stop { stop-color: #343434; }linearGradient#wprm-recipe-rating-5-50 stop { stop-color: #343434; }linearGradient#wprm-recipe-rating-5-66 stop { stop-color: #343434; }
Print Pin Rate
Ingredients
Macaron Shells
- 200 g icing sugar
- 100 g ground almonds
- 100 g egg whites (roughly 3 medium eggs)
- 75 g caster sugar
- golden food colouring
Buttercream
- 50 g unsalted butter (room temperature)
- 100 g icing sugar
- 35 g salted caramel sauce
Decoration & Filling
- 25 g salted caramel sauce
- 50 g dark chocolate
- sprinkles
Instructions
Macaron Shells
-
Blend together the icing sugar and almonds for a short while to combine.
-
In a large bowl, sift the icing sugar and almond mixture, discarding any large lumps that are left.
-
In a stand mixer, add your egg whites. Make sure the bowl and whisk you are using are spotlessly clean first!
-
Whisk the egg whites up to stiff peaks, and start adding the caster sugar teaspoon by teaspoon till all is incorporated. Whisk for another minute or so afterwards.
-
Once fully incorporated, continue to whisk for 1-2 minutes, and start adding your food colouring! I used a mix of ‘golden yellow’ and ‘amber leaf’ colours to get the colour I did – as it was all I had at the time!
-
Add in the sifted ground almonds and icing sugar mixture and fold through in as little folds as possible.
-
The next step is called ‘Macaronage’ where you basically press and wipe the mixture around the edges of the bowl to sort of de-fluff it in a way. It smooths the mixture out, making it better.
-
With a disposable piping bag, add a small round tip, add the mixtures. Carefully pipe the mixtures onto 2-3 large lined trays. The mixture does spread naturally, so don’t pipe them that large otherwise they might end up touching.
-
Using a piping bag and a round nozzle, pipe the macarons either onto a baking tray lined with parchment paper. The mixture is quite runny, so be careful that it doesn’t go everywhere or you risk make the shells too big!
-
Once piped, tap the trays onto the work surface 5-6 times to get any air bubbles out, and leave on the side for 1 hour to form a skin.
-
Towards the end of the hour, turn your oven on to 130ºfan.
-
Bake the macarons for 16-20 minutes until they have risen to have their “feet”, and are starting to peel away from the tray – leave them to cool fully before trying to remove them.
Buttercream
-
In a bowl, cream the unsalted butter and icing sugar together until smooth and supple, and add the salted caramel sauce and beat again.
Decoration & Filling
-
Once the shells have cooled – remove carefully from your trays and line them up.
-
Melt your dark chocolate (I do mine in the microwave in short bursts), and drizzle it on to of your shells.
-
Add some sprinkles of your choice, and leave to dry.
-
Transfer the mixture to a piping bag with a piping nozzle of your choice fitted. Pipe some of the buttercream in a circle onto half of the macaron shells.
-
Fill the middle of the buttercream circle with some salted caramel sauce.
-
Sandwich together with the remaining shells.
Notes
- I would recommend using parchment paper as opposed to a macaron mat (I find that sometimes they can stick) – but you can buy some with macaron shapes drawn on them already, or you can draw the circles yourself – or go freehand like me!
- The Macarons last for up to 7 days in an airtight container in the refrigerator, or you can freeze the shells for up to 3 months.
- I use this baking tray
- I use this baking parchment
- I use this KitchenAid hand whisk
- I use this Dark Chocolate
- I get my sprinkles from here – Iced Jems
- I use this piping bag and this piping tip
ENJOY!
Find my other recipes on my Recipes Page!
You can find me on:
Instagram
Facebook
Pinterest
Twitter
Youtube
J x
© Jane’s Patisserie. All images & content are copyright protected. Do not use my images without prior permission. If you want to republish this recipe, please re-write the recipe in your own words and credit me, or link back to this post for the recipe.